Introduction: IOT Based Smart Security Surveillance Robot


PROJECT ABSTRACT :
Now we as humans have always been intrigued by non living stuff moving around. Starting with throwing stones around we have now come at a point where we make those planes around the sky. On their own too. It helps us a lot when we are able to get to places wherein we can’t by ourselves. Firstly it compensates for our laziness and then it eliminates all the physical constraints that we might encounter. So it is always in need to bring automation in our lives to make daily stuff easy and admittingly fun to do.
Robots are what humans have always looked forward to but automation stuff is a bit distinct. Robots are ideally capable to do a lot more things than automated bots desire to. Automated bots desire to achieve surveillance and one other major usability that the maker would want to implement and this is in general though. Multiple functionalities could be put into place if in need.
To make such a bot we require to know about things in the electronic scene and also we need to have that software part covered up. To begin with the knowledge of almost all electronic components such as RasPi, motor drivers, camera modules, sensors, batteries is required. To get to control that bot a lot of programming acumen also comes into play. The codes though serve a lot of constraints as we have less memory to work with. The codes need to be short and crisp.
This project is aimed at developing a surveillance system which can be controlled remotely by using a website. It includes a robot with a Wireless Camera attach to it. This robot captures the high resolution video feed and transmits it to the connected local device which is used to control the robot. The live feed can be viewed clearly on the device.Also the bot is compatible with multiple users as it posses login functionality.
FEATURES :
- Wireless controlled bot having a maximum control range as much as the Wi-Fi server implementing it.
- IR sensors for obstacle detection and notifying the same on the website.
- Live 180 degree visual feed of the surrounding environment.
- Camera angle control via the website.
- User authentication system so as to have multiple users using the bot securely.
Supplies


HARDWARE COMPONENTS :
- RaspBerry Pi 3B x 1
- RaspBerry Pi Camera Module v1.3 x 1
- L293D Motor Driver x 1
- IR Sensor Module x 3
- Servo Motor SG-90 x 1
- DC Hobby Geared Motor x 2
- Motor Mountings x 2
- Caster Wheel x 1
- Fiber Wheels x 2
- 9V Battery x 1
- Power Bank x 1
- Buzzer x 1
- LED's x 2
- Jumper Wires
- Single Stranded Wires
- Robot Chassis (3D - Printed)
- Nuts (M4) x 20
- Bolts (M4) x 20
- Small Breadboard x 1
- Micro-USB Cable
- 9V Battery Connector
SOFTWARES USED :
- FUSION 360 (CAD)
- EAGLE (Schematic Designing)
- RaspBerry Pi OS
- Thonny Python IDE
- Ultimaker CURA (3D-Printing Software)
Step 1: Designing the Robot Chassis


Before starting any Project that involves Building of the Chassis from scratch such as a 3D Printed Chassis it is necessary to first create a simulated version of the same by taking accurate dimensions of all the components required and thus the dimensions of the overall Chassis.
In order to achieve this functionality AUTODESK brings to us a great CAD Designing Software FUSION 360.
By making use of this software we able to create real world objects in an Emulated environment by taking actual dimensions of that object so as to design our final product accordingly.
The Chassis made is completely designed in the FUSION 360 software by taking accurate dimensions and measurements and is then feed to the CURA Software which in turn generates a g-code for the respective 3D printer and the Chassis is thus developed.
The whole of the Designing process could be achieved in just 2 simple steps :
CAD Design :
Step 1 :
- We firstly design all the electronic components required as per our project.
- Now instead of designing every component from scratch we could also import some of the components such as the RasPi Board , Camera Module , L293D , etc. from GrabCAD. https://grabcad.com
- Make sure that all the components that you import or design should exactly match with your real world objects.
Step 2 :
- Once all the Components are accurately designed we can now further move on towards our Chassis Designing.
- In order to know the Chassis Dimensions we firstly need to arrange all our components and other peripheral parts sparingly and in an orderly manner so as to ensure space efficiency and component placing complexity.
- Once all the components are placed exactly as desired sketch a chassis accordingly and export it as a one body for the final 3D print.
I have added all the CAD Files. For Viewing all the files on your local machine open all the files onto your Fusion 360 software. The file named 'Robot Chassis' is the Chassis of the Robot.
The 'Robot Chassis' is actually the chassis which is to be printed and feed to the 3D Printer.The all other step files are the files containing the CAD designs of the respective individual components.
Due to the file size upload restrictions I was not able to upload the actual file of the final robot but I will paste the browser link of the final robot CAD below. You can download the same from there.
Link to access the Final Robot CAD : https://a360.co/3mgwzuc
Link to access the Robot Chassis CAD : https://a360.co/3xk2sYU
Attachments
 Battery 9V .step
- Battery Support .step
- Bread Board .step
- BreadBoard Support .step
- Cam Module (Covered) .step
- camera bottom holder .step
- Camera Module .step
- Camera Module Holder (Smooth Side) .step
- Camera Module Holder (wired_side_part) .step
- Camera Module Mounted Assembly .step
- Caster Wheel .step
- IR Sensor .step
- IR Sensor Support .step
- L293D Motor Driver .step
- L293D Support .step
- Left Motor .step
- Motor Mountings .step
- Power Bank .step
- Ras Pi 3B.step
- RasPi Support .step
- Right Motor .step
- Robot Chassis.step
- Servo Motor .step
- USB Connector .step
- Wheel .step
- Wheel Grip .step


Step 2: Assembling the Robot


Now its time to get some Hands On.....!!!
We now bring together all the components and all the Hardware parts required for our Bot and place them as per our final CAD Model, accordingly.
Below are all the Steps mentioned from Scratch after your 3D Printed Chassis is Ready.
Lets Assemble!!!
Step 3: Mechanical Locomotive Assembly
The whole of the Assembly part could be further divided into 3 simple Parts :
- The Mechanical Locomotion Assembly
- The Electronic Components Assembly
- The Circuit Connections
We firstly start off with the Mechanical part as per the order mentioned above........
Step 4: The Motor Mounts


- Fix the Motor Mounts using Nuts and Bolts as mentioned in the Supplies (M4).
- Take care that the Bolts chosen should be of considerable length as it should not obstruct between the Ground and the Chassis while Motion.
- Also care should be taken to use flat top Bolts as the DC Hobby Geared Motors are to be mounted on the motor mounts which need to mounted without any hinderance from the Bolts.
Step 5: Mounting the Motors


- Fit both the DC Motors using Nuts and Bolts onto the Motor Mountings.
- Care to be taken while attaching the Left and the Right motors according to the Hub Direction of both the Motors.
Step 6: Attaching the Rear Wheels


- Attach Both the wheels using small sized screws.
- Note that the screw length and width should be enough so that there is no slipping or Relative Motion between the motor hub and the attached wheel.
Step 7: Mounting the Caster Wheel


- Fix the 360 degree rotating Caster Wheel along the Three Triangular Holes drilled across the Front Side of the Chassis.
- The Height of the Caster wheel could be adjusted easily by using the two Nuts and one Bolt Mechanism on all the three Bolts Fitted.
With this our Basic Mechanical Locomotion Part is Ready!!!
Step 8: The Electronic Components Assembly
- All of the required Electronic Components are to be mounted on the Chassis as per our CAD Design.
- Following Describes all of the Procedure........
Step 9: IR Sensors Mounting


- The three IR Sensors are Designed to be mounted in such a way that it covers the Entire Front region of the Robot.
- The names are given accordingly left, right and the center sensors.
- The centre sensor is placed 90 degrees w.r.t the Chassis whereas other two are at an angle of 45 degrees.
- Some supporting plastic spacers are attached to the bottom of the sensors so as to increase its height.
Step 10: RaspBerry Pi Mounting


- Our most important electronic component the RasPi Board is mounted using four Bolts through the holes provided for mounting on the board itself.
- Care should be take about the orientation of the board before attaching it.
- The GPIO Pins side of the RasPi Board should be facing towards the Breadboard mouting side so as to ensure ease in connecting wires.
Step 11: L293D Motor Driver Mounting


- The motor driver for driving and controlling the direction of the two rear wheels is placed near to the 9V battery slot as per the CAD design.
- The orientation of the driver should be such that the 12V and Gnd Pin of the board should be facing towards the 9V battery slot which causes ease in connecting it with the battery connector.
Step 12: Attaching the Servo


- The servo is freely mounted over the two pillars provided on the Chassis on which the camera module is to be mounted later.
- The wires of the servo are pulled out through the slit made on one of the pillars.
- The servo is then attached with the horn.
Step 13: Attaching the Breadboard


- The Breadboard is attached on the four pillars on the Chassis provided at the rear end.
- The Top of the Pillars is covered with a Double tape.
- The Breadboard is just then pasted onto the four pillars gently.
Step 14: Casing the Camera Module


- The camera module which is to be mounted on a servo is first covered with a 3D Printed covering.
- The wiring of the module is been taken out through the slit made in the cover.
- The cover along with the module is then mounted on the servo.
Step 15: Placing the Power Sources


- On this bot there are using two power sources for powering two different parts of the Robot.
- First is the 9V Battery for powering up the L293D motor Driver which in turns provides the required amount of current by the Motors through this external battery connected.
- This battery is placed near to the driver in a special slot created for it.
- The second is the Mobile Power Bank which is used for powering the whole RasPi Board as well as all the other electronic components connected to the Board.
- The Power Bank is placed below the Breadboard.
- Using two different power supplies provides isolation between the 9V battery and rest of the circuitary thus reducing the threat of damage to our main micro-controller board.
With this we complete our Electronic Components Assembly!!!
Step 16: The Circuit Connections

The above picture depictes the overall connection diagram of each and every component shown with the RasPi board and the L293D motor driver.
The above schematic is designed by using the circuit designing software EAGLE from AUTODESK.
For simplicity we will break down each and every part of the circuit into smaller chunks and will first connect all the connections component by component in various steps.
So let the Wires speak.......!!!
Step 17: RaspBerry Pi Pinout Diagram

While making connections refer this RasPi Pinout Diagram
Step 18: Motor Driver Connections

- Connect the 5V Pin on the L293D to the 5V supply line on the Breadboard through the 5V power supply from the RasPi Board and similarly connect the Gnd Pin to the Gnd line on the Breadboard.
- Connect left motor to the M1 and M2 pins of the L293D and right motor to the M3 and M4 pins.
- Connect I1 ----> GPIO 18
- Connect I2 ----> GPIO 23
- Connect I3 ----> GPIO 24
- Connect I4 ----> GPIO 25
- Connect the 9V Battery Connector to the 12V and Gnd Pins of the L293D board.
Step 19: IR Sensor Connections

- Connect all grounds of all sensors to common ground pins as marked on the RasPi board.
- Connect all Vcc pins on the breadboard through the 5V supply from the RasPi board.
- Connect Vout of left IR Sensor -----> GPIO 2
- Connect Vout of center IR Sensor -----> GPIO 3
- Connect Vout of right IR Sensor -----> GPIO 4
Step 20: Servo Connections

- Connect 5V to Breaboard 5V supply line and Gnd to Gnd pin on RasPi.
- Connect Signal Pin ----> GPIO 26
Step 21: Camera Module Connection


Connect the bunch of wires from the Camera Module to the Camera Connector slot provided on the Raspi board keeping into account the front and back side of the wire.
Step 22: Buzzer Connection

- Connect Gnd pin of buzzer to the Gnd line on the Breadboard.
- Connect positive terminal of the buzzer ----> GPIO 17.
- For Breadboard connections make use of the single stranded wires.
Step 23: LED Connections

- Connect the grounds of both the LED's to the Gnd line on the Breadboard.
- Connect Power Led Positive terminal ----> GPIO 21
- Connect Obstacle Detection Led Positive terminal ----> GPIO 16
- For Breadboard connections make use of the single stranded wires.
Step 24: Overall Circuit Diagram

- The above image is the overall Circuit Connections of the Robot.
- For simplicity you can use the Breadboard 5V supply line for +Vcc and the RasPi board Gnd Pins for Gnd Connections of various sensors.
Step 25: Powering the Robot

- Connect the 9V Battery using the connector to the motor driver.
- Power up the RasPi board using the power bank via a micro-USB Cable.
Now with this we complete our Electronics and the Circuit Part......!!!!!!
Step 26: Website Building and Coding
Now coming across towards the Most important part of our project is the Controlling and the Logic Functionality.
The Control to the Bot is provided using the Website for its motion, sensors and to display the live feed of the camera. A User Authentication System is also developed for multiple users to access the Robot.
This Step could further be divided into two parts :
- Website Building which includes the Front-End using HTML, CSS, AJAX and the Back-End part which includes Flask and Sql as a Database for storing the User Login data.
- Coding which consists of the Logic and the Control of the Bot.
Tech-Stack Used :
- HTML
- CSS
- AJAX
- Flask
- SQL
- Python Programming
- Raspberry Pi
Step 27: Website Building
The Website is divided into six major parts :
- Home Page
- Registration Page
- Login Page
- About Us Page
- Contact Us Page
- Control Page
Each of these Webpages are linked with one another using Flask as a Back-End tech. Also Encryption for User password is provided while Login using the Flask library.
Step 28: Home Page

The Home Page is the basic landing page where the User is first directed when the Website is opened.The Home displays the main body of the Robot through images taken from various angles.
The Home Page also consists of the Login and Register Buttons for the User to directly access these Pages.
Below contains the HTML code for the Home Page.
<!doctype html>
	<html lang="en">


	<head>
	    <!-- Required meta tags -->
	    <meta charset="utf-8">
	    <meta name="viewport" content="width=device-width, initial-scale=1">


	    <!-- Bootstrap CSS -->
	    <link href="https://cdn.jsdelivr.net/npm/bootstrap@5.0.2/dist/css/bootstrap.min.css" rel="stylesheet"
	        integrity="sha384-EVSTQN3/azprG1Anm3QDgpJLIm9Nao0Yz1ztcQTwFspd3yD65VohhpuuCOmLASjC" crossorigin="anonymous">


	    <title>Home Page</title>


	    <!--INTERNAL CSS FOR HOME-->
	    <style>
	        body {
	            background-color: rgb(32, 32, 32);
	        }


	        #register {
	            background-color: rgb(198, 198, 198);
	            box-shadow: 5px 5px 25px 10px rgb(130, 130, 130);
	        }


	        #login {
	            background-color: rgb(198, 198, 198);
	            box-shadow: 5px 5px 25px 10px rgb(130, 130, 130);
	        }


	        .btncss {
	            border-radius: 10px;
	            width: 40%;
	            padding: 10px;
	            margin-left: 30%;
	            background-color: rgb(181, 0, 0);
	        }


	        .btncss:hover {
	            background-color: #1C8051;
	        }
	    </style>
	</head>


	<body>
	    <!--NAVBAR-->
	    <nav class="navbar navbar-expand-lg sticky-top navbar-dark bg-dark">
	        <div class="container-fluid">
	            <a class="navbar-brand" href="#">
	                <svg xmlns="http://www.w3.org/2000/svg" width="35" height="35" fill="currentColor"
	                    class="bi bi-cpu-fill" viewBox="0 0 16 16">
	                    <path d="M6.5 6a.5.5 0 0 0-.5.5v3a.5.5 0 0 0 .5.5h3a.5.5 0 0 0 .5-.5v-3a.5.5 0 0 0-.5-.5h-3z" />
	                    <path
	                        d="M5.5.5a.5.5 0 0 0-1 0V2A2.5 2.5 0 0 0 2 4.5H.5a.5.5 0 0 0 0 1H2v1H.5a.5.5 0 0 0 0 1H2v1H.5a.5.5 0 0 0 0 1H2v1H.5a.5.5 0 0 0 0 1H2A2.5 2.5 0 0 0 4.5 14v1.5a.5.5 0 0 0 1 0V14h1v1.5a.5.5 0 0 0 1 0V14h1v1.5a.5.5 0 0 0 1 0V14h1v1.5a.5.5 0 0 0 1 0V14a2.5 2.5 0 0 0 2.5-2.5h1.5a.5.5 0 0 0 0-1H14v-1h1.5a.5.5 0 0 0 0-1H14v-1h1.5a.5.5 0 0 0 0-1H14v-1h1.5a.5.5 0 0 0 0-1H14A2.5 2.5 0 0 0 11.5 2V.5a.5.5 0 0 0-1 0V2h-1V.5a.5.5 0 0 0-1 0V2h-1V.5a.5.5 0 0 0-1 0V2h-1V.5zm1 4.5h3A1.5 1.5 0 0 1 11 6.5v3A1.5 1.5 0 0 1 9.5 11h-3A1.5 1.5 0 0 1 5 9.5v-3A1.5 1.5 0 0 1 6.5 5z" />
	                </svg>
	                <img src="">
	                <span style="font-size: 25px;">IoTech</span></a>
	            <button class="navbar-toggler" type="button" data-bs-toggle="collapse"
	                data-bs-target="#navbarSupportedContent" aria-controls="navbarSupportedContent" aria-expanded="false"
	                aria-label="Toggle navigation">
	                <span class="navbar-toggler-icon"></span>
	            </button>
	            <div class="collapse navbar-collapse" id="navbarSupportedContent">
	                <ul class="navbar-nav me-auto mb-1 mb-lg-0">
	                    <li class="nav-item">
	                        <a class="nav-link active" aria-current="page" href="/"
	                            style="font-size: 20px; margin-left: 1.2em;">Home</a>
	                    </li>
	                    <li class="nav-item">
	                        <a class="nav-link" aria-current="page" href="{{url_for('about')}}"
	                            style="font-size: 20px; margin-left: 1.2em;">About</a>
	                    </li>
	                    <li class="nav-item">
	                        <a class="nav-link" aria-current="page" href="{{url_for('register')}}"
	                            style="font-size: 20px; margin-left: 1.2em;">Register</a>
	                    </li>
	                    <li class="nav-item">
	                        <a class="nav-link" aria-current="page" href="{{url_for('login')}}"
	                            style="font-size: 20px; margin-left: 1.2em;">Login</a>
	                    </li>
	                    <li class="nav-item">
	                        <a class="nav-link" aria-current="page" href="{{url_for('contact')}}"
	                            style="font-size: 20px; margin-left: 1.2em;">Contact</a>
	                    </li>
	                </ul>
	            </div>
	        </div>
	    </nav>


	    <!--CAROUSEL-->
	    <div id="carouselExampleCaptions" class="carousel slide" data-bs-ride="carousel">
	        <div class="carousel-indicators">
	            <button type="button" data-bs-target="#carouselExampleCaptions" data-bs-slide-to="0" class="active"
	                aria-current="true" aria-label="Slide 1"></button>
	            <button type="button" data-bs-target="#carouselExampleCaptions" data-bs-slide-to="1"
	                aria-label="Slide 2"></button>
	            <button type="button" data-bs-target="#carouselExampleCaptions" data-bs-slide-to="2"
	                aria-label="Slide 3"></button>
	        </div>
	        <div class="carousel-inner">
	            <div class="carousel-item active">
	                <img src="{{url_for('static', filename='iotimg.jpg')}}" height="600em;" class="d-block w-100" alt="...">
	                <div class="carousel-caption d-none d-md-block">
	                    <h5>First slide label</h5>
	                    <p>Some representative placeholder content for the first slide.</p>
	                </div>
	            </div>
	            <div class="carousel-item">
	                <img src="{{url_for('static', filename='mecha.jpg')}}" height="600em" class="d-block w-100" alt="...">
	                <div class="carousel-caption d-none d-md-block">
	                    <h5>Second slide label</h5>
	                    <p>Some representative placeholder content for the second slide.</p>
	                </div>
	            </div>
	            <div class="carousel-item">
	                <img src="{{url_for('static', filename='coding.jpg')}}" height="600em" class="d-block w-100" alt="...">
	                <div class="carousel-caption d-none d-md-block">
	                    <h5>Third slide label</h5>
	                    <p>Some representative placeholder content for the third slide.</p>
	                </div>
	            </div>
	        </div>
	        <button class="carousel-control-prev" type="button" data-bs-target="#carouselExampleCaptions"
	            data-bs-slide="prev">
	            <span class="carousel-control-prev-icon" aria-hidden="true"></span>
	            <span class="visually-hidden">Previous</span>
	        </button>
	        <button class="carousel-control-next" type="button" data-bs-target="#carouselExampleCaptions"
	            data-bs-slide="next">
	            <span class="carousel-control-next-icon" aria-hidden="true"></span>
	            <span class="visually-hidden">Next</span>
	        </button>
	    </div>


	    <!--LOGIN REGISTER-->
	    <div class="row row-cols-1 row-cols-md-2 g-4 mt-4">
	        <div class="col">
	            <div class="card" style="margin-left: 10%; margin-right: 10%; margin-bottom: 8%">
	                <div class="card-body" id="register">
	                    <h5 class="card-title" style="text-align: center;">REGISTER HERE</h5>
	                    <button class="btncss" onclick="window.location.href='/register'">Click to
	                        Register</a></button>
	                </div>
	            </div>
	        </div>
	        <div class="col">
	            <div class="card" style="margin-right: 10%; margin-bottom: 8%;">
	                <div class="card-body" id="login">
	                    <h5 class="card-title" style="text-align: center;">LOGIN HERE</h5>
	                    <button class="btncss" onclick="window.location.href='/login'">Click to
	                        Login</a></button>
	                </div>
	            </div>
	        </div>
	    </div>


	    <!--FOOTER-->
	    <footer class="footer mt-auto py-3 bg-light">
	        <span class="text-muted" style="margin-left: 2%;">Developed and Maintained by @IoTech</span>
	        <a href="#"><svg style="margin-left: 65%;" xmlns="http://www.w3.org/2000/svg" width="25" height="25" fill="currentColor" class="bi bi-instagram"
	            viewBox="0 0 16 16">
	            <path
	                d="M8 0C5.829 0 5.556.01 4.703.048 3.85.088 3.269.222 2.76.42a3.917 3.917 0 0 0-1.417.923A3.927 3.927 0 0 0 .42 2.76C.222 3.268.087 3.85.048 4.7.01 5.555 0 5.827 0 8.001c0 2.172.01 2.444.048 3.297.04.852.174 1.433.372 1.942.205.526.478.972.923 1.417.444.445.89.719 1.416.923.51.198 1.09.333 1.942.372C5.555 15.99 5.827 16 8 16s2.444-.01 3.298-.048c.851-.04 1.434-.174 1.943-.372a3.916 3.916 0 0 0 1.416-.923c.445-.445.718-.891.923-1.417.197-.509.332-1.09.372-1.942C15.99 10.445 16 10.173 16 8s-.01-2.445-.048-3.299c-.04-.851-.175-1.433-.372-1.941a3.926 3.926 0 0 0-.923-1.417A3.911 3.911 0 0 0 13.24.42c-.51-.198-1.092-.333-1.943-.372C10.443.01 10.172 0 7.998 0h.003zm-.717 1.442h.718c2.136 0 2.389.007 3.232.046.78.035 1.204.166 1.486.275.373.145.64.319.92.599.28.28.453.546.598.92.11.281.24.705.275 1.485.039.843.047 1.096.047 3.231s-.008 2.389-.047 3.232c-.035.78-.166 1.203-.275 1.485a2.47 2.47 0 0 1-.599.919c-.28.28-.546.453-.92.598-.28.11-.704.24-1.485.276-.843.038-1.096.047-3.232.047s-2.39-.009-3.233-.047c-.78-.036-1.203-.166-1.485-.276a2.478 2.478 0 0 1-.92-.598 2.48 2.48 0 0 1-.6-.92c-.109-.281-.24-.705-.275-1.485-.038-.843-.046-1.096-.046-3.233 0-2.136.008-2.388.046-3.231.036-.78.166-1.204.276-1.486.145-.373.319-.64.599-.92.28-.28.546-.453.92-.598.282-.11.705-.24 1.485-.276.738-.034 1.024-.044 2.515-.045v.002zm4.988 1.328a.96.96 0 1 0 0 1.92.96.96 0 0 0 0-1.92zm-4.27 1.122a4.109 4.109 0 1 0 0 8.217 4.109 4.109 0 0 0 0-8.217zm0 1.441a2.667 2.667 0 1 1 0 5.334 2.667 2.667 0 0 1 0-5.334z" />
	        </svg></a>
	        <a href="#"><svg style="margin-left: 1%;" xmlns="http://www.w3.org/2000/svg" width="25" height="25" fill="currentColor" class="bi bi-twitter"
	            viewBox="0 0 16 16">
	            <path
	                d="M5.026 15c6.038 0 9.341-5.003 9.341-9.334 0-.14 0-.282-.006-.422A6.685 6.685 0 0 0 16 3.542a6.658 6.658 0 0 1-1.889.518 3.301 3.301 0 0 0 1.447-1.817 6.533 6.533 0 0 1-2.087.793A3.286 3.286 0 0 0 7.875 6.03a9.325 9.325 0 0 1-6.767-3.429 3.289 3.289 0 0 0 1.018 4.382A3.323 3.323 0 0 1 .64 6.575v.045a3.288 3.288 0 0 0 2.632 3.218 3.203 3.203 0 0 1-.865.115 3.23 3.23 0 0 1-.614-.057 3.283 3.283 0 0 0 3.067 2.277A6.588 6.588 0 0 1 .78 13.58a6.32 6.32 0 0 1-.78-.045A9.344 9.344 0 0 0 5.026 15z" />
	        </svg></a>
	        <a href="#"><svg style="margin-left: 1%;" xmlns="http://www.w3.org/2000/svg" width="25" height="25" fill="currentColor" class="bi bi-linkedin"
	            viewBox="0 0 16 16">
	            <path
	                d="M0 1.146C0 .513.526 0 1.175 0h13.65C15.474 0 16 .513 16 1.146v13.708c0 .633-.526 1.146-1.175 1.146H1.175C.526 16 0 15.487 0 14.854V1.146zm4.943 12.248V6.169H2.542v7.225h2.401zm-1.2-8.212c.837 0 1.358-.554 1.358-1.248-.015-.709-.52-1.248-1.342-1.248-.822 0-1.359.54-1.359 1.248 0 .694.521 1.248 1.327 1.248h.016zm4.908 8.212V9.359c0-.216.016-.432.08-.586.173-.431.568-.878 1.232-.878.869 0 1.216.662 1.216 1.634v3.865h2.401V9.25c0-2.22-1.184-3.252-2.764-3.252-1.274 0-1.845.7-2.165 1.193v.025h-.016a5.54 5.54 0 0 1 .016-.025V6.169h-2.4c.03.678 0 7.225 0 7.225h2.4z" />
	        </svg></a>
	    </footer>


	    <!-- Optional JavaScript; choose one of the two! -->


	    <!-- Option 1: Bootstrap Bundle with Popper -->
	    <script src="https://cdn.jsdelivr.net/npm/bootstrap@5.0.2/dist/js/bootstrap.bundle.min.js"
	        integrity="sha384-MrcW6ZMFYlzcLA8Nl+NtUVF0sA7MsXsP1UyJoMp4YLEuNSfAP+JcXn/tWtIaxVXM"
	        crossorigin="anonymous"></script>


	    <!-- Option 2: Separate Popper and Bootstrap JS -->
	    <!--
	    <script src="https://cdn.jsdelivr.net/npm/@popperjs/core@2.9.2/dist/umd/popper.min.js" integrity="sha384-IQsoLXl5PILFhosVNubq5LC7Qb9DXgDA9i+tQ8Zj3iwWAwPtgFTxbJ8NT4GN1R8p" crossorigin="anonymous"></script>
	    <script src="https://cdn.jsdelivr.net/npm/bootstrap@5.0.2/dist/js/bootstrap.min.js" integrity="sha384-cVKIPhGWiC2Al4u+LWgxfKTRIcfu0JTxR+EQDz/bgldoEyl4H0zUF0QKbrJ0EcQF" crossorigin="anonymous"></script>
	    -->
	</body>


	</html>
Step 29: Registration Page

For new Users to access the Control Page i.e. to control the Robot they need to first Register theirselves on our Website through the Registeration Page.
Existing Users could simple Login through the link provided below the register button.
Below contains the HTML Code for Registration Page :
<!doctype html>
<html lang="en">

<head>
    <!-- Required meta tags -->
    <meta charset="utf-8">
    <meta name="viewport" content="width=device-width, initial-scale=1">

    <!-- Bootstrap CSS -->
    <link href="https://cdn.jsdelivr.net/npm/bootstrap@5.0.2/dist/css/bootstrap.min.css" rel="stylesheet"
        integrity="sha384-EVSTQN3/azprG1Anm3QDgpJLIm9Nao0Yz1ztcQTwFspd3yD65VohhpuuCOmLASjC" crossorigin="anonymous">

    <link rel="stylesheet" href="static\control.css">
    <title>Register</title>

    <!--INTERNAL CSS FOR REGISTER FORM-->
    <style>
       .register{
           border: solid black 1px;
           border-radius: 5px;
           background-color: rgb(105, 105, 105);
           margin-top: 8%;
           margin-bottom: 8%;
           margin-left: 36%;
           margin-right: 35%;
           padding-left: 7%;
           box-shadow: 5px 5px 25px 10px rgb(130, 130, 130);
       }
       .reg{
           padding: 2%;
           margin-left: 15%;
           width: 40%;
           margin-top: 2%;
       }
    </style>
</head>

<body>
    <!--NAVBAR-->
    <nav class="navbar navbar-expand-lg sticky-top navbar-dark bg-dark">
        <div class="container-fluid">
            <a class="navbar-brand" href="#">
                <svg xmlns="http://www.w3.org/2000/svg" width="35" height="35" fill="currentColor"
                    class="bi bi-cpu-fill" viewBox="0 0 16 16">
                    <path d="M6.5 6a.5.5 0 0 0-.5.5v3a.5.5 0 0 0 .5.5h3a.5.5 0 0 0 .5-.5v-3a.5.5 0 0 0-.5-.5h-3z" />
                    <path
                        d="M5.5.5a.5.5 0 0 0-1 0V2A2.5 2.5 0 0 0 2 4.5H.5a.5.5 0 0 0 0 1H2v1H.5a.5.5 0 0 0 0 1H2v1H.5a.5.5 0 0 0 0 1H2v1H.5a.5.5 0 0 0 0 1H2A2.5 2.5 0 0 0 4.5 14v1.5a.5.5 0 0 0 1 0V14h1v1.5a.5.5 0 0 0 1 0V14h1v1.5a.5.5 0 0 0 1 0V14h1v1.5a.5.5 0 0 0 1 0V14a2.5 2.5 0 0 0 2.5-2.5h1.5a.5.5 0 0 0 0-1H14v-1h1.5a.5.5 0 0 0 0-1H14v-1h1.5a.5.5 0 0 0 0-1H14v-1h1.5a.5.5 0 0 0 0-1H14A2.5 2.5 0 0 0 11.5 2V.5a.5.5 0 0 0-1 0V2h-1V.5a.5.5 0 0 0-1 0V2h-1V.5a.5.5 0 0 0-1 0V2h-1V.5zm1 4.5h3A1.5 1.5 0 0 1 11 6.5v3A1.5 1.5 0 0 1 9.5 11h-3A1.5 1.5 0 0 1 5 9.5v-3A1.5 1.5 0 0 1 6.5 5z" />
                </svg>
                <img src="">
                <span style="font-size: 25px;">IoTech</span></a>
            <button class="navbar-toggler" type="button" data-bs-toggle="collapse"
                data-bs-target="#navbarSupportedContent" aria-controls="navbarSupportedContent" aria-expanded="false"
                aria-label="Toggle navigation">
                <span class="navbar-toggler-icon"></span>
            </button>
            <div class="collapse navbar-collapse" id="navbarSupportedContent">
                <ul class="navbar-nav me-auto mb-1 mb-lg-0">
                    <li class="nav-item">
                        <a class="nav-link" aria-current="page" href="/"
                            style="font-size: 20px; margin-left: 1.2em;">Home</a>
                    </li>
                    <li class="nav-item">
                        <a class="nav-link" aria-current="page" href="{{url_for('about')}}"
                            style="font-size: 20px; margin-left: 1.2em;">About</a>
                    </li>
                    <li class="nav-item">
                        <a class="nav-link active" aria-current="page" href="{{url_for('register')}}"
                            style="font-size: 20px; margin-left: 1.2em;">Register</a>
                    </li>
                    <li class="nav-item">
                        <a class="nav-link" aria-current="page" href="{{url_for('login')}}"
                            style="font-size: 20px; margin-left: 1.2em;">Login</a>
                    </li>
                    <li class="nav-item">
                        <a class="nav-link" aria-current="page" href="{{url_for('contact')}}"
                            style="font-size: 20px; margin-left: 1.2em;">Contact</a>
                    </li>
                </ul>
            </div>
        </div>
    </nav>

    <!--REGISTRATION FORM-->
    <div class="register">
        <h1 style="color: white; margin-left: -10%">REGISTERATION</h1>
        <form method="POST" action="">
            {{ form.hidden_tag() }}
            <h5>Username</h5>
            {{ form.username }}
            <br>
            <br>
            <h5>Password</h5>
            {{ form.password }}
            <br>
            <br>
                <button class="reg" type="submit">Register</button>
        </form>
        <br>
        <a href="{{url_for('login')}}" style="color: blue; padding: 2%; margin-bottom: 2%;">Already have an account? Login</a>
    </div>

    <!--FOOTER-->
    <footer class="footer mt-auto py-3 bg-light">
        <span class="text-muted" style="font-size: large; margin-left: 2%">Developed and Maintained by @IoTech</span>
        <a href="#"><svg style="margin-left: 65%;" xmlns="http://www.w3.org/2000/svg" width="25" height="25" fill="currentColor" class="bi bi-instagram"
            viewBox="0 0 16 16">
            <path
                d="M8 0C5.829 0 5.556.01 4.703.048 3.85.088 3.269.222 2.76.42a3.917 3.917 0 0 0-1.417.923A3.927 3.927 0 0 0 .42 2.76C.222 3.268.087 3.85.048 4.7.01 5.555 0 5.827 0 8.001c0 2.172.01 2.444.048 3.297.04.852.174 1.433.372 1.942.205.526.478.972.923 1.417.444.445.89.719 1.416.923.51.198 1.09.333 1.942.372C5.555 15.99 5.827 16 8 16s2.444-.01 3.298-.048c.851-.04 1.434-.174 1.943-.372a3.916 3.916 0 0 0 1.416-.923c.445-.445.718-.891.923-1.417.197-.509.332-1.09.372-1.942C15.99 10.445 16 10.173 16 8s-.01-2.445-.048-3.299c-.04-.851-.175-1.433-.372-1.941a3.926 3.926 0 0 0-.923-1.417A3.911 3.911 0 0 0 13.24.42c-.51-.198-1.092-.333-1.943-.372C10.443.01 10.172 0 7.998 0h.003zm-.717 1.442h.718c2.136 0 2.389.007 3.232.046.78.035 1.204.166 1.486.275.373.145.64.319.92.599.28.28.453.546.598.92.11.281.24.705.275 1.485.039.843.047 1.096.047 3.231s-.008 2.389-.047 3.232c-.035.78-.166 1.203-.275 1.485a2.47 2.47 0 0 1-.599.919c-.28.28-.546.453-.92.598-.28.11-.704.24-1.485.276-.843.038-1.096.047-3.232.047s-2.39-.009-3.233-.047c-.78-.036-1.203-.166-1.485-.276a2.478 2.478 0 0 1-.92-.598 2.48 2.48 0 0 1-.6-.92c-.109-.281-.24-.705-.275-1.485-.038-.843-.046-1.096-.046-3.233 0-2.136.008-2.388.046-3.231.036-.78.166-1.204.276-1.486.145-.373.319-.64.599-.92.28-.28.546-.453.92-.598.282-.11.705-.24 1.485-.276.738-.034 1.024-.044 2.515-.045v.002zm4.988 1.328a.96.96 0 1 0 0 1.92.96.96 0 0 0 0-1.92zm-4.27 1.122a4.109 4.109 0 1 0 0 8.217 4.109 4.109 0 0 0 0-8.217zm0 1.441a2.667 2.667 0 1 1 0 5.334 2.667 2.667 0 0 1 0-5.334z" />
        </svg></a>
        <a href="#"><svg style="margin-left: 1%;" xmlns="http://www.w3.org/2000/svg" width="25" height="25" fill="currentColor" class="bi bi-twitter"
            viewBox="0 0 16 16">
            <path
                d="M5.026 15c6.038 0 9.341-5.003 9.341-9.334 0-.14 0-.282-.006-.422A6.685 6.685 0 0 0 16 3.542a6.658 6.658 0 0 1-1.889.518 3.301 3.301 0 0 0 1.447-1.817 6.533 6.533 0 0 1-2.087.793A3.286 3.286 0 0 0 7.875 6.03a9.325 9.325 0 0 1-6.767-3.429 3.289 3.289 0 0 0 1.018 4.382A3.323 3.323 0 0 1 .64 6.575v.045a3.288 3.288 0 0 0 2.632 3.218 3.203 3.203 0 0 1-.865.115 3.23 3.23 0 0 1-.614-.057 3.283 3.283 0 0 0 3.067 2.277A6.588 6.588 0 0 1 .78 13.58a6.32 6.32 0 0 1-.78-.045A9.344 9.344 0 0 0 5.026 15z" />
        </svg></a>
        <a href="#"><svg style="margin-left: 1%;" xmlns="http://www.w3.org/2000/svg" width="25" height="25" fill="currentColor" class="bi bi-linkedin"
            viewBox="0 0 16 16">
            <path
                d="M0 1.146C0 .513.526 0 1.175 0h13.65C15.474 0 16 .513 16 1.146v13.708c0 .633-.526 1.146-1.175 1.146H1.175C.526 16 0 15.487 0 14.854V1.146zm4.943 12.248V6.169H2.542v7.225h2.401zm-1.2-8.212c.837 0 1.358-.554 1.358-1.248-.015-.709-.52-1.248-1.342-1.248-.822 0-1.359.54-1.359 1.248 0 .694.521 1.248 1.327 1.248h.016zm4.908 8.212V9.359c0-.216.016-.432.08-.586.173-.431.568-.878 1.232-.878.869 0 1.216.662 1.216 1.634v3.865h2.401V9.25c0-2.22-1.184-3.252-2.764-3.252-1.274 0-1.845.7-2.165 1.193v.025h-.016a5.54 5.54 0 0 1 .016-.025V6.169h-2.4c.03.678 0 7.225 0 7.225h2.4z" />
        </svg></a>
    </footer>

    <!-- Optional JavaScript; choose one of the two! -->

    <!-- Option 1: Bootstrap Bundle with Popper -->
    <script src="https://cdn.jsdelivr.net/npm/bootstrap@5.0.2/dist/js/bootstrap.bundle.min.js"
        integrity="sha384-MrcW6ZMFYlzcLA8Nl+NtUVF0sA7MsXsP1UyJoMp4YLEuNSfAP+JcXn/tWtIaxVXM"
        crossorigin="anonymous"></script>

    <!-- Option 2: Separate Popper and Bootstrap JS -->
    <!--
    <script src="https://cdn.jsdelivr.net/npm/@popperjs/core@2.9.2/dist/umd/popper.min.js" integrity="sha384-IQsoLXl5PILFhosVNubq5LC7Qb9DXgDA9i+tQ8Zj3iwWAwPtgFTxbJ8NT4GN1R8p" crossorigin="anonymous"></script>
    <script src="https://cdn.jsdelivr.net/npm/bootstrap@5.0.2/dist/js/bootstrap.min.js" integrity="sha384-cVKIPhGWiC2Al4u+LWgxfKTRIcfu0JTxR+EQDz/bgldoEyl4H0zUF0QKbrJ0EcQF" crossorigin="anonymous"></script>
    -->
</body>

</html>
Step 30: Login Page

Existing Users could directly Login and start to access their Bot from the Control Page.
Below contains the HTML Code for the Login Page :
<!doctype html>
<html lang="en">

<head>
    <!-- Required meta tags -->
    <meta charset="utf-8">
    <meta name="viewport" content="width=device-width, initial-scale=1">

    <!-- Bootstrap CSS -->
    <link href="https://cdn.jsdelivr.net/npm/bootstrap@5.0.2/dist/css/bootstrap.min.css" rel="stylesheet"
        integrity="sha384-EVSTQN3/azprG1Anm3QDgpJLIm9Nao0Yz1ztcQTwFspd3yD65VohhpuuCOmLASjC" crossorigin="anonymous">
    <link rel="stylesheet" href="static\control.css">
    <title>Login</title>

    <!--LOGIN CSS-->
    <style>
        .login {
            border: solid black 1px;
            border-radius: 5px;
            background-color: rgb(105, 105, 105);
            margin-top: 8%;
            margin-bottom: 8%;
            margin-left: 36%;
            margin-right: 35%;
            padding-left: 7%;
            box-shadow: 5px 5px 25px 10px rgb(130, 130, 130);
        }

        .reg {
            padding: 2%;
            margin-left: 15%;
            width: 40%;
            margin-top: 2%;
        }
    </style>
</head>

<body>
    <!--NAVBAR-->
    <nav class="navbar navbar-expand-lg sticky-top navbar-dark bg-dark">
        <div class="container-fluid">
            <a class="navbar-brand" href="#">
                <svg xmlns="http://www.w3.org/2000/svg" width="35" height="35" fill="currentColor"
                    class="bi bi-cpu-fill" viewBox="0 0 16 16">
                    <path d="M6.5 6a.5.5 0 0 0-.5.5v3a.5.5 0 0 0 .5.5h3a.5.5 0 0 0 .5-.5v-3a.5.5 0 0 0-.5-.5h-3z" />
                    <path
                        d="M5.5.5a.5.5 0 0 0-1 0V2A2.5 2.5 0 0 0 2 4.5H.5a.5.5 0 0 0 0 1H2v1H.5a.5.5 0 0 0 0 1H2v1H.5a.5.5 0 0 0 0 1H2v1H.5a.5.5 0 0 0 0 1H2A2.5 2.5 0 0 0 4.5 14v1.5a.5.5 0 0 0 1 0V14h1v1.5a.5.5 0 0 0 1 0V14h1v1.5a.5.5 0 0 0 1 0V14h1v1.5a.5.5 0 0 0 1 0V14a2.5 2.5 0 0 0 2.5-2.5h1.5a.5.5 0 0 0 0-1H14v-1h1.5a.5.5 0 0 0 0-1H14v-1h1.5a.5.5 0 0 0 0-1H14v-1h1.5a.5.5 0 0 0 0-1H14A2.5 2.5 0 0 0 11.5 2V.5a.5.5 0 0 0-1 0V2h-1V.5a.5.5 0 0 0-1 0V2h-1V.5a.5.5 0 0 0-1 0V2h-1V.5zm1 4.5h3A1.5 1.5 0 0 1 11 6.5v3A1.5 1.5 0 0 1 9.5 11h-3A1.5 1.5 0 0 1 5 9.5v-3A1.5 1.5 0 0 1 6.5 5z" />
                </svg>
                <img src="">
                <span style="font-size: 25px;">IoTech</span></a>
            <button class="navbar-toggler" type="button" data-bs-toggle="collapse"
                data-bs-target="#navbarSupportedContent" aria-controls="navbarSupportedContent" aria-expanded="false"
                aria-label="Toggle navigation">
                <span class="navbar-toggler-icon"></span>
            </button>
            <div class="collapse navbar-collapse" id="navbarSupportedContent">
                <ul class="navbar-nav me-auto mb-1 mb-lg-0">
                    <li class="nav-item">
                        <a class="nav-link" aria-current="page" href="/"
                            style="font-size: 20px; margin-left: 1.2em;">Home</a>
                    </li>
                    <li class="nav-item">
                        <a class="nav-link" aria-current="page" href="{{url_for('about')}}"
                            style="font-size: 20px; margin-left: 1.2em;">About</a>
                    </li>
                    <li class="nav-item">
                        <a class="nav-link" aria-current="page" href="{{url_for('register')}}"
                            style="font-size: 20px; margin-left: 1.2em;">Register</a>
                    </li>
                    <li class="nav-item">
                        <a class="nav-link active" aria-current="page" href="{{url_for('login')}}"
                            style="font-size: 20px; margin-left: 1.2em;">Login</a>
                    </li>
                    <li class="nav-item">
                        <a class="nav-link" aria-current="page" href="{{url_for('contact')}}"
                            style="font-size: 20px; margin-left: 1.2em;">Contact</a>
                    </li>
                </ul>
            </div>
        </div>
    </nav>

    <!--LOGIN FORM-->
    <div class="login">
        <h1 style="color: white; margin-left: 15%">LOGIN</h1>
        <form method="POST" action="">
            {{ form.hidden_tag() }}
            <h5>Username</h5>
            {{ form.username }}
            <br>
            <br>
            <h5>Password</h5>
            {{ form.password }}
            <br>
            <br>
            <button class="reg" type="submit">Login</button>
        </form>
        <br>
        <a href="{{url_for('register')}}" style="color: blue; padding: 2%; margin-bottom: 2%;">Don't have an account?
            Sign Up!</a>
    </div>

    <!--FOOTER-->
    <footer class="footer mt-auto py-3 bg-light">
        <span class="text-muted" style="font-size: large; margin-left: 2%">Developed and Maintained by @IoTech</span>
        <a href="#"><svg style="margin-left: 65%;" xmlns="http://www.w3.org/2000/svg" width="25" height="25" fill="currentColor" class="bi bi-instagram"
            viewBox="0 0 16 16">
            <path
                d="M8 0C5.829 0 5.556.01 4.703.048 3.85.088 3.269.222 2.76.42a3.917 3.917 0 0 0-1.417.923A3.927 3.927 0 0 0 .42 2.76C.222 3.268.087 3.85.048 4.7.01 5.555 0 5.827 0 8.001c0 2.172.01 2.444.048 3.297.04.852.174 1.433.372 1.942.205.526.478.972.923 1.417.444.445.89.719 1.416.923.51.198 1.09.333 1.942.372C5.555 15.99 5.827 16 8 16s2.444-.01 3.298-.048c.851-.04 1.434-.174 1.943-.372a3.916 3.916 0 0 0 1.416-.923c.445-.445.718-.891.923-1.417.197-.509.332-1.09.372-1.942C15.99 10.445 16 10.173 16 8s-.01-2.445-.048-3.299c-.04-.851-.175-1.433-.372-1.941a3.926 3.926 0 0 0-.923-1.417A3.911 3.911 0 0 0 13.24.42c-.51-.198-1.092-.333-1.943-.372C10.443.01 10.172 0 7.998 0h.003zm-.717 1.442h.718c2.136 0 2.389.007 3.232.046.78.035 1.204.166 1.486.275.373.145.64.319.92.599.28.28.453.546.598.92.11.281.24.705.275 1.485.039.843.047 1.096.047 3.231s-.008 2.389-.047 3.232c-.035.78-.166 1.203-.275 1.485a2.47 2.47 0 0 1-.599.919c-.28.28-.546.453-.92.598-.28.11-.704.24-1.485.276-.843.038-1.096.047-3.232.047s-2.39-.009-3.233-.047c-.78-.036-1.203-.166-1.485-.276a2.478 2.478 0 0 1-.92-.598 2.48 2.48 0 0 1-.6-.92c-.109-.281-.24-.705-.275-1.485-.038-.843-.046-1.096-.046-3.233 0-2.136.008-2.388.046-3.231.036-.78.166-1.204.276-1.486.145-.373.319-.64.599-.92.28-.28.546-.453.92-.598.282-.11.705-.24 1.485-.276.738-.034 1.024-.044 2.515-.045v.002zm4.988 1.328a.96.96 0 1 0 0 1.92.96.96 0 0 0 0-1.92zm-4.27 1.122a4.109 4.109 0 1 0 0 8.217 4.109 4.109 0 0 0 0-8.217zm0 1.441a2.667 2.667 0 1 1 0 5.334 2.667 2.667 0 0 1 0-5.334z" />
        </svg></a>
        <a href="#"><svg style="margin-left: 1%;" xmlns="http://www.w3.org/2000/svg" width="25" height="25" fill="currentColor" class="bi bi-twitter"
            viewBox="0 0 16 16">
            <path
                d="M5.026 15c6.038 0 9.341-5.003 9.341-9.334 0-.14 0-.282-.006-.422A6.685 6.685 0 0 0 16 3.542a6.658 6.658 0 0 1-1.889.518 3.301 3.301 0 0 0 1.447-1.817 6.533 6.533 0 0 1-2.087.793A3.286 3.286 0 0 0 7.875 6.03a9.325 9.325 0 0 1-6.767-3.429 3.289 3.289 0 0 0 1.018 4.382A3.323 3.323 0 0 1 .64 6.575v.045a3.288 3.288 0 0 0 2.632 3.218 3.203 3.203 0 0 1-.865.115 3.23 3.23 0 0 1-.614-.057 3.283 3.283 0 0 0 3.067 2.277A6.588 6.588 0 0 1 .78 13.58a6.32 6.32 0 0 1-.78-.045A9.344 9.344 0 0 0 5.026 15z" />
        </svg></a>
        <a href="#"><svg style="margin-left: 1%;" xmlns="http://www.w3.org/2000/svg" width="25" height="25" fill="currentColor" class="bi bi-linkedin"
            viewBox="0 0 16 16">
            <path
                d="M0 1.146C0 .513.526 0 1.175 0h13.65C15.474 0 16 .513 16 1.146v13.708c0 .633-.526 1.146-1.175 1.146H1.175C.526 16 0 15.487 0 14.854V1.146zm4.943 12.248V6.169H2.542v7.225h2.401zm-1.2-8.212c.837 0 1.358-.554 1.358-1.248-.015-.709-.52-1.248-1.342-1.248-.822 0-1.359.54-1.359 1.248 0 .694.521 1.248 1.327 1.248h.016zm4.908 8.212V9.359c0-.216.016-.432.08-.586.173-.431.568-.878 1.232-.878.869 0 1.216.662 1.216 1.634v3.865h2.401V9.25c0-2.22-1.184-3.252-2.764-3.252-1.274 0-1.845.7-2.165 1.193v.025h-.016a5.54 5.54 0 0 1 .016-.025V6.169h-2.4c.03.678 0 7.225 0 7.225h2.4z" />
        </svg></a>
    </footer>

    <!-- Optional JavaScript; choose one of the two! -->

    <!-- Option 1: Bootstrap Bundle with Popper -->
    <script src="https://cdn.jsdelivr.net/npm/bootstrap@5.0.2/dist/js/bootstrap.bundle.min.js"
        integrity="sha384-MrcW6ZMFYlzcLA8Nl+NtUVF0sA7MsXsP1UyJoMp4YLEuNSfAP+JcXn/tWtIaxVXM"
        crossorigin="anonymous"></script>

    <!-- Option 2: Separate Popper and Bootstrap JS -->
    <!--
    <script src="https://cdn.jsdelivr.net/npm/@popperjs/core@2.9.2/dist/umd/popper.min.js" integrity="sha384-IQsoLXl5PILFhosVNubq5LC7Qb9DXgDA9i+tQ8Zj3iwWAwPtgFTxbJ8NT4GN1R8p" crossorigin="anonymous"></script>
    <script src="https://cdn.jsdelivr.net/npm/bootstrap@5.0.2/dist/js/bootstrap.min.js" integrity="sha384-cVKIPhGWiC2Al4u+LWgxfKTRIcfu0JTxR+EQDz/bgldoEyl4H0zUF0QKbrJ0EcQF" crossorigin="anonymous"></script>
    -->
</body>

</html>
Step 31: About Us Page

The About Us Page displays information about project members and their roles.
Below is the HTML Code for About Us Page :
<!doctype html>
<html lang="en">
<head>
<!-- Required meta tags -->
<meta charset="utf-8">
<meta name="viewport" content="width=device-width, initial-scale=1">
<!-- Bootstrap CSS -->
<link href="https://cdn.jsdelivr.net/npm/bootstrap@5.0.2/dist/css/bootstrap.min.css" rel="stylesheet"
integrity="sha384-EVSTQN3/azprG1Anm3QDgpJLIm9Nao0Yz1ztcQTwFspd3yD65VohhpuuCOmLASjC" crossorigin="anonymous">
<!-- Google Fonts -->
<link href="https://fonts.googleapis.com/css2?family=Lato:ital,wght@0,300;0,400;1,700;1,900&display=swap"
rel="stylesheet">
<!-- FOnt Awesome -->
<script src="https://kit.fontawesome.com/e48d166edc.js" crossorigin="anonymous"></script>
<title>Login</title>
<style>
/* Coding With Nick */
/* GEneral stuff */
*,
*::before,
*::after {
box-sizing: border-box;
}
html {
font-family: sans-serif;
line-height: 1.15;
}
body {
font-family: 'lato', sans-serif;
color: #454545;
font-weight: 300;
background: #ffffff;
}
a {
color: #333333;
font-weight: 400;
outline: none;
text-decoration: none;
transition: 0.5s;
}
a:hover,
a:focus {
outline: none;
text-decoration: none;
}
p {
padding: 0;
margin: 0 0 15px 0;
color: #454545;
font-weight: 300;
}
h1,
h2,
h3,
h4,
h5,
h6 {
padding: 0;
margin: 0 0 15px 0;
color: #333333;
font-weight: 700;
}
img {
width: 100%;
height: auto;
}
.container {
width: 100%;
padding-right: 15px;
padding-left: 15px;
margin-right: auto;
margin-left: auto;
}
.section-title {
flex: 0 0 100%;
max-width: 100%;
margin-bottom: 80px;
margin-top: 40px;
text-align: center;
}
.section-title h1 {
display: inline-block;
font-size: 35px;
text-transform: uppercase;
font-weight: 700;
color: #000000;
margin: 0 0 5px;
position: relative;
}
.section-title h1::before {
content: '';
left: 0;
position: absolute;
height: 3px;
right: 32%;
background-color: #50c5fc;
bottom: -5px;
}
.container .section-title h1::before {
left: 30%;
}
.row {
display: flex;
flex-wrap: wrap;
margin-right: -15px;
margin-left: -15px;
}
.column {
position: relative;
width: 100%;
padding-right: 15px;
padding-left: 15px;
flex: 0 0 100%;
max-width: 100%;
}
.team {
margin-bottom: 30px;
}
.team .team-img {
position: relative;
font-size: 0;
text-align: center;
}
.team .team-img img {
width: 160px;
height: auto;
border-radius: 100%;
border: 20px solid #f3f4fa;
}
.team .team-content {
padding: 80px 20px 20px 20px;
margin-top: -80px;
text-align: center;
background: #f3f4fa;
border-radius: 10px;
}
.team .team-content h2 {
font-size: 25px;
font-weight: 400;
letter-spacing: 2px;
}
.team .team-content h3 {
font-size: 16px;
font-weight: 300;
}
.team .team-content h4 {
font-size: 16px;
font-weight: 300;
letter-spacing: 1px;
font-style: italic;
margin-bottom: 0;
}
.team .team-content p {
font-size: 16px;
font-weight: 400;
line-height: 22px;
}
.team .team-social {
position: absolute;
width: 100%;
height: 100%;
padding: 35px;
top: 0;
left: 0;
display: flex;
align-items: center;
justify-content: center;
background: rgba(255, 255, 255, .6);
transition: all .3s;
font-size: 0;
z-index: 1;
opacity: 0;
}
.team:hover .team-social {
opacity: 1;
}
.team .team-social a {
display: inline-block;
width: 40px;
height: 40px;
margin-right: 5px;
padding: 11px 0 10px 0;
font-size: 16px;
font-weight: 300;
line-height: 16px;
text-align: center;
color: #ffffff;
border-radius: 10px;
transition: all .3s;
margin-top: 50px;
}
.team .team-social a.social-tw {
background: #00acee;
}
.team .team-social a.social-fb {
background: #3b5998;
}
.team .team-social a.social-li {
background: #0e76a8;
}
.team .team-social a.social-in {
background: #3f729b;
}
.team .team-social a.social-yt {
background: #c4302b;
}
.team .team-social a:last-child {
margin-right: 0;
}
.team:hover .team-social a {
margin-top: 0;
}
.team .team-social a:hover {
background: #222222;
}
/* Mobile Responsive */
@media (min-width: 576px) {
.container {
max-width: 540px;
}
.column {
max-width: 50%;
}
}
@media (min-width: 768px) {
.container {
max-width: 720px;
}
.column {
max-width: 33.333333%;
}
}
@media (min-width: 992px) {
.container {
max-width: 960px;
}
.column {
max-width: 25%;
}
}
@media (min-width: 1200px) {
.container {
max-width: 1140px;
}
}
</style>
</head>
<body style="background-color: rgb(32,32,32);">
<!--NAVBAR-->
<nav class="navbar navbar-expand-lg sticky-top navbar-dark bg-dark">
<div class="container-fluid">
<a class="navbar-brand" href="#">
<svg xmlns="http://www.w3.org/2000/svg" width="35" height="35" fill="currentColor"
class="bi bi-cpu-fill" viewBox="0 0 16 16">
<path d="M6.5 6a.5.5 0 0 0-.5.5v3a.5.5 0 0 0 .5.5h3a.5.5 0 0 0 .5-.5v-3a.5.5 0 0 0-.5-.5h-3z" />
<path
d="M5.5.5a.5.5 0 0 0-1 0V2A2.5 2.5 0 0 0 2 4.5H.5a.5.5 0 0 0 0 1H2v1H.5a.5.5 0 0 0 0 1H2v1H.5a.5.5 0 0 0 0 1H2v1H.5a.5.5 0 0 0 0 1H2A2.5 2.5 0 0 0 4.5 14v1.5a.5.5 0 0 0 1 0V14h1v1.5a.5.5 0 0 0 1 0V14h1v1.5a.5.5 0 0 0 1 0V14h1v1.5a.5.5 0 0 0 1 0V14a2.5 2.5 0 0 0 2.5-2.5h1.5a.5.5 0 0 0 0-1H14v-1h1.5a.5.5 0 0 0 0-1H14v-1h1.5a.5.5 0 0 0 0-1H14v-1h1.5a.5.5 0 0 0 0-1H14A2.5 2.5 0 0 0 11.5 2V.5a.5.5 0 0 0-1 0V2h-1V.5a.5.5 0 0 0-1 0V2h-1V.5a.5.5 0 0 0-1 0V2h-1V.5zm1 4.5h3A1.5 1.5 0 0 1 11 6.5v3A1.5 1.5 0 0 1 9.5 11h-3A1.5 1.5 0 0 1 5 9.5v-3A1.5 1.5 0 0 1 6.5 5z" />
</svg>
<img src="">
<span style="font-size: 25px;">IoTech</span></a>
<button class="navbar-toggler" type="button" data-bs-toggle="collapse"
data-bs-target="#navbarSupportedContent" aria-controls="navbarSupportedContent" aria-expanded="false"
aria-label="Toggle navigation">
<span class="navbar-toggler-icon"></span>
</button>
<div class="collapse navbar-collapse" id="navbarSupportedContent">
<ul class="navbar-nav me-auto mb-1 mb-lg-0">
<li class="nav-item">
<a class="nav-link" aria-current="page" href="/"
style="font-size: 20px; margin-left: 1.2em;">Home</a>
</li>
<li class="nav-item">
<a class="nav-link active" aria-current="page" href="{{url_for('about')}}"
style="font-size: 20px; margin-left: 1.2em;">About</a>
</li>
<li class="nav-item">
<a class="nav-link" aria-current="page" href="{{url_for('register')}}"
style="font-size: 20px; margin-left: 1.2em;">Register</a>
</li>
<li class="nav-item">
<a class="nav-link" aria-current="page" href="{{url_for('login')}}"
style="font-size: 20px; margin-left: 1.2em;">Login</a>
</li>
<li class="nav-item">
<a class="nav-link" aria-current="page" href="{{url_for('contact')}}"
style="font-size: 20px; margin-left: 1.2em;">Contact</a>
</li>
</ul>
</div>
</div>
</nav>
<div class="container" style="margin-bottom: 2%;">
<div class="section-title">
<h1 style="color: white;">Our Team</h1>
</div>
<div class="row">
<div class="column">
<div class="team">
<div class="team-img">
<img src="static\shub.jpeg" alt="Team Image">
</div>
<div class="team-content">
<h2>Shubham Vetal</h2>
<h3>Project Head</h3>
<p>Software and Hardware Integration (CAD Design)</p>
<h4>svvetal14@gmail.com</h4>
</div>
<div class="team-social">
<a href="#" class="social-tw"> <i class="fab fa-twitter"></i></a>
<a href="#" class="social-fb"> <i class="fab fa-facebook-f"></i></a>
<a href="#" class="social-li"> <i class="fab fa-linkedin-in"></i></a>
<a href="#" class="social-in"> <i class="fab fa-instagram"></i></a>
<a href="#" class="social-yt"> <i class="fab fa-youtube"></i></a>
</div>
</div>
</div>
<div class="column">
<div class="team">
<div class="team-img">
<img src="static\sans.jpg" alt="Team Image">
</div>
<div class="team-content">
<h2>Sanskruti Patil</h2>
<h3>Software Tech</h3>
<p>Front-End Developer WebPage Integration</p>
<h4>psanskruti09@gmail.com</h4>
</div>
<div class="team-social">
<a href="#" class="social-tw"> <i class="fab fa-twitter"></i></a>
<a href="#" class="social-fb"> <i class="fab fa-facebook-f"></i></a>
<a href="#" class="social-li"> <i class="fab fa-linkedin-in"></i></a>
<a href="#" class="social-in"> <i class="fab fa-instagram"></i></a>
<a href="#" class="social-yt"> <i class="fab fa-youtube"></i></a>
</div>
</div>
</div>
<div class="column">
<div class="team">
<div class="team-img">
<img src="static\mitts.jpeg" alt="Team Image">
</div>
<div class="team-content">
<h2>Mitul Shah</h2>
<h3>Software Tech</h3>
<p>UI/UX and WebPage Designing</p>
<h4>mitulshah0709@gmail.com</h4>
</div>
<div class="team-social">
<a href="#" class="social-tw"> <i class="fab fa-twitter"></i></a>
<a href="#" class="social-fb"> <i class="fab fa-facebook-f"></i></a>
<a href="#" class="social-li"> <i class="fab fa-linkedin-in"></i></a>
<a href="#" class="social-in"> <i class="fab fa-instagram"></i></a>
<a href="#" class="social-yt"> <i class="fab fa-youtube"></i></a>
</div>
</div>
</div>
<div class="column">
<div class="team">
<div class="team-img">
<img src="static\vish.jpeg" alt="Team Image">
</div>
<div class="team-content">
<h2>Vishwajit Patil</h2>
<h3>Hardware Tech</h3>
<p>Circuit Building and Circuit Designing</p>
<h4>raj22cric@gmail.com</h4>
</div>
<div class="team-social">
<a href="#" class="social-tw"> <i class="fab fa-twitter"></i></a>
<a href="#" class="social-fb"> <i class="fab fa-facebook-f"></i></a>
<a href="#" class="social-li"> <i class="fab fa-linkedin-in"></i></a>
<a href="#" class="social-in"> <i class="fab fa-instagram"></i></a>
<a href="#" class="social-yt"> <i class="fab fa-youtube"></i></a>
</div>
</div>
</div>
</div>
</div>
<!--FOOTER-->
<footer class="footer mt-auto py-3 bg-light">
<span class="text-muted" style="margin-left: 2%;">Developed and Maintained by @IoTech</span>
<a href="#"><svg style="margin-left: 65%;" xmlns="http://www.w3.org/2000/svg" width="25" height="25"
fill="currentColor" class="bi bi-instagram" viewBox="0 0 16 16">
<path
d="M8 0C5.829 0 5.556.01 4.703.048 3.85.088 3.269.222 2.76.42a3.917 3.917 0 0 0-1.417.923A3.927 3.927 0 0 0 .42 2.76C.222 3.268.087 3.85.048 4.7.01 5.555 0 5.827 0 8.001c0 2.172.01 2.444.048 3.297.04.852.174 1.433.372 1.942.205.526.478.972.923 1.417.444.445.89.719 1.416.923.51.198 1.09.333 1.942.372C5.555 15.99 5.827 16 8 16s2.444-.01 3.298-.048c.851-.04 1.434-.174 1.943-.372a3.916 3.916 0 0 0 1.416-.923c.445-.445.718-.891.923-1.417.197-.509.332-1.09.372-1.942C15.99 10.445 16 10.173 16 8s-.01-2.445-.048-3.299c-.04-.851-.175-1.433-.372-1.941a3.926 3.926 0 0 0-.923-1.417A3.911 3.911 0 0 0 13.24.42c-.51-.198-1.092-.333-1.943-.372C10.443.01 10.172 0 7.998 0h.003zm-.717 1.442h.718c2.136 0 2.389.007 3.232.046.78.035 1.204.166 1.486.275.373.145.64.319.92.599.28.28.453.546.598.92.11.281.24.705.275 1.485.039.843.047 1.096.047 3.231s-.008 2.389-.047 3.232c-.035.78-.166 1.203-.275 1.485a2.47 2.47 0 0 1-.599.919c-.28.28-.546.453-.92.598-.28.11-.704.24-1.485.276-.843.038-1.096.047-3.232.047s-2.39-.009-3.233-.047c-.78-.036-1.203-.166-1.485-.276a2.478 2.478 0 0 1-.92-.598 2.48 2.48 0 0 1-.6-.92c-.109-.281-.24-.705-.275-1.485-.038-.843-.046-1.096-.046-3.233 0-2.136.008-2.388.046-3.231.036-.78.166-1.204.276-1.486.145-.373.319-.64.599-.92.28-.28.546-.453.92-.598.282-.11.705-.24 1.485-.276.738-.034 1.024-.044 2.515-.045v.002zm4.988 1.328a.96.96 0 1 0 0 1.92.96.96 0 0 0 0-1.92zm-4.27 1.122a4.109 4.109 0 1 0 0 8.217 4.109 4.109 0 0 0 0-8.217zm0 1.441a2.667 2.667 0 1 1 0 5.334 2.667 2.667 0 0 1 0-5.334z" />
</svg></a>
<a href="#"><svg style="margin-left: 1%;" xmlns="http://www.w3.org/2000/svg" width="25" height="25"
fill="currentColor" class="bi bi-twitter" viewBox="0 0 16 16">
<path
d="M5.026 15c6.038 0 9.341-5.003 9.341-9.334 0-.14 0-.282-.006-.422A6.685 6.685 0 0 0 16 3.542a6.658 6.658 0 0 1-1.889.518 3.301 3.301 0 0 0 1.447-1.817 6.533 6.533 0 0 1-2.087.793A3.286 3.286 0 0 0 7.875 6.03a9.325 9.325 0 0 1-6.767-3.429 3.289 3.289 0 0 0 1.018 4.382A3.323 3.323 0 0 1 .64 6.575v.045a3.288 3.288 0 0 0 2.632 3.218 3.203 3.203 0 0 1-.865.115 3.23 3.23 0 0 1-.614-.057 3.283 3.283 0 0 0 3.067 2.277A6.588 6.588 0 0 1 .78 13.58a6.32 6.32 0 0 1-.78-.045A9.344 9.344 0 0 0 5.026 15z" />
</svg></a>
<a href="#"><svg style="margin-left: 1%;" xmlns="http://www.w3.org/2000/svg" width="25" height="25"
fill="currentColor" class="bi bi-linkedin" viewBox="0 0 16 16">
<path
d="M0 1.146C0 .513.526 0 1.175 0h13.65C15.474 0 16 .513 16 1.146v13.708c0 .633-.526 1.146-1.175 1.146H1.175C.526 16 0 15.487 0 14.854V1.146zm4.943 12.248V6.169H2.542v7.225h2.401zm-1.2-8.212c.837 0 1.358-.554 1.358-1.248-.015-.709-.52-1.248-1.342-1.248-.822 0-1.359.54-1.359 1.248 0 .694.521 1.248 1.327 1.248h.016zm4.908 8.212V9.359c0-.216.016-.432.08-.586.173-.431.568-.878 1.232-.878.869 0 1.216.662 1.216 1.634v3.865h2.401V9.25c0-2.22-1.184-3.252-2.764-3.252-1.274 0-1.845.7-2.165 1.193v.025h-.016a5.54 5.54 0 0 1 .016-.025V6.169h-2.4c.03.678 0 7.225 0 7.225h2.4z" />
</svg></a>
</footer>
<!-- Optional JavaScript; choose one of the two! -->
<!-- Option 1: Bootstrap Bundle with Popper -->
<script src="https://cdn.jsdelivr.net/npm/bootstrap@5.0.2/dist/js/bootstrap.bundle.min.js"
integrity="sha384-MrcW6ZMFYlzcLA8Nl+NtUVF0sA7MsXsP1UyJoMp4YLEuNSfAP+JcXn/tWtIaxVXM"
crossorigin="anonymous"></script>
<!-- Option 2: Separate Popper and Bootstrap JS -->
<!--
<script src="https://cdn.jsdelivr.net/npm/@popperjs/core@2.9.2/dist/umd/popper.min.js" integrity="sha384-IQsoLXl5PILFhosVNubq5LC7Qb9DXgDA9i+tQ8Zj3iwWAwPtgFTxbJ8NT4GN1R8p" crossorigin="anonymous"></script>
<script src="https://cdn.jsdelivr.net/npm/bootstrap@5.0.2/dist/js/bootstrap.min.js" integrity="sha384-cVKIPhGWiC2Al4u+LWgxfKTRIcfu0JTxR+EQDz/bgldoEyl4H0zUF0QKbrJ0EcQF" crossorigin="anonymous"></script>
-->
</body>
</html>
Step 32: Contact Us Page

The Contact Us Page contains a Form for the Users in order to get connected with us.
Below is the HTML Code for the same :
<!doctype html>
<html lang="en">

<head>
    <!-- Required meta tags -->
    <meta charset="utf-8">
    <meta name="viewport" content="width=device-width, initial-scale=1">
    <link rel="stylesheet" type="text/css" href="static\style.css">

    <!-- Bootstrap CSS -->
    <link href="https://cdn.jsdelivr.net/npm/bootstrap@5.0.2/dist/css/bootstrap.min.css" rel="stylesheet"
        integrity="sha384-EVSTQN3/azprG1Anm3QDgpJLIm9Nao0Yz1ztcQTwFspd3yD65VohhpuuCOmLASjC" crossorigin="anonymous">

    <title>Login</title>
</head>

<body style="background-color: rgb(32,32,32);">
    <!--NAVBAR-->
    <nav class="navbar navbar-expand-lg sticky-top navbar-dark bg-dark">
        <div class="container-fluid">
            <a class="navbar-brand" href="#">
                <svg xmlns="http://www.w3.org/2000/svg" width="35" height="35" fill="currentColor"
                    class="bi bi-cpu-fill" viewBox="0 0 16 16">
                    <path d="M6.5 6a.5.5 0 0 0-.5.5v3a.5.5 0 0 0 .5.5h3a.5.5 0 0 0 .5-.5v-3a.5.5 0 0 0-.5-.5h-3z" />
                    <path
                        d="M5.5.5a.5.5 0 0 0-1 0V2A2.5 2.5 0 0 0 2 4.5H.5a.5.5 0 0 0 0 1H2v1H.5a.5.5 0 0 0 0 1H2v1H.5a.5.5 0 0 0 0 1H2v1H.5a.5.5 0 0 0 0 1H2A2.5 2.5 0 0 0 4.5 14v1.5a.5.5 0 0 0 1 0V14h1v1.5a.5.5 0 0 0 1 0V14h1v1.5a.5.5 0 0 0 1 0V14h1v1.5a.5.5 0 0 0 1 0V14a2.5 2.5 0 0 0 2.5-2.5h1.5a.5.5 0 0 0 0-1H14v-1h1.5a.5.5 0 0 0 0-1H14v-1h1.5a.5.5 0 0 0 0-1H14v-1h1.5a.5.5 0 0 0 0-1H14A2.5 2.5 0 0 0 11.5 2V.5a.5.5 0 0 0-1 0V2h-1V.5a.5.5 0 0 0-1 0V2h-1V.5a.5.5 0 0 0-1 0V2h-1V.5zm1 4.5h3A1.5 1.5 0 0 1 11 6.5v3A1.5 1.5 0 0 1 9.5 11h-3A1.5 1.5 0 0 1 5 9.5v-3A1.5 1.5 0 0 1 6.5 5z" />
                </svg>
                <img src="">
                <span style="font-size: 25px;">IoTech</span></a>
            <button class="navbar-toggler" type="button" data-bs-toggle="collapse"
                data-bs-target="#navbarSupportedContent" aria-controls="navbarSupportedContent" aria-expanded="false"
                aria-label="Toggle navigation">
                <span class="navbar-toggler-icon"></span>
            </button>
            <div class="collapse navbar-collapse" id="navbarSupportedContent">
                <ul class="navbar-nav me-auto mb-1 mb-lg-0">
                    <li class="nav-item">
                        <a class="nav-link" aria-current="page" href="/"
                            style="font-size: 20px; margin-left: 1.2em;">Home</a>
                    </li>
                    <li class="nav-item">
                        <a class="nav-link" aria-current="page" href="{{url_for('about')}}"
                            style="font-size: 20px; margin-left: 1.2em;">About</a>
                    </li>
                    <li class="nav-item">
                        <a class="nav-link" aria-current="page" href="{{url_for('register')}}"
                            style="font-size: 20px; margin-left: 1.2em;">Register</a>
                    </li>
                    <li class="nav-item">
                        <a class="nav-link" aria-current="page" href="{{url_for('login')}}"
                            style="font-size: 20px; margin-left: 1.2em;">Login</a>
                    </li>
                    <li class="nav-item">
                        <a class="nav-link active" aria-current="page" href="{{url_for('contact')}}"
                            style="font-size: 20px; margin-left: 1.2em;">Contact</a>
                    </li>
                </ul>
            </div>
        </div>
    </nav>

    <!--Contact Form-->
    <div class="container" style="margin-top: 0;">
        <div class="contact-box">
            <div class="left">
                <img src="static\profile_con.png" height="80%" width="80%" style="margin-top: 10%;">
            </div>
            <div class="right">
                <h2>Contact Us</h2>
                <input type="text" class="field" placeholder="Your Name">
                <input type="text" class="field" placeholder="Your Email">
                <input type="text" class="field" placeholder="Phone">
                <textarea placeholder="Message" class="field"></textarea>
                <button class="btn">Send</button>
            </div>
        </div>
    </div>

    <!--FOOTER-->
    <footer class="footer mt-auto py-3 bg-light">
        <span class="text-muted" style="margin-left: 2%;">Developed and Maintained by @IoTech</span>
        <a href="#"><svg style="margin-left: 65%;" xmlns="http://www.w3.org/2000/svg" width="25" height="25"
                fill="currentColor" class="bi bi-instagram" viewBox="0 0 16 16">
                <path
                    d="M8 0C5.829 0 5.556.01 4.703.048 3.85.088 3.269.222 2.76.42a3.917 3.917 0 0 0-1.417.923A3.927 3.927 0 0 0 .42 2.76C.222 3.268.087 3.85.048 4.7.01 5.555 0 5.827 0 8.001c0 2.172.01 2.444.048 3.297.04.852.174 1.433.372 1.942.205.526.478.972.923 1.417.444.445.89.719 1.416.923.51.198 1.09.333 1.942.372C5.555 15.99 5.827 16 8 16s2.444-.01 3.298-.048c.851-.04 1.434-.174 1.943-.372a3.916 3.916 0 0 0 1.416-.923c.445-.445.718-.891.923-1.417.197-.509.332-1.09.372-1.942C15.99 10.445 16 10.173 16 8s-.01-2.445-.048-3.299c-.04-.851-.175-1.433-.372-1.941a3.926 3.926 0 0 0-.923-1.417A3.911 3.911 0 0 0 13.24.42c-.51-.198-1.092-.333-1.943-.372C10.443.01 10.172 0 7.998 0h.003zm-.717 1.442h.718c2.136 0 2.389.007 3.232.046.78.035 1.204.166 1.486.275.373.145.64.319.92.599.28.28.453.546.598.92.11.281.24.705.275 1.485.039.843.047 1.096.047 3.231s-.008 2.389-.047 3.232c-.035.78-.166 1.203-.275 1.485a2.47 2.47 0 0 1-.599.919c-.28.28-.546.453-.92.598-.28.11-.704.24-1.485.276-.843.038-1.096.047-3.232.047s-2.39-.009-3.233-.047c-.78-.036-1.203-.166-1.485-.276a2.478 2.478 0 0 1-.92-.598 2.48 2.48 0 0 1-.6-.92c-.109-.281-.24-.705-.275-1.485-.038-.843-.046-1.096-.046-3.233 0-2.136.008-2.388.046-3.231.036-.78.166-1.204.276-1.486.145-.373.319-.64.599-.92.28-.28.546-.453.92-.598.282-.11.705-.24 1.485-.276.738-.034 1.024-.044 2.515-.045v.002zm4.988 1.328a.96.96 0 1 0 0 1.92.96.96 0 0 0 0-1.92zm-4.27 1.122a4.109 4.109 0 1 0 0 8.217 4.109 4.109 0 0 0 0-8.217zm0 1.441a2.667 2.667 0 1 1 0 5.334 2.667 2.667 0 0 1 0-5.334z" />
            </svg></a>
        <a href="#"><svg style="margin-left: 1%;" xmlns="http://www.w3.org/2000/svg" width="25" height="25"
                fill="currentColor" class="bi bi-twitter" viewBox="0 0 16 16">
                <path
                    d="M5.026 15c6.038 0 9.341-5.003 9.341-9.334 0-.14 0-.282-.006-.422A6.685 6.685 0 0 0 16 3.542a6.658 6.658 0 0 1-1.889.518 3.301 3.301 0 0 0 1.447-1.817 6.533 6.533 0 0 1-2.087.793A3.286 3.286 0 0 0 7.875 6.03a9.325 9.325 0 0 1-6.767-3.429 3.289 3.289 0 0 0 1.018 4.382A3.323 3.323 0 0 1 .64 6.575v.045a3.288 3.288 0 0 0 2.632 3.218 3.203 3.203 0 0 1-.865.115 3.23 3.23 0 0 1-.614-.057 3.283 3.283 0 0 0 3.067 2.277A6.588 6.588 0 0 1 .78 13.58a6.32 6.32 0 0 1-.78-.045A9.344 9.344 0 0 0 5.026 15z" />
            </svg></a>
        <a href="#"><svg style="margin-left: 1%;" xmlns="http://www.w3.org/2000/svg" width="25" height="25"
                fill="currentColor" class="bi bi-linkedin" viewBox="0 0 16 16">
                <path
                    d="M0 1.146C0 .513.526 0 1.175 0h13.65C15.474 0 16 .513 16 1.146v13.708c0 .633-.526 1.146-1.175 1.146H1.175C.526 16 0 15.487 0 14.854V1.146zm4.943 12.248V6.169H2.542v7.225h2.401zm-1.2-8.212c.837 0 1.358-.554 1.358-1.248-.015-.709-.52-1.248-1.342-1.248-.822 0-1.359.54-1.359 1.248 0 .694.521 1.248 1.327 1.248h.016zm4.908 8.212V9.359c0-.216.016-.432.08-.586.173-.431.568-.878 1.232-.878.869 0 1.216.662 1.216 1.634v3.865h2.401V9.25c0-2.22-1.184-3.252-2.764-3.252-1.274 0-1.845.7-2.165 1.193v.025h-.016a5.54 5.54 0 0 1 .016-.025V6.169h-2.4c.03.678 0 7.225 0 7.225h2.4z" />
            </svg></a>
    </footer>

    <!-- Optional JavaScript; choose one of the two! -->

    <!-- Option 1: Bootstrap Bundle with Popper -->
    <script src="https://cdn.jsdelivr.net/npm/bootstrap@5.0.2/dist/js/bootstrap.bundle.min.js"
        integrity="sha384-MrcW6ZMFYlzcLA8Nl+NtUVF0sA7MsXsP1UyJoMp4YLEuNSfAP+JcXn/tWtIaxVXM"
        crossorigin="anonymous"></script>

    <!-- Option 2: Separate Popper and Bootstrap JS -->
    <!--
    <script src="https://cdn.jsdelivr.net/npm/@popperjs/core@2.9.2/dist/umd/popper.min.js" integrity="sha384-IQsoLXl5PILFhosVNubq5LC7Qb9DXgDA9i+tQ8Zj3iwWAwPtgFTxbJ8NT4GN1R8p" crossorigin="anonymous"></script>
    <script src="https://cdn.jsdelivr.net/npm/bootstrap@5.0.2/dist/js/bootstrap.min.js" integrity="sha384-cVKIPhGWiC2Al4u+LWgxfKTRIcfu0JTxR+EQDz/bgldoEyl4H0zUF0QKbrJ0EcQF" crossorigin="anonymous"></script>
    -->
</body>

</html>
Step 33: Control Page

The Control Page is basically the main Page through which we access and Control the functioning of the Robot.
Its consists of four areas :
- Live Camera Feed
- IR Sensor Status
- Camera Angle Adjust
- Controller Unit
The Instructions are send via the Flask web server towards the Back-End using AJAX which are to be executed or which get triggered on pressing certain buttons provided.
Similarly, data from sensors is fetched and published on the Control Page using Realtime functionality provided by AJAX, without refreshing the Website.
HTML Code for Control Page :
<html>

<head>
  <!-- Required meta tags -->
  <meta charset="utf-8">
  <meta name="viewport" content="width=device-width, initial-scale=1">

  <!-- Bootstrap CSS -->
  <link href="https://cdn.jsdelivr.net/npm/bootstrap@5.0.2/dist/css/bootstrap.min.css" rel="stylesheet"
    integrity="sha384-EVSTQN3/azprG1Anm3QDgpJLIm9Nao0Yz1ztcQTwFspd3yD65VohhpuuCOmLASjC" crossorigin="anonymous">

  <link rel="stylesheet" href="static\control.css">
  <title>Testing</title>
</head>

<body>
  <!--NAVBAR-->
  <nav class="navbar navbar-expand-lg sticky-top navbar-dark bg-dark">
    <div class="container-fluid">
      <a class="navbar-brand" href="#">
        <svg xmlns="http://www.w3.org/2000/svg" width="35" height="35" fill="currentColor" class="bi bi-cpu-fill"
          viewBox="0 0 16 16">
          <path d="M6.5 6a.5.5 0 0 0-.5.5v3a.5.5 0 0 0 .5.5h3a.5.5 0 0 0 .5-.5v-3a.5.5 0 0 0-.5-.5h-3z" />
          <path
            d="M5.5.5a.5.5 0 0 0-1 0V2A2.5 2.5 0 0 0 2 4.5H.5a.5.5 0 0 0 0 1H2v1H.5a.5.5 0 0 0 0 1H2v1H.5a.5.5 0 0 0 0 1H2v1H.5a.5.5 0 0 0 0 1H2A2.5 2.5 0 0 0 4.5 14v1.5a.5.5 0 0 0 1 0V14h1v1.5a.5.5 0 0 0 1 0V14h1v1.5a.5.5 0 0 0 1 0V14h1v1.5a.5.5 0 0 0 1 0V14a2.5 2.5 0 0 0 2.5-2.5h1.5a.5.5 0 0 0 0-1H14v-1h1.5a.5.5 0 0 0 0-1H14v-1h1.5a.5.5 0 0 0 0-1H14v-1h1.5a.5.5 0 0 0 0-1H14A2.5 2.5 0 0 0 11.5 2V.5a.5.5 0 0 0-1 0V2h-1V.5a.5.5 0 0 0-1 0V2h-1V.5a.5.5 0 0 0-1 0V2h-1V.5zm1 4.5h3A1.5 1.5 0 0 1 11 6.5v3A1.5 1.5 0 0 1 9.5 11h-3A1.5 1.5 0 0 1 5 9.5v-3A1.5 1.5 0 0 1 6.5 5z" />
        </svg>
        <img src="">
        <span style="font-size: 25px;">IoTech</span></a>
      <button class="navbar-toggler" type="button" data-bs-toggle="collapse" data-bs-target="#navbarSupportedContent"
        aria-controls="navbarSupportedContent" aria-expanded="false" aria-label="Toggle navigation">
        <span class="navbar-toggler-icon"></span>
      </button>
      <div class="collapse navbar-collapse" id="navbarSupportedContent">
        <ul class="navbar-nav me-auto mb-1 mb-lg-0">
          <li class="nav-item">
            <a class="nav-link" aria-current="page" href="/" style="font-size: 20px; margin-left: 1.2em;">Home</a>
          </li>
          <li class="nav-item">
            <a class="nav-link" aria-current="page" href="{{url_for('about')}}"
              style="font-size: 20px; margin-left: 1.2em;">About</a>
          </li>
          <li class="nav-item">
            <a class="nav-link" aria-current="page" href="{{url_for('register')}}"
              style="font-size: 20px; margin-left: 1.2em;">Register</a>
          </li>
          <li class="nav-item">
            <a class="nav-link" aria-current="page" href="{{url_for('login')}}"
              style="font-size: 20px; margin-left: 1.2em;">Login</a>
          </li>
          <li class="nav-item">
            <a class="nav-link" aria-current="page" href="{{url_for('contact')}}"
              style="font-size: 20px; margin-left: 1.2em;">Contact</a>
          </li>
          <li class="nav-item">
            <a class="nav-link active" aria-current="page" href="{{url_for('logout')}}"
              style="font-size: 20px; margin-left: 1.2em;">Logout</a>
          </li>
          <li class="nav-item" style="margin-left: 75%;">
            <img src="static\test.jpg" height="45px" width="45px" style="border-radius: 50%;">
          </li>
          <li class="nav-item" style="margin-left: 2%;">
            <h1 style="color: white; font-size: 25px; margin-top: 5px">{{ current_user.username }}</h1>
          </li>
        </ul>
      </div>
    </div>
  </nav>

  <br>
  <br>

  <!--CONTROL PAD AND SENSOR DATA DISPLAY-->
  <div class="container">
    <div class="row">
      <div class="col">
        <div class="camera">
          <h2 style="color: white; text-align: center">Live RasPi Camera Feed</h2>
          <img src="{{ url_for('video_feed') }}" height="450px" width="700px">
        </div>
      </div>
      <div class="col">
        <div class="sensor">
          <h2 style="text-align: center;">IR-Sensor Status</h2>
          <span>IR Left Sensor :</span>
          <h4>
            <div id='test1'></div>
          </h4>
          <span>IR Center Sensor :</span>
          <h4>
            <div id='test2'></div>
          </h4>
          <span>IR Right Sensor :</span>
          <h4>
            <div id='test3'></div>
          </h4>
        </div>
        <div class="control">
          <h2 style="text-align: center;">Controller</h2>
          <form>
            <div class="container">
              <div class="row">
                <div class="col">
                  <a href="left" id="left"><button style="margin-top: 86.5%;">LEFT</button></a>
                </div>
                <div class="col">
                  <a href="forward" id="forward"><button>FORWARD</button></a>
                  <br>
                  <a href="backward" id="backward"><button>BACKWARD</button></a>
                </div>
                <div class="col">
                  <a href="right" id="right"><button style="margin-top: 86.5%;">RIGHT</button></a>
                </div>
              </div>
            </div>
          </form>
        </div>
      </div>
    </div>
  </div>

  <!--SERVO CONTROLLER-->
  <div id="slidecontainer">
    <h3 style="color: white;">Camera Angle</h3>
    <input type="range" min="1" max="12.5" value="1" id="range1">
    <p style="color: white;">Value : <span id="range1_value"></span></p>
  </div>
  <script src="//ajax.googleapis.com/ajax/libs/jquery/1.9.1/jquery.min.js"></script>

  <!--AJAX SCRIPT-->
  <script>
    document.addEventListener("DOMContentLoaded", function (event) {

      const getSensorReading = function () {
        fetch(`http://0.0.0.0:8000/update`)  // send request to route /update
          .then((resp) => resp.json())
          .then(function (response) {
            document.getElementById('test1').innerHTML = response.data1;
            document.getElementById('test2').innerHTML = response.data2;
            document.getElementById('test3').innerHTML = response.data3;
          });
      }

      getSensorReading();
      setInterval(getSensorReading, 100);  //request for update every 1 second
    });
    $(function () {
      $('a#forward').on('mousedown', function (e) {
        e.preventDefault()
        $.getJSON('/forward',
          function (data) {
            //do nothing
          });
        return false;
      });
    });

    $(function () {
      $('a#forward').on('mouseup', function (e) {
        e.preventDefault()
        $.getJSON('/stop',
          function (data) {
            //do nothing
          });
        return false;
      });
    });

    $(function () {
      $('a#backward').on('mousedown', function (e) {
        e.preventDefault()
        $.getJSON('/backward',
          function (data) {
            //do nothing
          });
        return false;
      });
    });

    $(function () {
      $('a#backward').on('mouseup', function (e) {
        e.preventDefault()
        $.getJSON('/stop',
          function (data) {
            //do nothing
          });
        return false;
      });
    });

    $(function () {
      $('a#left').on('mousedown', function (e) {
        e.preventDefault()
        $.getJSON('/left',
          function (data) {
            //do nothing
          });
        return false;
      });
    });

    $(function () {
      $('a#left').on('mouseup', function (e) {
        e.preventDefault()
        $.getJSON('/stop',
          function (data) {
            //do nothing
          });
        return false;
      });
    });

    $(function () {
      $('a#right').on('mousedown', function (e) {
        e.preventDefault()
        $.getJSON('/right',
          function (data) {
            //do nothing
          });
        return false;
      });
    });

    $(function () {
      $('a#right').on('mouseup', function (e) {
        e.preventDefault()
        $.getJSON('/stop',
          function (data) {
            //do nothing
          });
        return false;
      });
    });
    var slider = document.getElementById("range1");
    var output = document.getElementById("range1_value");
    slider.oninput = function () {
      output.innerHTML = slider.value;
      var xhttp = new XMLHttpRequest();
      xhttp.onreadystatechange = function () {
        if (this.readyState == 4 && this.status == 200) {
        }
      };
      xhttp.open("GET", "http://0.0.0.0:8000/set_speed?speed=" + slider.value, true);
      xhttp.send();
    }
  </script>

  <!--FOOTER-->
  <footer class="footer mt-auto py-3 bg-light">
    <span class="text-muted" style="font-size: large; margin-left: 2%">Developed and Maintained by @IoTech</span>
    <a href="#"><svg style="margin-left: 65%;" xmlns="http://www.w3.org/2000/svg" width="25" height="25" fill="currentColor" class="bi bi-instagram"
        viewBox="0 0 16 16">
        <path
            d="M8 0C5.829 0 5.556.01 4.703.048 3.85.088 3.269.222 2.76.42a3.917 3.917 0 0 0-1.417.923A3.927 3.927 0 0 0 .42 2.76C.222 3.268.087 3.85.048 4.7.01 5.555 0 5.827 0 8.001c0 2.172.01 2.444.048 3.297.04.852.174 1.433.372 1.942.205.526.478.972.923 1.417.444.445.89.719 1.416.923.51.198 1.09.333 1.942.372C5.555 15.99 5.827 16 8 16s2.444-.01 3.298-.048c.851-.04 1.434-.174 1.943-.372a3.916 3.916 0 0 0 1.416-.923c.445-.445.718-.891.923-1.417.197-.509.332-1.09.372-1.942C15.99 10.445 16 10.173 16 8s-.01-2.445-.048-3.299c-.04-.851-.175-1.433-.372-1.941a3.926 3.926 0 0 0-.923-1.417A3.911 3.911 0 0 0 13.24.42c-.51-.198-1.092-.333-1.943-.372C10.443.01 10.172 0 7.998 0h.003zm-.717 1.442h.718c2.136 0 2.389.007 3.232.046.78.035 1.204.166 1.486.275.373.145.64.319.92.599.28.28.453.546.598.92.11.281.24.705.275 1.485.039.843.047 1.096.047 3.231s-.008 2.389-.047 3.232c-.035.78-.166 1.203-.275 1.485a2.47 2.47 0 0 1-.599.919c-.28.28-.546.453-.92.598-.28.11-.704.24-1.485.276-.843.038-1.096.047-3.232.047s-2.39-.009-3.233-.047c-.78-.036-1.203-.166-1.485-.276a2.478 2.478 0 0 1-.92-.598 2.48 2.48 0 0 1-.6-.92c-.109-.281-.24-.705-.275-1.485-.038-.843-.046-1.096-.046-3.233 0-2.136.008-2.388.046-3.231.036-.78.166-1.204.276-1.486.145-.373.319-.64.599-.92.28-.28.546-.453.92-.598.282-.11.705-.24 1.485-.276.738-.034 1.024-.044 2.515-.045v.002zm4.988 1.328a.96.96 0 1 0 0 1.92.96.96 0 0 0 0-1.92zm-4.27 1.122a4.109 4.109 0 1 0 0 8.217 4.109 4.109 0 0 0 0-8.217zm0 1.441a2.667 2.667 0 1 1 0 5.334 2.667 2.667 0 0 1 0-5.334z" />
    </svg></a>
    <a href="#"><svg style="margin-left: 1%;" xmlns="http://www.w3.org/2000/svg" width="25" height="25" fill="currentColor" class="bi bi-twitter"
        viewBox="0 0 16 16">
        <path
            d="M5.026 15c6.038 0 9.341-5.003 9.341-9.334 0-.14 0-.282-.006-.422A6.685 6.685 0 0 0 16 3.542a6.658 6.658 0 0 1-1.889.518 3.301 3.301 0 0 0 1.447-1.817 6.533 6.533 0 0 1-2.087.793A3.286 3.286 0 0 0 7.875 6.03a9.325 9.325 0 0 1-6.767-3.429 3.289 3.289 0 0 0 1.018 4.382A3.323 3.323 0 0 1 .64 6.575v.045a3.288 3.288 0 0 0 2.632 3.218 3.203 3.203 0 0 1-.865.115 3.23 3.23 0 0 1-.614-.057 3.283 3.283 0 0 0 3.067 2.277A6.588 6.588 0 0 1 .78 13.58a6.32 6.32 0 0 1-.78-.045A9.344 9.344 0 0 0 5.026 15z" />
    </svg></a>
    <a href="#"><svg style="margin-left: 1%;" xmlns="http://www.w3.org/2000/svg" width="25" height="25" fill="currentColor" class="bi bi-linkedin"
        viewBox="0 0 16 16">
        <path
            d="M0 1.146C0 .513.526 0 1.175 0h13.65C15.474 0 16 .513 16 1.146v13.708c0 .633-.526 1.146-1.175 1.146H1.175C.526 16 0 15.487 0 14.854V1.146zm4.943 12.248V6.169H2.542v7.225h2.401zm-1.2-8.212c.837 0 1.358-.554 1.358-1.248-.015-.709-.52-1.248-1.342-1.248-.822 0-1.359.54-1.359 1.248 0 .694.521 1.248 1.327 1.248h.016zm4.908 8.212V9.359c0-.216.016-.432.08-.586.173-.431.568-.878 1.232-.878.869 0 1.216.662 1.216 1.634v3.865h2.401V9.25c0-2.22-1.184-3.252-2.764-3.252-1.274 0-1.845.7-2.165 1.193v.025h-.016a5.54 5.54 0 0 1 .016-.025V6.169h-2.4c.03.678 0 7.225 0 7.225h2.4z" />
    </svg></a>
</footer>
</body>

</html>
CSS Code for the Control Page :
.sensor {
    border: solid black 1px;
    border-radius: 20px;
    margin-left: 20%;
    margin-top: 0.5%;
    margin-right: 2%;
    padding-left: 2%;
    padding-top: 2%;
    padding-bottom: 2%;
    background-color: rgb(198, 198, 198);
    box-shadow: 5px 5px 25px 10px rgb(130, 130, 130);
}

span {
    font-size: x-large;
}

.control {
    border: solid black 2px;
    margin-left: 20%;
    border-radius: 20px;
    margin-top: 10%;
    margin-right: 2%;
    padding: 2%;
    background-color: rgb(198, 198, 198);
    box-shadow: 5px 5px 25px 10px rgb(130, 130, 130);
}

button {
    border-radius: 10px;
    text-align: center;
    width: 100%;
    padding: 10%;
    margin-top: 20%;
}


button:active {
    background-color: #1C8051;
}

img {
    border-radius: 3.5%;
}

#slidecontainer {
    margin-left: 26%;
    padding-top: 0px;
    margin-top: 0%;
}

body {
    background-color: rgb(32, 32, 32);
}
Step 34: Robot Control
The main Robot controlling and the User Authentication functionality is implemented using the app.py file. The app.py file is written is Python and the Tech used is Flask and SQL for database management.
The Raspberry Pi code for Robot Controlling is coded within this file itself.The Raspberry Pi code consists of the Locomotion Code, Sensor Interfacing Code and the Servo Control Code.
The app.py file also contains the code for live camera feed. The additional files for the same is provided in the same folder itself.
All the updates and redirections for the User is maintained in this file.This file acts as the most important file in controlling the overall functioning of the Robot.
app.py file code is as below :
from flask import Flask, render_template, url_for, redirect
from flask_sqlalchemy import SQLAlchemy
from flask_login import UserMixin, login_user, LoginManager, login_required, logout_user
from flask_wtf import FlaskForm
from wtforms import StringField, PasswordField, SubmitField
from wtforms.validators import InputRequired, Length, ValidationError
from flask_bcrypt import Bcrypt

import flask
from flask import Flask, render_template, jsonify, request
import RPi.GPIO as GPIO
from time import sleep

from flask import Flask, render_template, Response
import os

if os.environ.get('CAMERA'):
    Camera = import_module('camera_' + os.environ['CAMERA']).Camera
else:
    from camera import Camera

mA1=18
mA2=23
mB1=24
mB2=25

ir_left = 2
ir_center = 3
ir_right = 4
buzz = 17
obs_led = 16
pow_led = 21

GPIO.setwarnings(False)
GPIO.setmode(GPIO.BCM)
GPIO.setup(mA1, GPIO.OUT)
GPIO.setup(mA2, GPIO.OUT)
GPIO.setup(mB1, GPIO.OUT)
GPIO.setup(mB2, GPIO.OUT)
GPIO.output(mA1 , 0)
GPIO.output(mA2 , 0)
GPIO.output(mB1, 0)
GPIO.output(mB2, 0)

GPIO.setup(ir_left, GPIO.IN)
GPIO.setup(ir_center, GPIO.IN)
GPIO.setup(ir_right, GPIO.IN)
GPIO.setup(buzz, GPIO.OUT)
GPIO.output(buzz,0)
GPIO.setup(obs_led, GPIO.OUT)
GPIO.output(obs_led,0)
GPIO.setup(pow_led, GPIO.OUT)
GPIO.output(pow_led,1)

servo = 26

GPIO.setup(servo, GPIO.OUT)

p = GPIO.PWM(servo, 50)

p.start(0)

app = Flask(__name__)
db = SQLAlchemy(app)
bcrypt = Bcrypt(app)
app.config['SQLALCHEMY_DATABASE_URI'] = 'sqlite:///database.db'
app.config['SECRET_KEY'] = 'thisisasecretkey'

login_manager = LoginManager()
login_manager.init_app(app)
login_manager.login_view = "login"

@login_manager.user_loader
def load_user(user_id):
    return User.query.get(int(user_id))

class User(db.Model, UserMixin):
    id = db.Column(db.Integer, primary_key=True)
    username = db.Column(db.String(20), nullable=False, unique=True)
    password = db.Column(db.String(80), nullable=False)

class RegisterForm(FlaskForm):
    username = StringField(validators = [InputRequired(), Length(
        min=4, max=20)], render_kw={"placeholder" : "Username"})

    password = PasswordField(validators = [InputRequired(), Length(
        min=4, max=20)], render_kw={"placeholder" : "Password"})

    submit = SubmitField("Register")

    def validate_username(self, username):
        existing_user_username = User.query.filter_by(
            username = username.data).first()

        if existing_user_username:
            raise ValidationError(
                "That Username already exists. Please choose a Different one")

class LoginForm(FlaskForm):
    username = StringField(validators = [InputRequired(), Length(
        min=4, max=20)], render_kw={"placeholder" : "Username"})

    password = PasswordField(validators = [InputRequired(), Length(
        min=4, max=20)], render_kw={"placeholder" : "Password"})

    submit = SubmitField("Login")

@app.route('/')
def home():
    return render_template('home.html')

@app.route('/login', methods=['GET', 'POST'])
def login():
    form = LoginForm()

    if form.validate_on_submit():
        user = User.query.filter_by(username=form.username.data).first()
        if user:
            if bcrypt.check_password_hash(user.password, form.password.data):
                login_user(user)
                return redirect(url_for('control'))

    return render_template('login.html', form=form)

@app.route('/control', methods=['GET', 'POST'])
@login_required
def control():
    return render_template('Motor_test.html')

@app.route('/logout', methods=['GET', 'POST'])
@login_required
def logout():
    logout_user()
    return redirect(url_for('login'))

@app.route('/register', methods=['GET', 'POST'])
def register():
    form = RegisterForm()

    if form.validate_on_submit():
        hashed_password = bcrypt.generate_password_hash(form.password.data)
        new_user = User(username=form.username.data, password = hashed_password)
        db.session.add(new_user)
        db.session.commit()
        return redirect(url_for('login'))

    return render_template('register.html', form=form)

@app.route('/about')
def about():
    return render_template('about.html')

@app.route('/contact')
def contact():
    return render_template('contact.html')

@app.route('/forward')
def forward():
    GPIO.output(mA1 , 1)
    GPIO.output(mA2 , 0)
    GPIO.output(mB1, 0)
    GPIO.output(mB2, 1)
    return ("nothing")

@app.route('/backward')
def backward():
    GPIO.output(mA1 , 0)
    GPIO.output(mA2 , 1)
    GPIO.output(mB1, 1)
    GPIO.output(mB2, 0)
    return ("nothing")

@app.route('/right')
def right():
    GPIO.output(mA1 , 0)
    GPIO.output(mA2 , 1)
    GPIO.output(mB1, 0)
    GPIO.output(mB2, 0)
    return ("nothing")

@app.route('/left')
def left():
    GPIO.output(mA1 , 0)
    GPIO.output(mA2 , 0)
    GPIO.output(mB1, 1)
    GPIO.output(mB2, 0)
    return ("nothing")

@app.route('/stop')
def stop():
    GPIO.output(mA1 , 0)
    GPIO.output(mA2 , 0)
    GPIO.output(mB1, 0)
    GPIO.output(mB2, 0)
    return ("nothing")

@app.route('/set_speed')
def set_speed():
    speed = request.args.get("speed")
    p.ChangeDutyCycle(int(speed))
    return render_template('Motor_test.html')

@app.route('/update')
def update():
    data_1 = GPIO.input(ir_left)
    data_2 = GPIO.input(ir_center)
    data_3 = GPIO.input(ir_right)
    global irl,irc,irr
    irl = "No Obstacle Detected"
    irc = "No Obstacle Detected"
    irr = "No Obstacle Detected"
    if data_1 == 0:
        irl = "Obstacle Detected"
        GPIO.output(buzz, 1)
        GPIO.output(obs_led, 1)
    elif data_2 == 0:
        irc = "Obstacle Detected"
        GPIO.output(buzz, 1)
        GPIO.output(obs_led, 1)
    elif data_3 == 0:
        irr = "Obstacle Detected"
        GPIO.output(buzz, 1)
        GPIO.output(obs_led, 1)
    elif data_1 == 1:
        irl = "No Obstacle Detected"
        GPIO.output(buzz, 0)
        GPIO.output(obs_led, 0)
    elif data_2 == 1:
        irc = "No Obstacle Detected"
        GPIO.output(buzz, 0)
        GPIO.output(obs_led, 0)
    elif data_3 == 1:
        irr = "No Obstacle Detected"
        GPIO.output(buzz, 0)
        GPIO.output(obs_led, 0)
    templateData = {'data1' : irl, 'data2' : irc, 'data3' : irr}
    return jsonify(templateData), 200

def gen(camera):
    while True:
        frame = camera.get_frame()
        yield (b'--frame\r\n'
               b'Content-Type: image/jpeg\r\n\r\n' + frame + b'\r\n')

@app.route('/video_feed')
def video_feed():
    return Response(gen(Camera()),
                    mimetype='multipart/x-mixed-replace; boundary=frame')

if __name__ == '__main__':
    app.run(host='0.0.0.0')<br>
Step 35: Camera Coding
For Camera Interfacing and displaying its live feed on our server we separately define the Camera Code into another files.We just import those files in our app.py file and declare a function in order to initiate the camera feed.
For Camera Coding we separately define the following files :
- base_camera.py
- camera.py
Note : While executing the Final app.py file all the two files i.e. base_camera.py, camera.py should all be in a single folder along with the app.py file.
base_camera.py code :
import time
import threading
try:
    from greenlet import getcurrent as get_ident
except ImportError:
    try:
        from thread import get_ident
    except ImportError:
        from _thread import get_ident


class CameraEvent(object):
    """An Event-like class that signals all active clients when a new frame is
    available.
    """
    def __init__(self):
        self.events = {}

    def wait(self):
        """Invoked from each client's thread to wait for the next frame."""
        ident = get_ident()
        if ident not in self.events:
            # this is a new client
            # add an entry for it in the self.events dict
            # each entry has two elements, a threading.Event() and a timestamp
            self.events[ident] = [threading.Event(), time.time()]
        return self.events[ident][0].wait()

    def set(self):
        """Invoked by the camera thread when a new frame is available."""
        now = time.time()
        remove = None
        for ident, event in self.events.items():
            if not event[0].isSet():
                # if this client's event is not set, then set it
                # also update the last set timestamp to now
                event[0].set()
                event[1] = now
            else:
                # if the client's event is already set, it means the client
                # did not process a previous frame
                # if the event stays set for more than 5 seconds, then assume
                # the client is gone and remove it
                if now - event[1] > 5:
                    remove = ident
        if remove:
            del self.events[remove]

    def clear(self):
        """Invoked from each client's thread after a frame was processed."""
        self.events[get_ident()][0].clear()


class BaseCamera(object):
    thread = None  # background thread that reads frames from camera
    frame = None  # current frame is stored here by background thread
    last_access = 0  # time of last client access to the camera
    event = CameraEvent()

    def __init__(self):
        """Start the background camera thread if it isn't running yet."""
        if BaseCamera.thread is None:
            BaseCamera.last_access = time.time()

            # start background frame thread
            BaseCamera.thread = threading.Thread(target=self._thread)
            BaseCamera.thread.start()

            # wait until first frame is available
            BaseCamera.event.wait()

    def get_frame(self):
        """Return the current camera frame."""
        BaseCamera.last_access = time.time()

        # wait for a signal from the camera thread
        BaseCamera.event.wait()
        BaseCamera.event.clear()

        return BaseCamera.frame

    @staticmethod
    def frames():
        """"Generator that returns frames from the camera."""
        raise RuntimeError('Must be implemented by subclasses.')

    @classmethod
    def _thread(cls):
        """Camera background thread."""
        print('Starting camera thread.')
        frames_iterator = cls.frames()
        for frame in frames_iterator:
            BaseCamera.frame = frame
            BaseCamera.event.set()  # send signal to clients
            time.sleep(0)

            # if there hasn't been any clients asking for frames in
            # the last 10 seconds then stop the thread
            if time.time() - BaseCamera.last_access > 10:
                frames_iterator.close()
                print('Stopping camera thread due to inactivity.')
                break
        BaseCamera.thread = None

<br>
camera.py code :
import io
import time
import picamera
from base_camera import BaseCamera


class Camera(BaseCamera):
    @staticmethod
    def frames():
        with picamera.PiCamera() as camera:
            # let camera warm up
            time.sleep(0.001)
            camera.rotation = 180

            stream = io.BytesIO()
            for _ in camera.capture_continuous(stream, 'jpeg',
                                                 use_video_port=True):
                # return current frame
                stream.seek(0)
                yield stream.read()

                # reset stream for next frame
                stream.seek(0)
                stream.truncate()<br>
Step 36: Files Management Into Our Raspberry Pi OS
As we have completed with all our necessary files and code we now move on to how to actually run and execute these files at one go according to our desire.
For this it is very important to save all our files into the right directories as mentioned in our code onto our Raspberry Pi OS.
Below is a detailed explanation of how all the files are stored onto our local machine:
Step 37: Creating the Project Folder

- Create a Main Project folder into which your whole of the project files will be residing.
- Name this Folder as "Smart Robot".
- This folder contains all the files required.
Step 38: Creating Our Main App.py File

- After creating the main we create in that our main app.py file.
- Along this file other supporting folders named static and templates is also created here itself.
- Both the Camera Coding files also resides in this folder.
Step 39: Templates Folder

- The templates folder consists of all our HTML Pages Code.
- This consists of all the Webpage logic.
- The control.html file is the required one which is responsible for controlling our Bot and capable of handling requests from our flask web server.
Step 40: Static Folder

- This folder holds all of the media files required for our Website such images and videos.
- This also holds our CSS files required for styling our HTML Webpages.
Step 41: Executing the Code
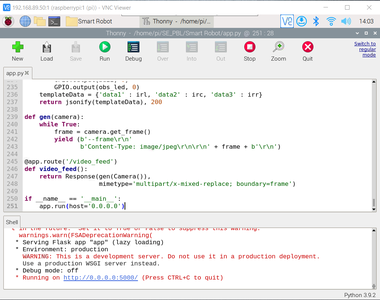


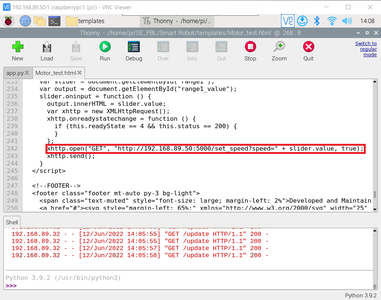
This Step could be further divided into two steps :
1. Running the app.py file
2. Locally hosting the Website on the right URL and the PORT which would also be visible through any other Laptop or PC connected to the same Internet.
Running the app.py file :
- Open the 'app.py' file in the Thonny Editor available on the RasPi OS.
- Scroll to the bottom of the code and set the host to '0.0.0.0'
- Click on the Run Button available at the top toolbar.
- On a successful run the interpreter should give some message like this : 'Running on '
- As a result your code has been executed perfectly.
Loading the Website :
- As soon as the 'app.py' file is executed the flask webser is hosted on the below mentioned URL and the PORT No.
- Now in order to access the Website through any other device we just need to type in the URL as follows into the web browser on which you would like to view your Website
- URL - 'http://:'
- In my case it was - 'http://192.168.89.50:5000'
- So using this URL you could access your Website through any PC connected to the same network.
NOTE :
While running the Website on your side some changes need to be done in the control.html file. As the IP address and localhost of all PC's are different you need to put that IP address into the code while you access some data from the backend server.
In our code there are two such instances where we fetch data from the backend server at regular intervals :
- IR Sensor Data
- Servo Position
The Third Image is the Code which needs to be altered while executing in order to fetch the IR Sensor Data from the correct URL.The Red highlighted box tells us where the changes are to be done. The URL given should be replaced with your own URL.
Similarly, the fourth image shows the code for Servo position which also needs to be replaced by your own unique URL.
Step 42: Video Demonstration
So now with this Demonstration videos we conclude our Project!!!!!
Hope everyone would enjoy doing this.........
Thank You :)
Links for Buying Components
- Raspberry Pi - https://robu.in/product/raspberry-pi-3-model-b-bc...
- L293D Motor Driver - https://robu.in/product/l293d-motor-driver-module...
- Raspberry Pi Camera Module - https://robu.in/product/raspberry-pi-camera-modul...
- IR Sensor Module - https://robu.in/product/ir-infrared-obstacle-avoi...
- Servo Motor - https://robu.in/product/sg-90-9g-mini-micro-servo...
- DC Hobby Motor - https://robu.in/product/300-rpm-bo-motor-straight...
- Buzzer - https://robu.in/product/5v-active-electromagnetic...
- Breadboard - https://robu.in/product/400-tie-points-contacts-m...
- Caster Wheel - https://robu.in/product/ball-castors/
- Robot Fiber Wheels - https://robu.in/product/bo-wheel-7x1/?gclid=CjwKC...
- LED's - https://robu.in/product/8mm-dip-led-red-10-pcs/
- 9V Battery - https://robu.in/product/9v-original-hw-high-quali...
Download Links for Softwares
- Fusion 360 - https://www.autodesk.in/products/fusion-360/free-t...
- EAGLE PCB - https://www.autodesk.in/products/eagle/free-downl...
- Raspberry Pi OS - https://www.raspberrypi.com/software/
- Flask - https://flask.palletsprojects.com/
- AJAX - https://api.jquery.com/category/ajax/

Judges Prize in the
Electronics Contest


![Tim's Mechanical Spider Leg [LU9685-20CU]](https://content.instructables.com/FFB/5R4I/LVKZ6G6R/FFB5R4ILVKZ6G6R.png?auto=webp&crop=1.2%3A1&frame=1&width=306)


