

Introduction: Nail in Box Puzzle


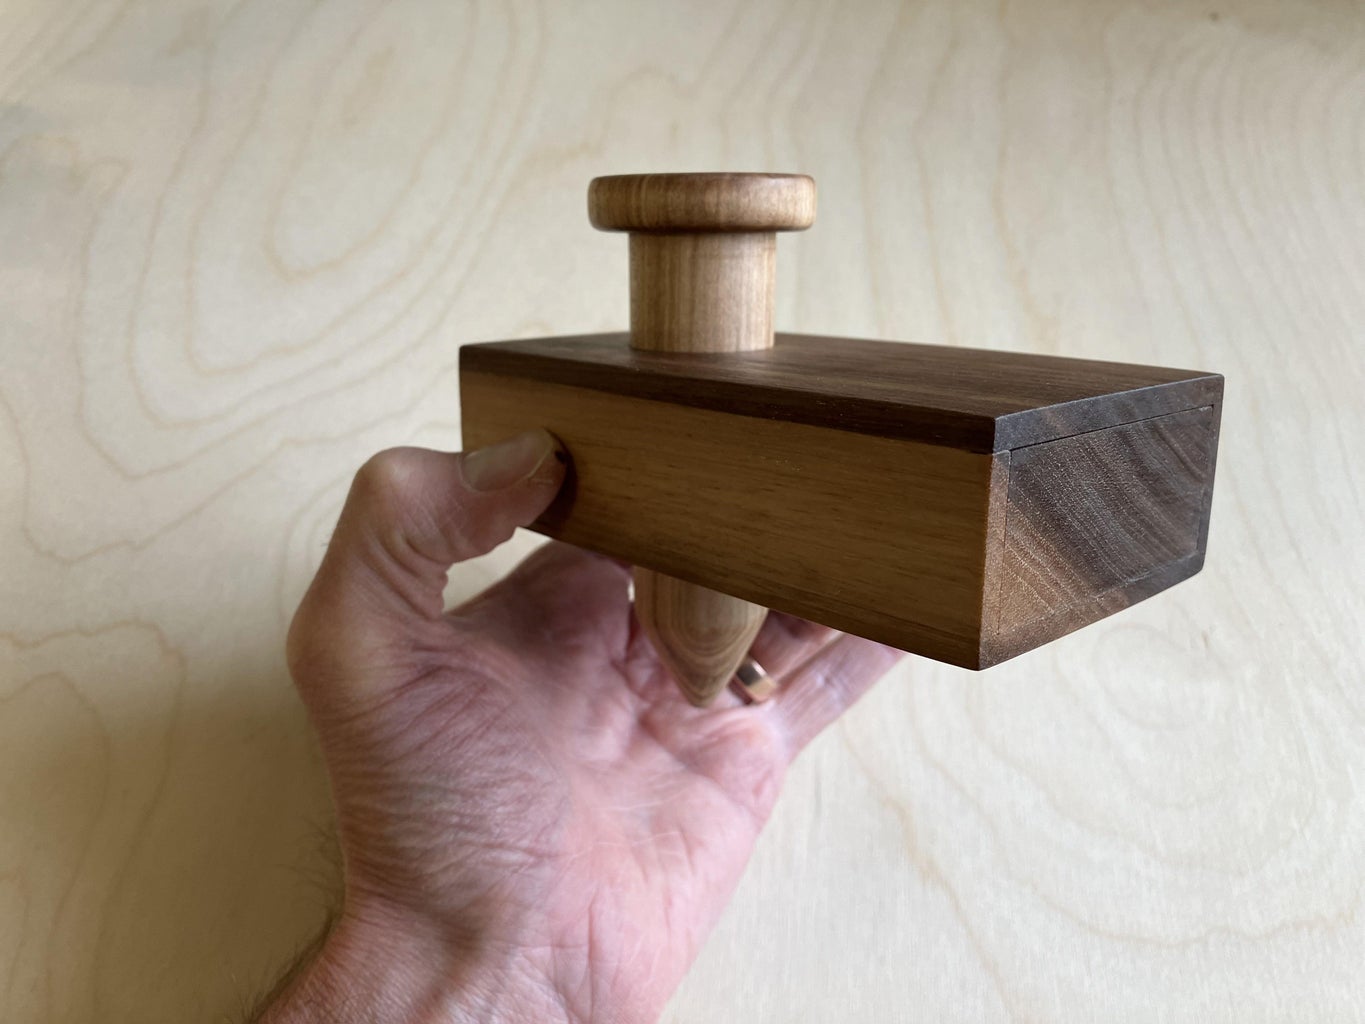


This is a puzzle box I designed that requires removing the nail in order to slide the drawer open.
Supplies


Materials
Block of wood 1 5/8 x 3 x 5 inches (Walnut)
1 3/4 inch dowel, 6 inches long (Maple)
1/8 inch diameter brass rod.
Tools
Table Saw
Drill Press
Lathe
Step 1: Box and Drawer


Plan
The objective of this step is to create a box, and a drawer. This method is an attempt to grain match both the box and the drawer to create the illusion that it is one piece of wood. This is why the starting block is 1 5/8 x 3 x 5 inches.
The same results can be achieved with thinner pieces of wood (3/16 to 1/4 inch thick for the box and 1 inch thick for the drawer) if you are not trying to grain match.
Cut
First rip the top and bottom 3/16 inches off the the block of wood. Then, rip 3/16 inches off both sides of the remaining piece of wood. As you cut, mark corresponding sides to keep track of how the pieces go back together.
Glue
To ensure a snug fit, glue up the box with the drawer inside it. Once it is clamped together you can push out, or tap out the drawer. Use a chisel to clean out any glue that may be inside the box.
Step 2: Initial Clean Up


The tops of the box will be oversized because of the material lost to the kerf of the blade. Use a flush trim router to clean up these edges. You could also hand plane or sand to match.
With the drawer inserted in the box I removed 1/8 of an inch off each end to flush them up.
I had to apply paste wax to the inside of the box for the drawer to slide in and out smoothly. You may also have to sand the drawer to get a good fit.
Step 3: Cut Out the Drawer


I used the CNC to cut out the drawer. You could also use a larger forstner bit to create a round cavity. You also could hog out material with a forstner bit then use a chisel to clean up the perimeter.
The first version of this puzzle I made I did not use a CNC, and instead constructed the drawer more 'traditionally.'
Step 4: Hole Through the Box and Drawer


Mark the center of the hole on the box.
With the drawer inserted in the box, clamp down at the drill press with a 1 1/8 inch forstner bit chucked up.
Drill all the way through the box and the drawer.
Step 5: The Nail Part 1


With the dowel chucked up in the lathe, begin roughing out the head of the nail and the shank. As you sneak up on the final width of the shank (1 1/8 in) check regularly for a snug fit in the drawer and box.
Once the nail fits, un-chuck from the lathe for the next step.
Step 6: Prepare Holes for the Pins


The holes for the pins will be drilled with a 9/64 inch drill bit. This will create the locking mechanism with the 1/8 inch brass rods.
Position the nail in the drawer.
Mark the location for the holes. One side is drilled 5/16 inches from the bottom, and the other side will be drill 5/16 inches from the top. Each hole is 1 3/8 inches from the end.
Set the depth stop to drill 1 11/16 inches down. This is 1/4 inch above the bottom of the nail.
After drilling the first hole you will need to revolve the nail 90 degrees without changing its depth. I put a clamp on the nail with the jaws against the drawer, and the rotated.
Once rotated, you are drilling though the other side of the drawer.
Return the nail to the Lathe. Use a parting tool to create a groove aligned with each hole you just drilled. The depth of these groups is 1/8 inch. Then finish shaping and sanding the nail.
Step 7: Prepare the Pins


Cut the pins from the 1/8 inch brass rod.
Each pin is 3/4 in long. The ends are rounded slightly by chucking the pins in a drill and using 120 grit sandpaper to shape.
When in their holes, and the grooves in the nail, the pin should sit below the surface of the drawer.
When the nail rotates and the pin drops into the hole in the nail, the pin should sit below circumference of the nail.
Step 8: Finish


I used an oil finish on all parts so that it absorbs into the wood and does not change the dimensions of the pieces. A film forming finish (like a polyurethane) would increase the dimensions of the pieces and they would not fit well any more.
I also applied paste wax to the inside of the box and to the nail so that they move smoothly.
Step 9: Solving the Puzzle
To solve the puzzle lay the box on one side. Rotate the nail until the first pin drop into the nail. Rotate the box 180 degrees and then rotate the nail until the second pin drops into the nail. At this point the pins have cleared the slots in the nail, and the nail can be removed.
Setting the puzzle is a bit finicky, but involves reversing the solution.

First Prize in the
Puzzles Challenge


