Introduction: 1200+ Lumen Flashlight


This flashlight will put out about 600 lm but if you add external battery or power supply it can output up to 1200+ lumens (LED can output up to 700lm (2x 700lm))
Flashlight is perfect for power outages (it will provide 600 lumens for 10 minutes and it start droping (max time : about 1:30) also bike riding or even if you go out for a walk at night
And its also pocket sized
Build of this flashlight requires minimal knowledge and almost everybody can build it
Safety :
Dont look at flashlight while its working , it can permanently damage your eyes
Dont point it at someones eyes or look at really bright spot
Step 1: Parts & Tools


Tools & Equipment:
Soldering iron
Hot Glue gun (optional)
Hobby knife
Parts & Materials:
Thermal glue (any glue that can hold up to 150C)
Heatsink
Battery (3.7v LiPo or Li Ion)
3 Connectors
Switch
2x 10w LEDs (i have 700lm 10w LED but you can get 10w 900lm)
Links for LEDs:
10w 900lm LED
10w 960lm LED
Step 2: Pre-tinning Wires

Pre tinning wires and battery terminal will make it easier to solder becouse the solder will be allready on wire and battery terminal and when you apply heat it will flow from terminal to wire and vice versa
Step 3: Soldering Connectors and Switch

You will need to solder 2 connector (one wire going to switch and one wire going to connector) and 1 connector directly to battery terminals
This connector will be used as charging connector and it will go from battery to charger
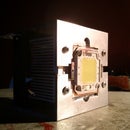
Step 4: Mounting Battery and LEDs to Heatsink


Before you glue LEDs to heatsink you will need to put battery and switch on the heatsink
My switch actually fits perfectly between heatsink
For mounting battery i used zip tie
For gluing LEDs i used thermal glue that can hold up to 250C (any glue that holds 150C for longer period of time will work)
Step 5: Charging Battery

The lithium ion battery is easy to charge. Charging safely is a more difficult.
Most cells charge to 4.20V/cell with a tolerance of +/–50mV/cell.
The basic is to charge at constant current (0.2 C to 0.7 C depending on manufacturer) until the battery reaches 4.2 V
Every LiPo, Li Ion battery have safety board which monitors the charge and discharge of the pack, and prevents dangerous things from happening.
Protection board on my battery have :
Reverse polarity protection
Short Circuit protection
Overcharge protection
Overdischarge protection
Step 6: Measuring Output Wattage & Testing


As you can see on pictures with both LEDs i am drawing 1.92A @ 3.07V
3.07*1.92=5,8944
Since this LEDs will output about 700lm @ 10w (700/10= 70lm per W) average output i get is 5,8944*70=412,608Lm but you will lose some lumens becouse you dont have reflector (even if you have its not 100% reflective)
According to datasheet you will need 3.3V delivered to LEDs so it can draw 3A (10w output)
Since battery voltage drops from 3.7V to 3v you shouldn't be worried about LEDs (but you may damage your battery if you leave flashligh working after voltage drops below 2.8V)
Battery have capacity of 1Ah and current draw from LEDs is 6A (at 3.3V), but since im drawing only 2A this should last 30 min
After some time cell voltage will drop to 2.95V and LEDs will draw about 700mA (you will lose couple of watts but the battery will last longer)
Finally i measured that flashlight can work for 1:30h without damaging battery (before voltage drops below 2.8V)
Step 7: Version 2.0


I ve added second battery (3.7v 1.5Ah) so now i have 3.7v 2.5Ah and i can run single diode on 10W, also i removed second diode


