

Introduction: 3 Custom Arduino Cases - 3D Printing & CNC Milling


Using digital fabrication techniques like 3D printing and CNC milling engineers and makers can easily customize their projects while keeping the production costs low.
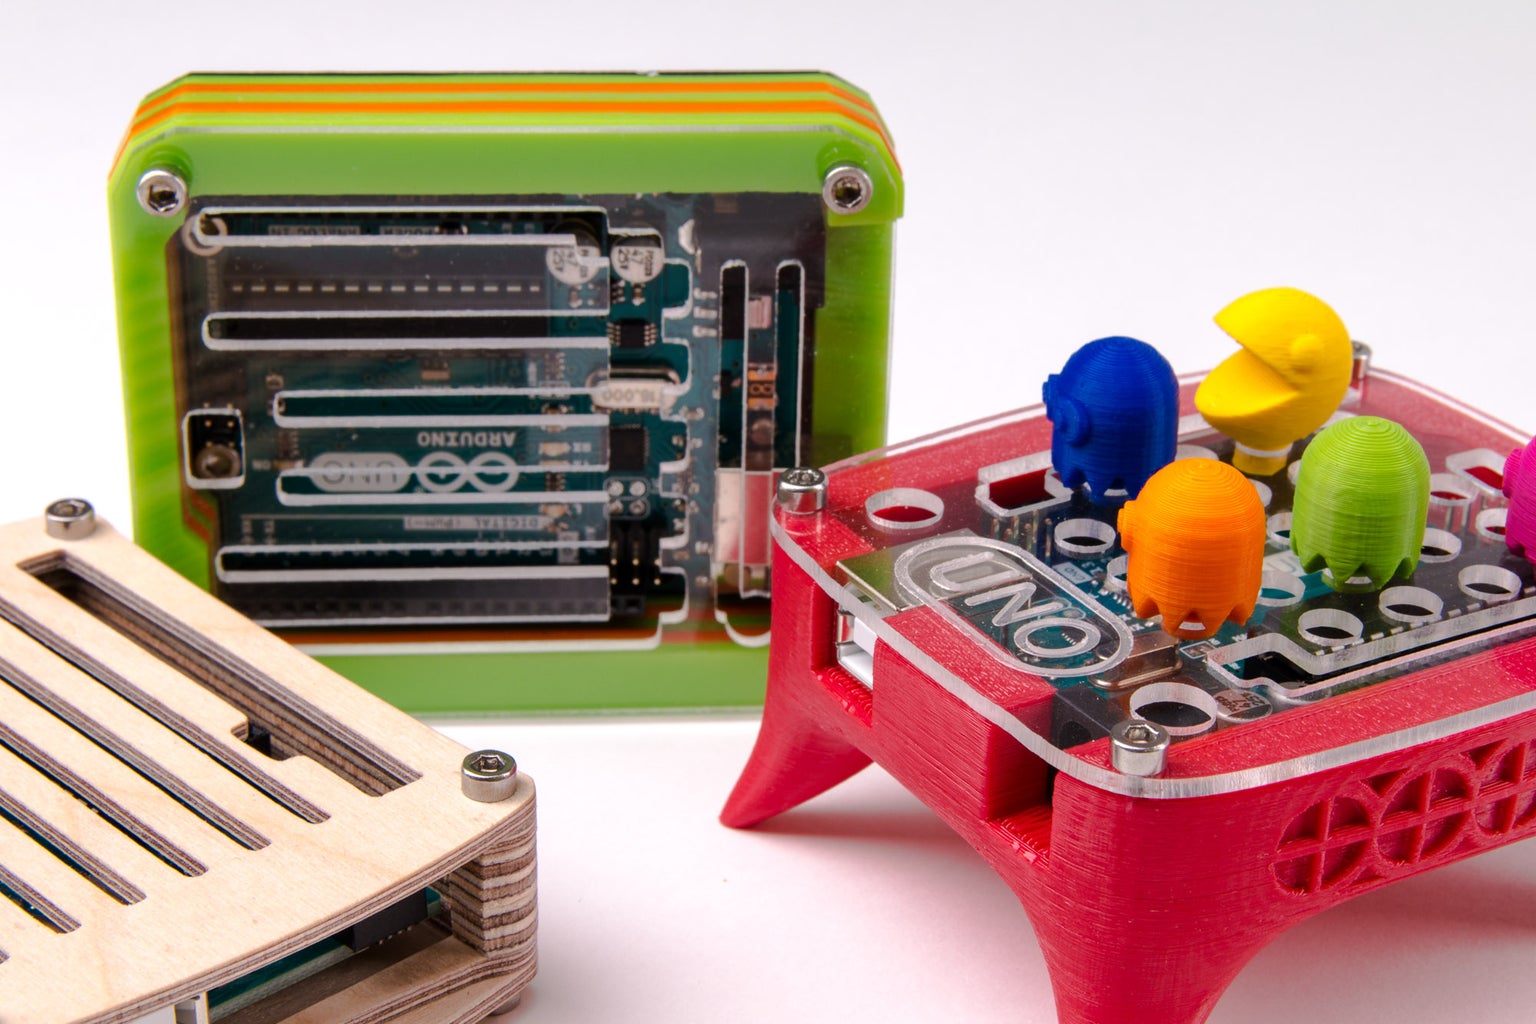
At ZMorph we recently designed and manufactured three custom Arduino cases with various applications in mind - for gaming, interior design, and student projects.
In this Instructable we’re sharing all three designs, their source files, and some tips on how to make them yourself.
All three cases for Arduino boards were originally made using our own ZMorph 2.0 SX multitool 3D printer, but you can use these free source files with any kind of software, 3D printers or CNC milling machines.
Enjoy!
Attachments

Step 1: Pac-Man Arduino Case
3D printing remains one of the best ways to create custom Arduino cases. For gaming-related projects, we created a case that resembles a classic arcade table and printed it from ABS filament. There’s a plexiglass cover on top of the case with holes for Pac-Man pins that were also printed from ABS.
We used standard settings for ABS printing with 0.2 mm layer height.
1.8 mm drill was used for CNC cutting the plexiglass top, and 1.2 mm drill for engraving Uno logo on top of it.
To assemble this Arduino case you’ll also need four M3x10 screws.
Step 2: Wooden Arduino Case

This stylish Arduino case can be used to hide electronics in a home interior or office. We made it entirely from sheets of 2 mm (top, bottom, and two middle layers) and 6 mm plywood (2 middle layers). There are two 2 mm and two 6 mm middle layers joined together, but you could also print only two of them using 8 mm plywood.
For CNC cutting of plywood parts, we recommend a 1.8 mm drill.
Arduino board needs to be screwed to the 2 mm bottom plywood part - you’ll need two M3x25 screws and nuts.
Four additional M3x25 screws and nuts are needed to hold the entire case together.
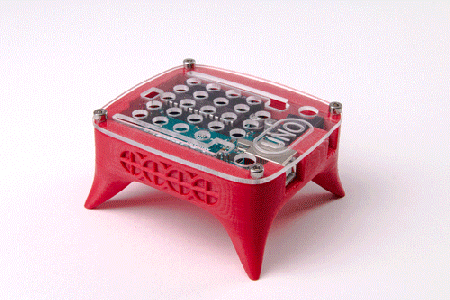
Step 3: Plexiglass Arduino Case

This is the most colorful and universal of our cases, perfect for student projects. It’s made entirely from plexiglass of various colors. 2 mm thick plexiglass is used for top and bottom of the cover, and 4 mm thick for layers between them (it’s a single file in the source files that needs to be cut 4 times).
For CNC cutting of plexiglass, we used 1.8 mm drill.
Arduino board needs to be attached to the bottom layer of the case with two M3x10 screws and nuts.
Four M3x25 screws and nuts are needed to assemble the entire box.


