

Introduction: 3C-H0, the Astromech Echo


This is the droid you're looking for.
I've had my Amazon Echo for over a year now and Alexa has become a part of my daily life. Sitting there one day looking at that simple black cylinder I realized that I could do something to make it a little fancier. With the release of the latest Star-Wars movie I had an idea.
Create an Astromech frame for my Amazon Echo to sit in.
Step 1: Print the Parts


First you're going to have a to spend the better part of a week printing parts. I used a Makergear M2. My choice of yellow PLA filament was based on the fact that I happen to have picked up a spool of this on sale at Home Depot and really didn't have any other use for it. Since I knew I was going to paint it anyway, the choice didn't matter so much. Because my Echo will be sitting in this I wanted it to be sturdy. I printed all of the parts fairly dense but not solid. I used a 40% fill but with solid layers every 4 layers.
Attached are the STL files for all the parts. These are based on this design by Luginets from Thingiverse. It is licensed under the Creative Commons - Attribution - Non-Commercial license.
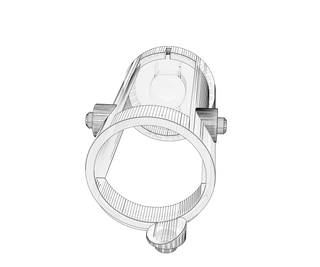
Here are the basic parts you will need to print:
- Left foot and leg
- Right foot and leg
- Center foot and post
- Main body
You'll notice a couple of discrepancies in the STL file and the parts in the photos.
First there is an extra file. This file is the post. I included it for two reasons, it was in the original design by Luginets and while not required for this project it was useful to print a few of these out and use them to fill the holes when painting in order to keep the paint out.
Second There are more parts printed than files. This is because I decided to slice the main body into three parts, print them separately and glue them together. I did this also for two reasons, the entire body was to tall for the print area of my M2 and by printing the parts separately I could mostly avoid the use of supports.
It is possible to print the main body in several separate parts from the same file simply by adjusting the start and stop print heights in your slicing software. (I used Simplify3D for this project.) I printed the main body in the following four parts.
From top to bottom the slices I used were:
- The very top and "eye". The part with the eye and just a couple layers of the top ring. Having this separate allowed me to print the main body without having to worry about this detail piece and also allowed me to easily paint this part a different color later in the process.
- The top "ring" and vertical supports. This was printed upside down. I simple flipped the model over and offset it through the bottom of the bed so that the very top part would not be printed. Then I set the stop print height so that it would end just at the point where the two supports meet the bottom cup. Since this meant that there were no overhangs except for the two nubs on either side, I didn't need to use many supports. I did have to turn off automatic supports and place supports manually under the nubs.
- The bottom "cup" this was printed right side up. However again I offset the bottom through the bed and set the end point so that it would stop just before it started to print the vertical supports. Again this eliminated the need for supports.
- The very bottom "vents". This was printed upside down since it was tapered and had with some detailing. This allowed me to avoid using supports, keeping the detail clean.


Step 2: Prime and Paint the Parts


Mask off the parts of the parts that you will need to glue/weld together. You will want to keep these parts clean of any paint to get good adhesion.
For a primer I used a Rust-Oleum 2x primer that is good for use on plastics. I had thought about painting it white originally so used a white primer that I happened to have already. I changed my mind and decided to go for a black color. Luckily the choice of primer doesn't matter dramatically.
Having primed the base the wrong color meant that I had to use two coats of black model paint instead of one.
Note that you may want to assemble and glue/weld some parts prior to painting. I did this with the bottom the main body and the center foot peg. (In the photo with the spray can) In these cases simply invert this step and the next step.
Step 3: Glue the Main Body Together and Test Fit the Echo


I glue/welded the three bottom parts of the main body together so I could do a test fitting. I did not yet glue on the the very top ring with the eye as I wanted to paint this first.
Because I was working on other parts while waiting for the main body to finish printing, I ended up in a situation where various parts were in different stages of the process. However once the main body had printed I was able to proceed to assembly and test to make sure the Echo would fit in the body.
In these pictures:
- the very top part with the eye is painted in black (and is not actually attached)
- the main body is freshly printed in yellow,
- the bottom cup is in white primer
- the very bottom is black and white since I had to remove some of the paint to glue the parts together.
For anyone working with PLA I highly recommend purchasing some #4 Weld-On solvent. This is by far the best way to join PLA pieces together. It does for PLA what ABS solvent does for ABS. It works much better than a glue and actually welds the two pieces of PLA together. The easiest way to work with this solvent is to use a syringe and simple suck the solvent in and then place it on each surface that needs to be welded. Another great thing about this solvent is that it does not stick to your hands like thing like superglue do. Do keep a paper towel handy to wipe up any excess drips as this is a solvent and will dissolve bits of your print.
Step 4: Finish Paint and Assembly


I looked at many many images of Astromech droids all over the internet in get an idea for a color scheme.
With a base of black I decided on shiny blue and silver accents. It also helped that I happened to have these paints already, so I considered that total win.
After the detail paint I used more of the solvent to glue/weld the parts together. I will be finishing it off with a gloss clear coat.

Participated in the
3D Printing Contest 2016


