

Introduction: 3D Design and Make Your Own Construction Set


This instructable will show you how to design and make your own construction set using freely available opensource software like Google Sketchup or Tinkercad to design your 3D models.
This project is ideal for children who want to make and learn about 3D design/printing as well as Making Stuff. This Instructable provides the necessary files to create your own construction set. Parents could even do this for their children.
3D printers are widely available now for home and hobby use so you may have access to one at home, your local Makerspace and 3Dhubs.com to 3D print the construction pieces and build amazing models. I have my own 3D Hub and have provided a link too.
Things you may need:
- Free CAD/3D design software
- Sketchup
- Tinkercad
- Free 3D printing software
- Cura
- Repetier host
- Access to 3D printer
- My 3D Hub
Step 1: Design in Sketchup


The first thing you need to do is download and install Sketchup from here. You may also need to spend a little time learning how to use Sketchup which you can do from here.
Once you have done this you can start designing the 3D pieces of your construction set. If you want to skip this part and just want to 3D print the pieces then go to the next step.
Almost all of these parts are basic shapes and very easy to create. Watch the video I created for designing a construction set.
Creating blocks is even easier. Please view the video I have created for this too.
Step 2: 3D Printing Your Construction Set or Blocks

Then you can download my STL files and use Cura to generate the gcode file to 3D print straight away. After you have imported the STL file to Cura you can multiply or delete individual objects to print the items you need.
If you don't have a 3D printer. There are thousands of local 3D printers at your finger tips that you can access and get quotes for at 3Dhubs.com.
Construction set settings:
layer height: 0.2
Shell: 0.4
Fill: 20%
Ideally for this construction set you would need some screws and nuts. However the M4 screw and nut that this project requires are very difficult to design and 3D print accurately. Therefore I have come up with a much easier solution. A popper/stud/rivot. I've included the file though a small part like this might need tweaking.
Popper/stud/rivot print settings:
layer height: 0.1
Shell: 0.4
Fill: 100%
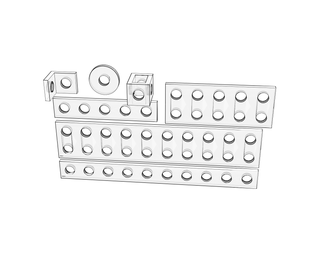
If you just prefer simple building blocks then I have provided STL files for these as well. Open in Cura. Change your printer settings and create your gcode file for printing. Like previously you can multiply or delete individual objects to print the items you need.
Blocks don't need to be high resolution. Therefore you could print at low-res or even with a E3D Volcano which allows for 1m layer height and reduces print time considerably. IT also gives the prints a really cool layered effect.
Blocks settings(0.4 nozzle):
layer height: 0.2
Shell: 0.4
Fill: 15%
I made a time-lapse video of the construction set printing. See what this looks like with the embedded video or photo.


Step 3: Make Something!
Finally you are ready to make something with your newly printed construction set.
Here's one I did. I'm sure you can do much much better though. :-)
Happy printing!

Participated in the
3D Printing Contest


