

Introduction: 3D Shadow-Box Photo


This is a guide on how to create a 3d image using numerous copies of the same photo. By reading this instructable, you will be able to assemble a cool looking 3D shadow-box photo for free. Check out the video on the 6th step or look at the photos below to see what you will soon be creating.
If you enjoyed this instructable, please click the "vote now" button up above. Thanks a lot!
Step 1: Preparation and Planning


the first step is to take a picture that has a foreground, a middle ground, and a background.
Next, if you wish, you can turn the picture gray-scale to add a more serious effect to your photo.
Plan out your picture ahead of time, much like I did below.
After figuring out how many different levels their will be in the picture, print out that amount of the previously prepared photo.
My picture had 4 different levels, as you can see in the second photo below.
Step 2: Cutting the Photos


In this step, you must first cut out the foreground of the first photo, then cut out the foreground and the middle ground in the second photo, and leave the last photo (background) alone.
See the images below to see what I mean.
Step 3: Assembling of the 3D Photo


This part is the most complicated of all of the steps.
In this step, you must first take the background photo and put it down in front of you.
Using "spacers" such as foam, matches (see the first picture below), or wood, place it down beneath the next layer of the photo to keep that layer suspended over the one behind it and to give it the 3D effect.
Hot glue the "spacers" (foam/wood) on to the background photo where the middle ground will go. Then hot glue the middle ground onto these "spacers". See the second image below.
After this, do the same thing, only glue "spacers" onto the middle ground where the foreground will go. Glue the foreground image onto these "spacers" to complete the 3D photo. See the third image below.
Your 3D photo is now complete. Now onto the Shadow-Box!
Tip: I glued two match-sticks on top of each other to make the each level farther apart, but you can do whatever seems to look best for your photo.
Step 4: Assembling the Shadow-Box

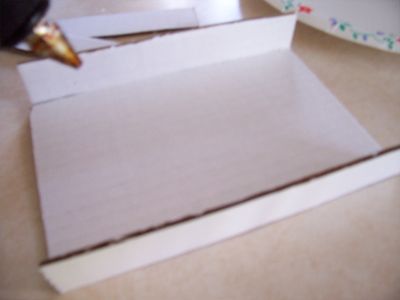


Assembling the shadow-box is much easier than it seems.
I first measured and cut a piece of cardboard the size of my 3D photo, and set it aside. I then cut 4 other pieces, to go around the outside of the shadow-box. If you do not know what I mean, see the pictures below. Assemble the shadow-box using your glue of choice.
When the shadow box is complete and looks like the one in the third image below, feel free to decorate or spray paint your shadow-box in any way you wish.
Step 5: Final Assembly
The last step of this instructable is to use the glue of your choice (I suggest a glue stick to be neat) and glue the 3D photo to the bottom of your shadow-box. Your 3D shadow-box photo is now complete. Check out the one I made below or watch the YouTube video on the intro and 6th step.
Step 6: Final Product
If you enjoyed this instructable, please click the "vote now" button up above. Thanks a lot!
Second Prize in the
Photojojo Photo Month
Participated in the
The Instructables Book Contest


