

Introduction: A Visual Illusion in 5 Mins From Stationery (and a Film Container)


Make your own micro-scale Muybridge visual illusion with a used 35mm plastic film canister and a selection of everyday office stationery supplies.
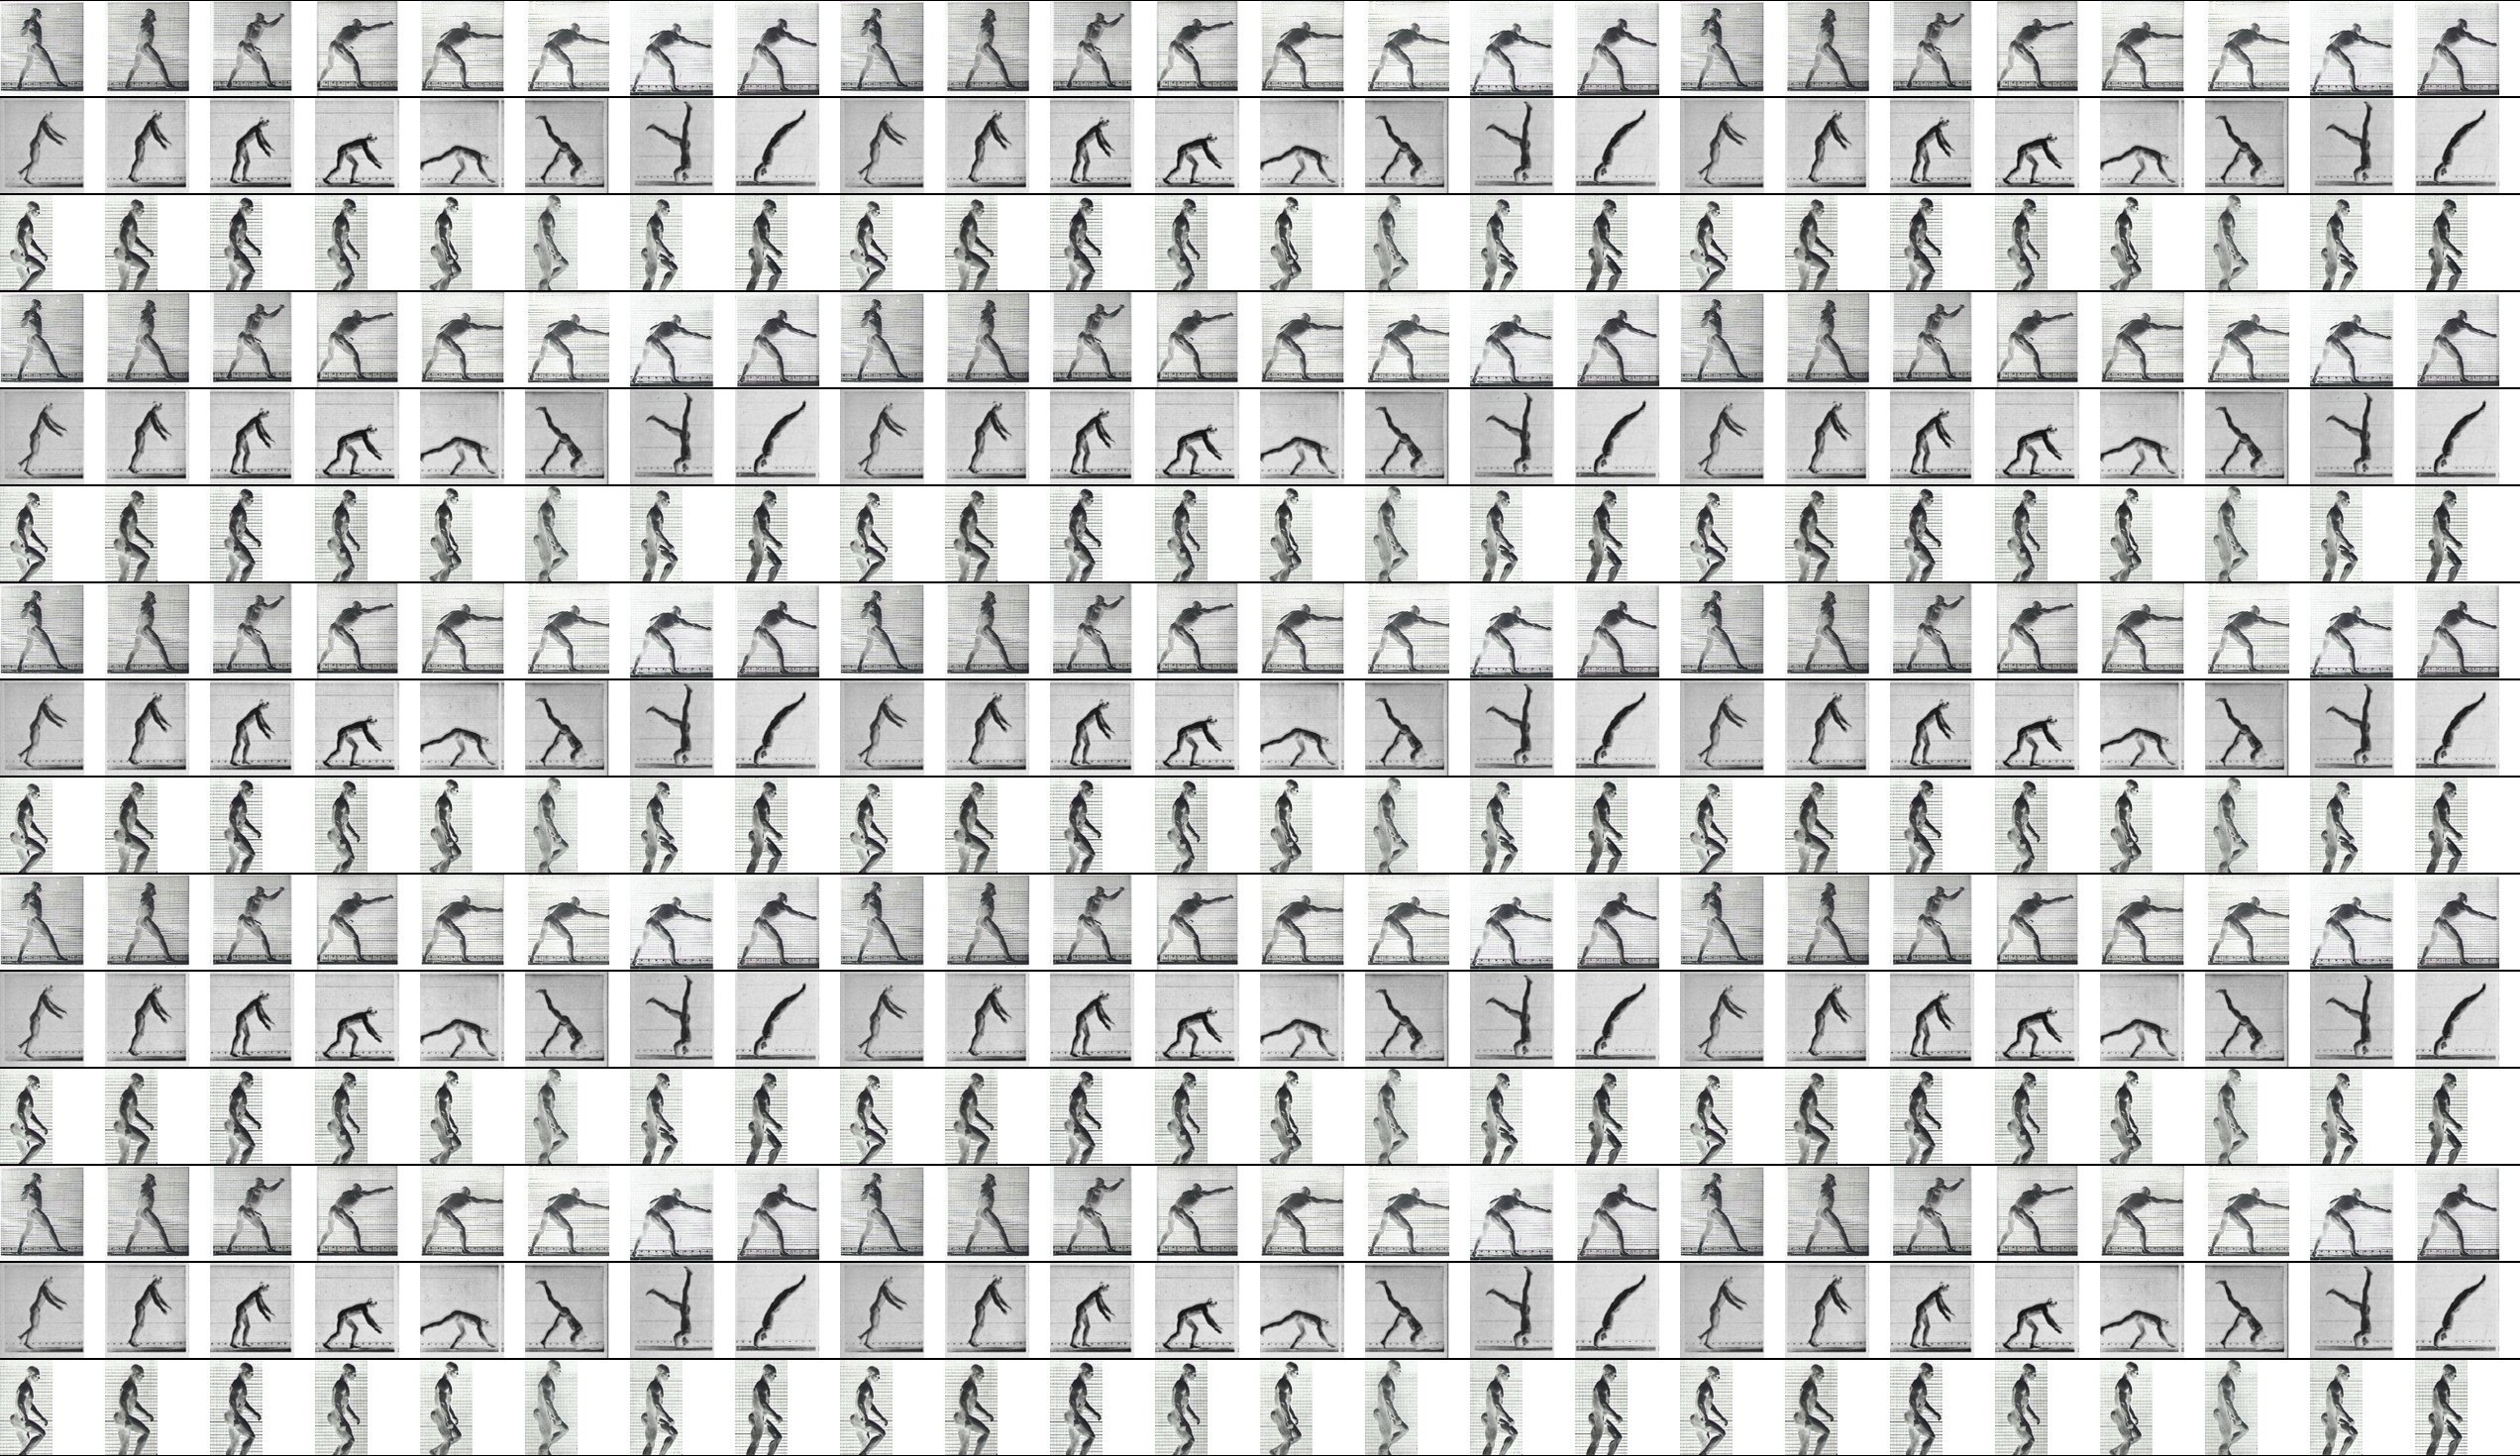
We are using newly obsoleted film technology to re-capture the oldest obsoleted film technology, the Zoetrope, popularised by early moving image pioneers such as Eadward Muybridge.
A Zoetrope is a revolving black drum with multiple slits positioned opposite still frames on the inside surface. The still frames are taken from live motion, and when the zoetrope is rotated, they are revealed in sequence through the slits opposite. This technique creates the illusion of motion.
When the sequence is periodic, the motion seems continuous, as seen in the animated gifs here...
http://cefn.com/blog/muybridge.html
To make this Zoetrope you will need:
A 35mm film canister
Scissors
A piece of paper and printer
A piece of tape
A pencil
(Please rate this project by hitting the (+) or (-) buttons near the upper right of the page)
Step 1: Get a Film Canister

Perhaps someone you know is still in the dark ages, enjoys the smell of chemicals, and the frisson of keeping a darkened, pornographically lit, developing room.
Or perhaps like me, you'll go down your local film processing lab. When I asked locally for freebie film canisters to use in an unrelated project they asked how many thousand I wanted, and I couldn't help myself. I came away with several bin bags full. That's how it all started! It led me to puzzling what else I could do with them.
After a brainstorm with a friend - Mark Dixon - we came up with the Filmcan Zoetrope.
Step 2: Make the Slits

The plastic of film canisters is soft enough to cut with regular scissors.
Never put your fingers between the blades, however tempting it is to hold the canister firm in this way. You can hold it with your hand over the outside scissor blade, or not hold it at all.
I made 8 slits, which was a simple number to cut. You simply cut a slot about the width of a matchstick (two scissor cuts next to each other), and then bisect the remaining can wall with a similar cut, then bisect the remaining two parts, then bisect the remaining 4 parts. You end up with 8 matchstick-size slits and 8 pinkie-width black wall sections, assuming you still have your pinkies.
The exact number depends how many images you have in your sequence. A lot of the muybridge ones are 12s, but they ended up REALLY small that way, so I made sequences of 8 images.
I found it was easier to get the cuts straight if I held the top blade of the scissor flush with the outside of the can wall. Then you can get the matchstick-slit nicely perpendicular to the base, and nicely consistent in its width.
Step 3: Print Out the Frames

Now you need an 8 frame animation.
The example can be downloaded here which prints to the right scale on European A4 - some re-scaling may be required for US Letter paper to fit inside the 30mm diameter of the typical film canister, although it will probably just work, given the tolerances involved.
Get your desktop to 'scale to fit' the image to the A4 or Letter sized paper for best results.
Cut out your chosen 8 frames from the printout, and make a continuous cylindrical film-strip by bending it round and sticking a bit of sellotape on the outside.
This film-strip will fit inside your Zoetrope to generate the animation illusion as you rotate the film canister, viewing it through the slits.
Film Canister Stats:
Interior diameter: 30mm
Interior circumference: 30mm * PI = 94.25mm
3 * 94.25 = 282.75mm
A4 longest side: 297mm
So you can fit a triplet of 8 frames into the longest side of A4 (minus the unprintable border). For workshops, when you have your thousands of film canisters, you can easily provide thousands of different animations for people by pre-printing sheets like the one shown.
Of course you can hand-draw your own animations, but I enjoyed recovering the 19th Century Muybridge ones with some bash scripting hacks.
Step 4: Punch a Hole in the Lid

Do you really need instructions for this one? Ok, then don't stick the pen/pencil through your hand.
Step 5: Put the Strip in the Can and Close It Up.


Insert the strip and push it to the base of the film canister. Then turn it upside down and prize the 8 segments of walls back into the lid with your thumb or fingernail. Finally, you can use a pen to establish an even separation around the slits.
Step 6: Enjoy the Animation


The pen/pencil stuck through the lid can be spun between your hands by rubbing them together. Look through the rotating slits at the frames inside to get the illusion of motion.
You may need to orient the hole you have cut towards the window or other source of light. Stand with your back to the light so that the frames you're viewing are illuminated directly.
It's possible to put more than one animation in your Zoetrope, but leave a gap between them that you can look through.
If you make your own animation files, please link to them in the comments, or send them to me and I'll add them here.
It is almost impossible to record the visual illusion on video. I've tried using a maglite instead of a pen to maximise the illumination, and rotated it on a turntable to create the video. Hence it's the other way up.
The 58rpm-ish which it works best at (in the movie 78rpm slowed down using a pitch controller on a DJ turntable) interferes pretty badly with the frame capture rate of the camera itself so this illusion is best seen with the naked eye. You'll just have to build it yourself to see - only takes 5 minutes!
The Filmcan Zoetrope was conceived as part of a Curiosity Collective workshop.
For links to other people's filmcan projects, try this page


