

Introduction: Adaptive Tricycle Modifications


For this project, the team's goal was to create a bicycle or tricycle for a young man named Nicholas, who is diagnosed with Cerebral Palsy. Our hope is that this design will allow him to get some outside exercise, and to add to his self reliance and overall self esteem as a young man. We also hope that this will allow him to work on more of his body to gain more long lasting physical skills. Using a bicycle like this will increase his overall range of motion and strength as he continues to used it.
Supplies
The following is a list of build materials:
- Adaptive Tricycle, such as Rifton R-140 (we purchased ours used from a local family)
- Stationary Bike Stand - Stationary Stand
- Front Light - Front Light
- Rear Light - Rear Light
- Mirror - Mirror
- iPhone/iPod Holder - iPhone/iPod Holder
- Helmet - Helmet
- License Plate - License Plate
- Wichita State Decals - Wichita State Decals
Step 1: Meeting the Customer

Given the large distance between us and our customer, we had to resort to online Zoom meetings until final testing and the final product.
In our first online meeting, the team met with Nick's physical therapist Lisa. She has been working on and off with him for over 15 years. With that knowledge and experience she was able to speak to us on his range of motion and his overall physical ability, especially concerning bicycles. She also brought up some concerns brought to her from the parents that they wanted to shine a light about.
The next week we met online with Nick's parents and PT Lisa. This was the team's first meet and greet with all involved. In this meeting we got to know Nick and his needs that both his parents and PT are looking to find solutions for.
Step 2: Research on Product Designs and Cerebral Palsy


Before speaking with our customer's physical therapist, our initial plan was to provide our customer with a recumbent bike. After speaking with the physical therapists we learned some challenges that needed to be accommodated for. One problem is that because our customer has cerebral palsy, he has braces on both legs. We were shown that his range of leg flexibility is limited due to them. If our customer were to use the suggested bike he would not be able to pedal. He also would have struggled with the ability to get in and out of the bike as it is so low to the ground, he would require assistance every time he wanted to get in and out of it. Had we gone with our own understanding of the problem we would not have helped the customer; this is why it is best to collaborate with multiple experts on an assistive project like this, so that multiple viewpoints are considered to find the best solution for the customer.
We also thought was that we needed to build a bicycle from scratch, but due to time constraints that was not a viable option. The team then met to come up with ideas as to where we could come up with a sufficient starting point to build from. After doing research over potential candidates for a tricycle, the team thought to look on the local Wichita Craigslist and Facebook Marketplace.
After some further searching using these websites, we discovered a perfect deal on a gently used tricycle. The model that we found was a Rifton R140, which just so happens to be one of the most expensive and top of the line assistive tricycles offered on the market today. The Rifton is made in the USA, and is a weld together model using aluminum tubing for the body and brackets. It also comes with a fully adjustable front brake handle, fully adjustable steering bars, fully adjustable seat, upper and lower seatbelt restraints, sturdy parking brake, and a convenient lower mounted storage basket. The model also offers a completely floating pedal system, which eliminates the user from overexertion when trying to pedal as it adds to their pedal motion to makes a smoother feel.
The tricycle itself was a great deal, at a mere fraction of its original MSRP, and this one in specific was very lightly used. After a nice deep clean on a Saturday afternoon, the tricycle was looking like new.
Step 3: Initial Cleaning


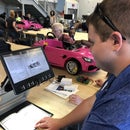
After the team did the initial cleaning on the tricycle, they set to work on developing modifications specific to Nicholas' needs.
Step 4: Bike Stand Prototype


After the decision to move forward with the Rifton R140 tricycle, we wanted to design a stand to lift the back of the bike up to transition it to be an indoor stationary bike. Having the ability to pedal inside would be a huge advantage if Nick were not able to go outside, needing to wait to see if weather permits or not.
We expected a budget constraint to prevent us from purchasing the Rifton stand that comes with the tricycle, so we designed and built our own. These were our initial design sketches for the stand.
After the team completed the prototype of the stationary stand, the team then set out to find a way to manufacture this model using the tools in the Wichita State Lab. After careful consideration and meetings with the instructor as well as many of the lab and CAD manufacturers on campus, the team decided the best method for time and cost savings was to purchase an already made model of the stationary stand, which was developed by Rifton.
The pre-made Rifton stand was developed for all of their bikes, with each set of notches being for a specific model. The stand itself was identical to the team CAD model, but after assessing cost it would have cost the team more to buy raw material and manufacture their stand based on the model.
Step 5: Modifying the Brakes


In addition to the stationary stand being created, the team decided to do other modifications to the bike. One of the modifications that was done was to the front brake. After the initial test of the bike, the team felt that the front brake pressure and grip was inadequate for what was needed for safety. Because of this, the team disassembled the front brake and coated the brake shoe with a strong epoxy. This allowed the front brake to have more grip and resistance to the front tire, allowing better stopping power.
The team also needed to address the other levels of safety on the bike. For this, the team moved to lighting and making sure that the bike could be seen at any time of day. The team decided to add a front and rear LED light, powered by a button, for Nick. This will allow a better safety measure for onlookers, as well as a custom touch.
Lastly, the team needed to begin adding custom touches that would be personalized for Nick. The team created a Kansas License plate similar to the ones on all registered cars, but with a personalized touch.
Step 6: Customizing the Tricycle


After prototyping, it was time to customize the tricycle with several features.
During the second meeting with Nicholas' parents, the team was told that Nicholas likes to listen to music a lot. So, the team decided to purchase a phone holder that would best fit his needs. The phone holder was securely placed directly in front of the seat for easy accessibility.
It was also decided among the team that it would be best to put a mirror on the bike because Nicholas it would be easier and more comfortable for him to see his surroundings. Unfortunately, the first mirror could not properly attach where we wanted it due to complications with its attachments features. The team looked for a second mirror and made sure before purchasing that it would be able to attach. This mirror was placed securely on the left side of the handlebar.
The team also added custom flame decals along the body and lower basket of the bike. These flames were made using a laser cutter which cut pieces of vinyl which then were attached to the bike.
Step 7: Final Product Delivery


Nick took his FIRST independent bike ride on his new trike and had a great time! The team was very surprised as to how easily he got on and was able to pedal, he started right off like he had been riding it for years. Overall the family was thrilled at the end result and at the new opportunities this gives to Nicholas.


