

Introduction: Affordable Camera Slider


If you want to have nice effects on your videos or make moving time-lapses, you need a camera slider. Photographic equipment is expensive but if you have access to a 3D printer, this solution may interest you. I used only three bearings, a small dc motor with reductor and a controller. The controller is not required but it allows me to select the speed accurately.
The axis linear guide consist of a 30 x 30 mm aluminium profile.
This article has three parts:
- The slider
- The controller
- Usage
Thank you Fablab Moscow for the facilities.
Step 1: Tools and Material
Tools
- 3D printer
- Laser cutter (not required)
- PCB prototyping tools (not required)
Material
- PLA filament
- 30 x 30 mm aluminum profile
- 3 skate bearings (608ZZ)
- 3 inline skate axle 45 x 8 mm
- 25mm DC motor with reductor and encoder (200rpm)
- Attiny84 (or any arduino)
- Motor driver

Step 2: The Slider


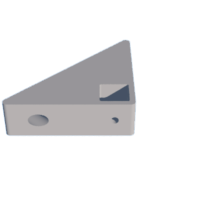
Download the files and print the carriage, the camera plate and the three wheels.
Press-fit the wheels on the bearings. (I used a vise)
Then assemble the bearings and the motor with the carriage.
The screw head that we see on the first picture is a security. It should not touch the profile in normal use. If a wheel fails, the carriage can not fall down with your expensive camera.


Step 3: The Controller


In the introduction I say that the controller is optional. Indeed you can connect the motor to the battery with a switch and this way send the right or left command. But this makes brutal moves and fixes the speed. Moreover I like to play with microcontrollers.
I chose an Attiny84 microcontroller and used the Arduino environment to program it. The code is on my github.
The driver stage consist of an H-bridge (ZXMHC3H01) two mosfet transistors(NDS355AN) and a bunch of resistors.
Now my controller has one radio button and one potentiometer. The radio button turns the system on and the potentiometer set the speed (positive or negative).
Step 4: Usage


To use your slider you need to mount the carriage on a 30 x 30 mm aluminum profile. The transmission is made with a small string or a thread. The string is secured on both ends with standards screws. It makes a loop around the motor shaft.
Engage the carriage on the profile while maintaining tension in the string. Then tight the screw up. This also tensions the string.
To hold the aluminum profile you have several options: from the ends or from the side.
Finally secure your camera on the carriage with a standard 3/8-16 screw. The camera plate can be separate from the carriage in order to fit any camera.
Show us your movies!


Participated in the
Microcontroller Contest


