

Introduction: Alternative Christmas Tree 2011


Well another year is upon us & so it time for our family tradition of making our tree. This tradition started when our boys were young. At that time we used to make everything that went on the tree, but as the boys got older (and more into building things) it shifted into making our tree. we change the theme every year & this year is no exception. I hope you enjoy.
Step 1: Materials & Tools

So this year, after working out a number of different designs, we decided to make our tree out of Pallets.
The two shops behind mine always have old pallets laying around so I got mine for free from them. I brought them home & washed them off.
I had an old 3x4 in the basement (for the main trunk of the tree).
As for tools this year we only needed a few things.
-Drill
-Sawzall
-Skillsaw (or chopsaw)
-Speed Square (or any Square)
-Chalk Line
-TapeMasure
As a side note I love using corded drills to drive screws. I know that we live in the world of 87volt cordless tools (ok maybe a slight exaggeration), & don't get me wrong I have them. but if I can get a corded version of a tool to where I'm working, I do.
Step 2: Prepping the Pallets


Heres where the Sawzall come into play.
Typically the nails in pallets are ring-shank (i.e. they don't pull out), so its best to cut the nails with a good metal cutting blade in the sawzall. most likely if you try to pull the nails you'll just break the boards.
After removing all the slats I cut one end of every slat, with the Skillsaw (or chopsaw) to have a clean starting point. A quick & easy way to get square ends on a board, with a skillsaw, (without drawing a line on everyone) is to use your Speed Square as a guide for the saw shoe to run against. Note: I point the Square toward myself, this aids in getting the saw started straight.
Step 3: Laying Out Your Tree

Once you have your pieces of wood cut on one end it time to think about how you want your finished tree to look. We ran through lots of different ways to pattern our "Branches". In the end we decided to spiral our branches around the tree like a spiral staircase. This determined how we cut the branches to length.
Obviously the lengths I use here are arbitrary & can be changed to meet you needs.
As it happened our 3x4 was a little over 11', perfect for the tree this year
We decided that the diameter of the bottom of the tree should be around 6', & that the bottom branch should start around 22" off the floor.
Take the bottom slat, at your determined hight & screw it to your "trunk" Using a square. Then lay the slats in a row perpendicular to & on top of the 3x4, on the ground, one next to the other starting next to the one you screwed down. Make certain that the cut ends are at the trunk end & flush with the edge of the 3x4
Once you have this done mark your bottom branch at half you diameter, from the center of your trunk. Now mark the top branch at a pleasing size. We determined this using a Tape measure held at the end of our bottom branch strung out across our tree to the top. Moving the line in & out at the top pick a point on your top branch that makes a good shape. Mark this point. Using a Chalk line snap a line from your bottom to your top slat. Making sure that all the slats are marked.
Cut your slats at the chalk mark. Now here you have some choices you could cut the slats on the line (at an angle) or square up from the point where the line intersects the bottom of each slat. We chose the latter, as the square ends seemed to fit more with the design.
Step 4: Building & Decorating the Tree


Once you have all the branches cut its time to start attaching them. based on the pattern we decided on, every fourth branch would end-up on the same side. So I started by attaching every fourth branch, using my speed Square to keep the branches perpendicular.
I then turned the tree over & attached the center of each group left on the back (confusingly written, I know) i.e. every other one from the branches already attached. At this point we have the branches attached on the front & the back that go 180 deg from each other.
Time to make choices. I found it easier to attach the third side outside but the question is can you get it into your house?
I'll just say it was close but we made it
Place your tree in your stand, & attach the forth side. it really helps to have another set of hands for this step
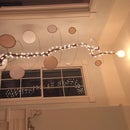
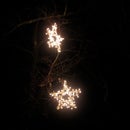
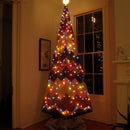
Hang your lights & decorate!
A few notes this year we liked the austerity of the tree, so once we got the lights on we decided we were done (what do you mean I brought all these boxes of decorations up for nothing!). For the star this year I mounted a light socket to the top of the tree. We wanted an old Edison looking bulb, but I couldn't find one so after trying a number of different bulbs we chose a flicker flame bulb (you can't tell in the photos)
Thanks for checking this years tree out.


