

Introduction: Ardu-Shaker MK I


First of all, in my school we don't have enough shakers/mixers, so i decided to make something which is useful. I built it, then show my teachers they liked it i hope you like it too.
Step 1: Design Schematic and Write Some Codes

#include <Servo.h>
int button1 = 4;
int press1 = 0;
int pos = 0;
Servo myservo;
void setup()
{
pinMode(button1, INPUT);
myservo.attach(7);
digitalWrite(2, HIGH);
}
void loop()
{
press1 = digitalRead(button1);
if (press1 == LOW)
{
for(pos = 0; pos < 180; pos += 1)
{
myservo.write(pos);
delay(1);
}
for(pos = 180; pos>=1; pos-=1)
{
myservo.write(pos);
delay(1);
}
}
else {
for(pos = 0; pos < 180; pos += 1)
{
myservo.write(pos);
delay(0);
}
for(pos = 180; pos>=1; pos-=1)
{
myservo.write(pos);
delay(0);
}
}
}
Step 2: Wiring Basic Components and Preparing Enclosure


Step 3: Making the Frame


I started to build this frame by using scrap wood. Later on i made paint job and add a little touch :)
Step 4: Making the Control Panel


I put my electronics into the pre-drilled enclosure. Then closed it all up.
Step 5: Final Assembly

I put everything together.
1. I use some epoxy to attach metal tube to the servo arm.
2. Then zip ties are helped me to attach servo to the frame. (Using zip ties will give me the advantage of changing the height of the servo)
3. Next, I used some double sided tape to stick control panel to the frame.
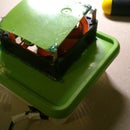
Step 6: Results!!!


I'm pretty happy with results and i really wanted to add heating mechanism to future versions.
I really wanted to learn what you're thinking about this project
Thanks

Participated in the
Build My Lab Contest


