

Introduction: Arduino Noise Alarm


For a school project at HKU in The Netherlands me and a classmate made a noise alarm. This device will measure the sound level in the room and when it get's too high it will send a signal to a Processing script that then will play an mp3-file of your choice.
What you will need:
- Arduino
- Microphone module /w adjustable sensitivity (we used a Velleman VMA309)
- Processing /w Sound library
- A computer to run Processing on
- (Optional) LED w/ 220 Ohm resistor
- (Optional) buzzer
We chose processing because we had to make this project in a short amount of time and didn't have an audio-shield. You can choose between using Processing or you can make an easier version with just a buzzer.
Step 1: The Build
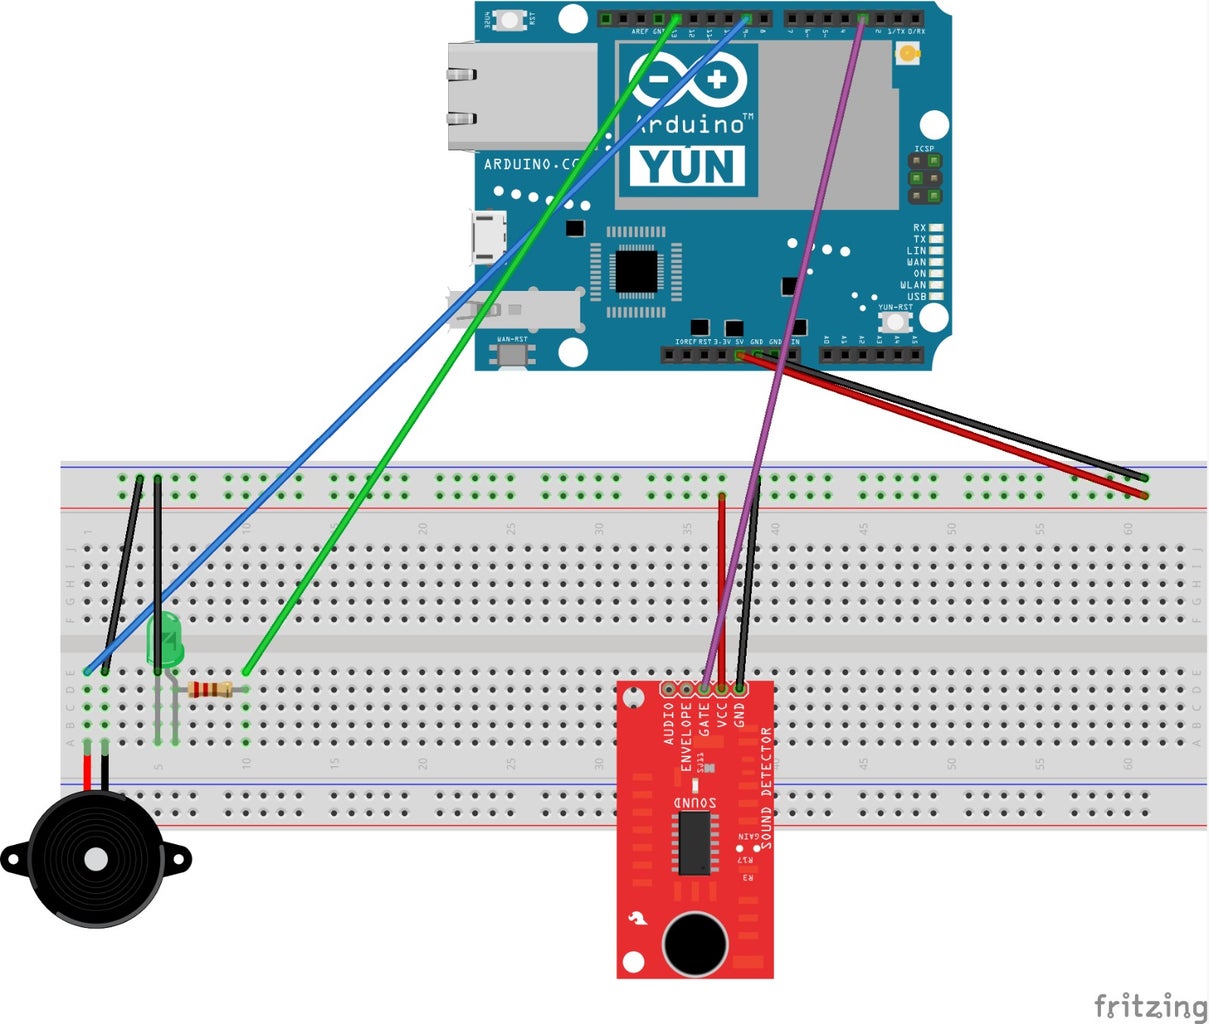
In the schematic above you can see all the versions (buzzer, Processing, with LED) layed out. You will only need to look at certain parts of the schematics, which will be mentioned in the versions below.
Buzzer
If you want the buzzer to make noise when sound is detected, you will need to connect that part of the diagram. Optionally you can wire up the LED as well if you like, it is included in the code.
- Buzzer connected to Gnd and Pin 9.
- LED connected to Gnd and Pin 13 thru the 220 Ohm resistor.
We used the screw on our sensor to set the sensitivity.If the LED is permanently on, turn it counter clockwise first until it's off. Then turn clockwise until it's on again and back off slightly.
Sound file using Processing
For this version it is important that your Arduino is connected to your pc. This is how it sends the data to Processing. Build the diagram above apart from the buzzer. Again, you can connect the LED if you want to.
- Connecting your sound sensor will be different depending on the brand. For the VMA309 we connected + to 5V, G to Gnd and DO (Digital Out) to Pin 3.
- LED connected to Gnd and Pin 13 thru the 220 Ohm resistor.
We used the screw on our sensor to set the sensitivity.If the LED is permanently on, turn it counter clockwise first until it's off. Then turn clockwise until it's on again and back off slightly.
Step 2: The Code

Buzzer
For the buzzer you will only need the "Arduino Buzzer Sketch.zip" file. That's it!
Sound file using Processing
For this method you will need both the "Arduino sound file sketch.zip" and "Processing sketch.zip" files.
You will also need to install the 'Sound' library. To do this in Processing go to Sketch > Import Library... > Add Library... A window will open. Search for 'sound' and install the library.
Make sure to set the correct COM port and mp3 file in the Processing sketch. There is already an mp3 in the project folder for testing. You should also change the delay-value depending on how long your audio fragment is to prevent overlapping playback.
After you've uploaded the Arduino sketch you can click play in Processing and your mp3 should play when sound is detected!
I've made the comments as clear as possible so you can easily change some values to your liking. If you have questions, feel free to ask!


![Tim's Mechanical Spider Leg [LU9685-20CU]](https://content.instructables.com/FFB/5R4I/LVKZ6G6R/FFB5R4ILVKZ6G6R.png?auto=webp&crop=1.2%3A1&frame=1&width=306)


