If you following exactly what I do, then connect up the rows on the keypad to pins 2 - 5 and the columns to pins 6 - 9. Connect the buzzer to pin 11. Connect VCC on the I2C to 5V, and GND to GND. Connect SDA on the I2C controller to SDA on the Arduino. (Analog 4 on the UNO) Do the same with SCL. (Analog 5 on the UNO)
The only thing to do now is download the .ino file with the code in it. It is commentated, and will hopefully explain itself.
Also, here is the code if all you wanted to do was look at it: (P.S. it's WAY easier to understand when you open the file in the Arduino IDE!!)
/*===== 6-Code Combination Lock =====
* You can use this code how you want, its not copyrighted or anything. * I used a I2C controller with my 16x2 lcd, but don't worry- all of the commands that are activly used are the same as LiquidCrystal.h, the stock library for LCD's. * If the setup array for the keypad looks weird, it's because it's rotated to the right. Make yours normally, my keypad is just weird. * When you enter the correct combination, it waits 5~ seconds before locking again, but you can change that easily. * The default combo is 123456. Predictable- I know. */ #include //standard keypad library #include //lines 7 - 19 are I2C-Related #include #include
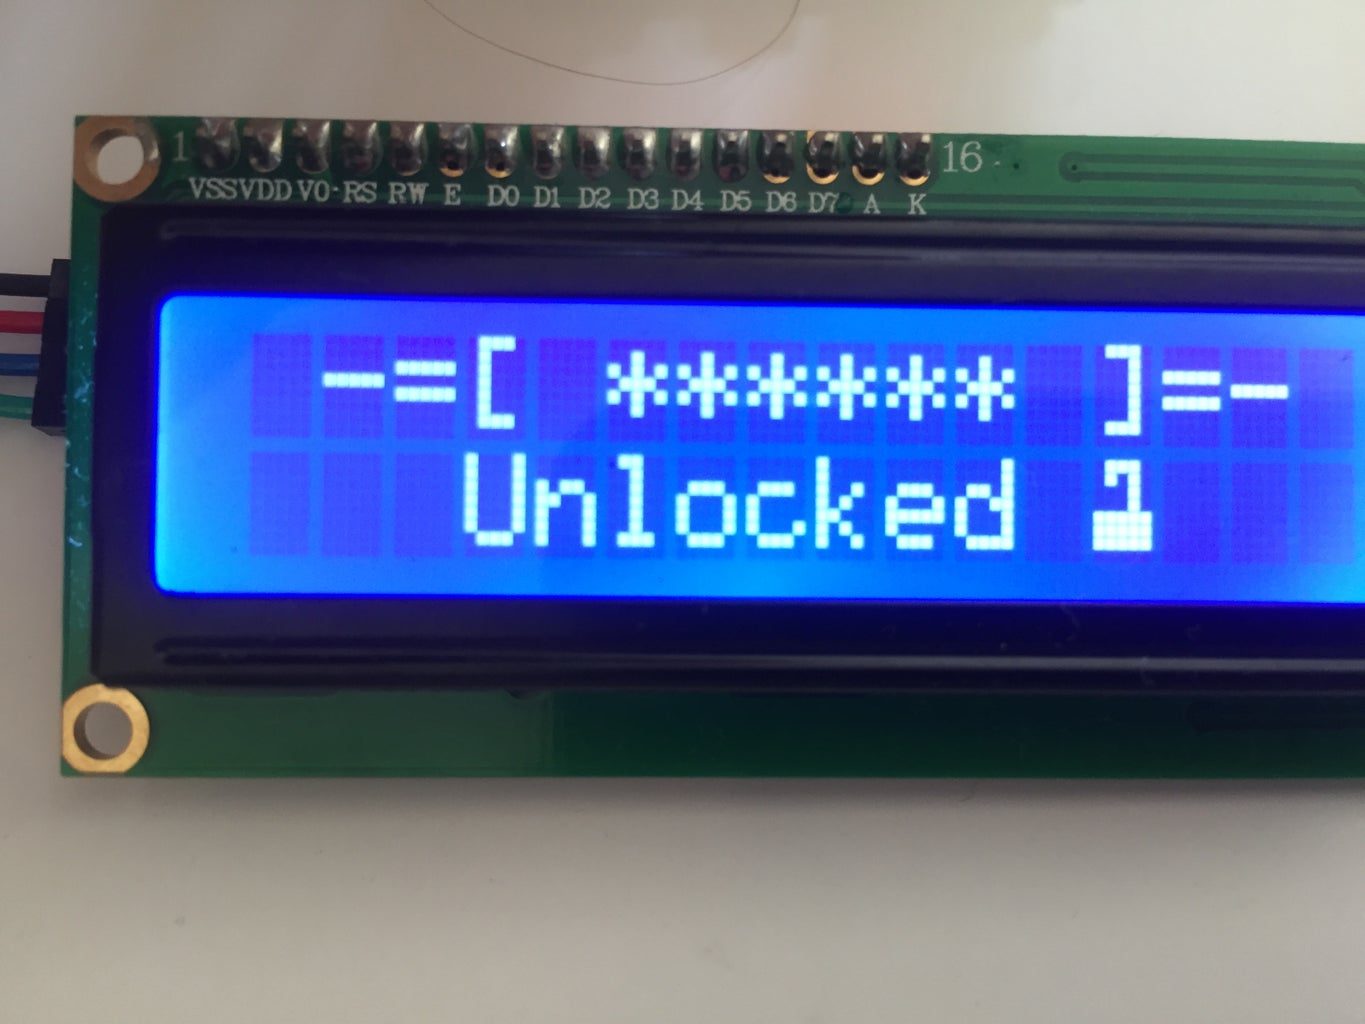
// F Malpartida's NewLiquidCrystal library #define I2C_ADDR 0x3F #define En_pin 2 #define Rw_pin 1 #define Rs_pin 0 #define D4_pin 4 #define D5_pin 5 #define D6_pin 6 #define D7_pin 7 #define BACKLIGHT 3 LiquidCrystal_I2C lcd(I2C_ADDR,En_pin,Rw_pin,Rs_pin,D4_pin,D5_pin,D6_pin,D7_pin); int soundPin = 11; const byte ROWS = 4; const byte COLS = 4; char keys[ROWS][COLS] = { //I basically made it a 12-key keypad, I ignoreed the other 4 keys. {'*','*','*','*'}, {'n','7','4','1'}, {'0','8','5','2'}, {'c','9','6','3'}, }; byte rowPins[ROWS] = {5, 4, 3, 2}; //connect to the row pinouts of the keypad byte colPins[COLS] = {9, 8, 7, 6}; //connect to the column pinouts of the keypad Keypad keypad = Keypad( makeKeymap(keys), rowPins, colPins, ROWS, COLS ); byte locked[8] = { B01110, B01010, B01010, B01010, B11111, B11111, B11111, B00000, }; byte unlocked[8] = { // Cute little custom icons for locked & unlocked. Don't judge- i'm not an artist B01110, B01010, B00010, B00010, B11111, B11111, B11111, B00000, }; void setup() { pinMode(soundPin, OUTPUT); lcd.begin(16,2); lcd.setBacklightPin(BACKLIGHT,POSITIVE); lcd.setBacklight(HIGH); lcd.createChar(0, locked); //The lcd code here sets up the lcd with some minimal "art" for when you enter the code. lcd.createChar(1, unlocked); lcd.home(); lcd.print(" -=[ ]=- "); //"art" lcd.setCursor(4,1); lcd.print("Locked "); lcd.write(byte(0)); Serial.begin(9600); } void dots(int x) { //function for displaying little stars on the screen to track you punching in numbers. x += 4; //positions the cursor correctly lcd.setCursor(x,0); lcd.write("*"); } int a = 0; //ints a through e are never displayed, they are the main components of the combination lock int b = 0; int c = 0; int d = 0; int e = 0; int f = 0; //This is the int for the failsafe mechanism. it adds one everytime something is pressed void abcdef() { //useful function for resetting all the variables to save space a = 0; b = 0; c = 0; d = 0; e = 0; f = 0; } void loop() { char key = keypad.getKey(); if(key != NO_KEY){ if(key == '1' || key == '2' || key == '3' || key == '4' || key == '5' || key == '6' || key == '7' || key == '8' || key == '9' || key == '0'){ f++; //told you! adds one everytime you press a button. dots(f); //calls that useful star displaying function. if(key == '1'){a = 1;} //===== FIRST MOVE ===== !!! NOTICE !!! to edit the combination, change what "key" is equal to in the first through sixth moves if(a == 1 && key == '2'){b = 1;} //===== SECOND MOVE ===== if(b == 1 && key == '3'){c = 1;} //===== THIRD MOVE ===== if(c == 1 && key == '4'){d = 1;} //===== FOURTH MOVE ===== if(d == 1 && key == '5'){e = 1;} //===== FIFTH MOVE ===== if(e == 1 && key == '6'){ //===== SIXTH MOVE ===== All the things in this if statement are just what happan when the correct code is entered. Nothing special here. abcdef(); //resets all variables lcd.setCursor(3,1); lcd.print("Unlocked "); lcd.write(byte(1)); delay(500); for(int i = 5; i < 11; i++){ //this for statement is just a visual aid while it counts down before it locks. I think it looks pretty cool.` lcd.setCursor(i,0); if(i == 5){lcd.write("5");} //coulden't find a way to simplify this. You could add another variable, j, and use this equation: j = 5 - (i - 5), but the problem comes when you try to display it. if(i == 6){lcd.write("4");} if(i == 7){lcd.write("3");} if(i == 8){lcd.write("2");} if(i == 9){lcd.write("1");} if(i == 10){lcd.write("0");} tone(11, 587.33, 250); delay(1000); } lcd.setCursor(5,0); //lines 113 - 118 rewrite "Locked" with the little lock icon. lcd.print(" "); lcd.setCursor(3,1); lcd.print(" Locked "); lcd.write(byte(0)); lcd.write(" "); } //ends what happans when correct code is entered } //ends what happans when any NUMBER buttons get pressed if(key == 'c' && e == 0){ //if you press "c" while solving the combination, it will reset the whole thing. useful for when you get one or more numbers wrong. abcdef(); lcd.setCursor(5,0); lcd.print(" "); } } //ends what happans when ANY button is pressed on the pad Serial.println(f); if(f == 6 && e == 0){ //this is what happans when f gets to six without the code being correctly solved meaning you got the code wrong. Now you don't want to do that... P.S. "&& e == 0" tests for if the code is solved or not. abcdef(); for(int i = 0; i < 3; i++){tone(11, 150, 200);delay(350);} lcd.setCursor(5,0); lcd.print(" "); } } //ends void loop