

Introduction: Armrest Drink Holder


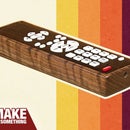
In our house we don't have room for end tables and depending on where you sit, the coffee table can be out of reach. This project can be made in about 2 hours which includes the time it takes to glue and finish. If you like this project visit my woodworking website for more tutorials!
Step 1: Rip Board to Width

I first start out by ripping a 1/2" thick board of red oak on the tablesaw to 4" wide.
Step 2: Crosscuting All the Pieces

Next I cross cut all the pieces I need using my tablesaw sled. The center piece is 4" x 4" and the six outer pieces are 4" x 1 3/4"
Step 3: Drilling the Drink Hole

I then drill a 2 7/8" hole in the center of my middle piece using a large forstner bit. If you don't have a bit this larger you could easily drill a hole with a smaller bit and use a jig saw to expand it.
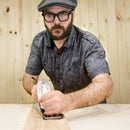
Step 4: Round Over Edges

I'll ease the edges over with a 1/4" round over bit on my router table. If you want your armrest drink holder to look like mine then you'll only want to round over the top of each piece leaving the bottoms as is.
Step 5: Sand and Finish

Before glue-up you'll want to sand and finish all pieces. I used Minwax satin spray lacquer for my finish as it dries quick.
Step 6: Glue-up

I picked up some scrap leather from a local art scrap store. I'll glue all the pieces right on the smooth side. For the glue I used Titebond Quick and Thick but found it didn't work well for this application. Next time I may try wood glue or contact cement.
Step 7: Cutting Leather to Length

Once dry cut the leather to length using an utility knife or exact-o knife.
Step 8: Adding Reinforcement to the Bottom

I dove into this project without a plan and thought maybe the leather would be a strong enough bottom if glued taught. I decided that the bottom needed some reinforcement so I used contact cement to glue another piece of leather to a 1/8" thick piece of red oak.
Step 9: Gluing the Bottom Reinforcement

And finally use contact cement to glue the bottom reinforcement right to the underside of the drink holder and you're done!
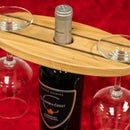
Step 10: You're Finished!


That's it! Add your drink and enjoy! Visit my woodworking website for more projects like this!


