Introduction: Blade B450 Heli Cargo Hook


Summary: In this instructables you get to know how to build a cargo hook for your Blade B450 X or 3D helicopter. Of course, interface adaptions for other heli classes and types are easy to achieve. Get an impression of it by watching the YouTube video: http://www.youtube.com/watch?v=WkS0qComzhA
Material required:
3D printed parts, 2ea nails diameter 2mm, servo and associated link/rods etc, tie wraps and double tape, metal ring, long lane, 1 free channel on the receiver/radio
Step 1: Step1: Printing 3D


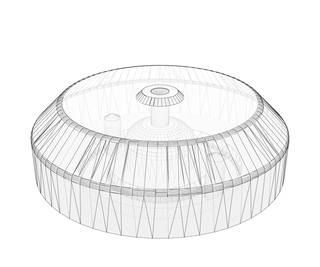
Print your parts with ABS in medium resolution. The base plate was printed in 0,3mm layers but I recommend making them thinner like the hook parts.
Base Plate volume: 21986.54 cube millimeter
Hook part1 volume: 2557.12 cube millimeter
Hook part2 volume: 3461.60 cube millimeter
The pictures do not show the servo arm and servo rod.
You don't own a 3D printer? No problem: go to http://www.3dhubs.com/ , register and select a 3D printer in your neighborhood. Pay online and grab it later. Works fantastic.


Step 2: Step2: Surface Treat Your Parts
Smooth the surface of the parts with an acetone steam bath. Instruction is attached as PDF file. After treatment, drill the holes according to your nail diameter and the servo screws.

Step 3: Step3: Assembly and Installation


Assemble the hook parts and glue the nail head to the base plate. Install the servo and shape the servo rod accordingly. With double tape, I have attached the landing skid to the base plate and secured it with tie wraps.
Now you have two configuration options: place the base plate so the hook is right under the rotor shaft or turn it around by 180 degrees like shown on the pictures. The base plate is attached to the heli frame with double tape as well and secured with tie wraps.
The long lane needs to be at least 1.5meters long.
Step 4: Step4: Testing and Lift-off

PRE-FLIGHT CHECK: After installation check the proper release function of the hook. Maybe you need to adjust the travel of the servo. Be sure you can easily operate the release switch on your radio in a case of emergency (e.g. heavy oscillation of the load). The switch should be near your stick and not somewhere far away from your fingers. Also check if the modification has a negative impact on existing control cables or rod.
PRECAUTION: Be aware an oscillating, heavy load on a short lane can have a severe impact on the stability of your heli. Perform your first flight with an empty tin or light weight object. Depending on your installation configuration: Keep in mind the center of gravity CG of the heli itself and the potential eccentric force from the cargo hook.
BEST PRACTICE: Do not hover too long on the spot. Take off and fly forward slowly but constantly. This can avoid oscillation of the load. Like controlling a crane, placing a cargo needs some practice. Enjoy!
Step 5: UPDATE


I felt I would need a nicer hook so I designed one. Actually the hook is based on the geometry and design of Firebird (http://www.thingiverse.com/thing:14653). So if you like this heli cargo hook, just print the parts from the attached STL files. You don't own a 3D printer? No problem: go to http://www.3dhubs.com/ , register and select a 3D printer in your neighborhood. Pay online and grab it later. Works fantastic.
Note: two parts need to be glued together with acetone. The upper part (grey) will be screwed together. The two cylindrical parts should be printed in the same orientation to match best! The curved hook part should be printed horizontally.