

Introduction: Blink- Your First Arduino Project


Blink is a great first project for Arduino beginners. It is so simple you can do it in ten minutes with this instructable.
Step 1: Materials

Arduino
LED
Arduino Cable
(optional) Two AA batteries
Step 2: Attach Arduino to Computer

Pretty self explanatory...
Step 3: Upload Sketch to Arduino


Open the Arduino sketch drawing program thingy (You can download it from the Arduino website). Copy and paste this code-
/*
Blink
Turns on an LED on for one second, then off for one second, repeatedly.
This example code is in the public domain.
*/
// Pin 13 has an LED connected on most Arduino boards.
// give it a name:
int led = 13;
// the setup routine runs once when you press reset:
void setup() {
// initialize the digital pin as an output.
pinMode(led, OUTPUT);
}
// the loop routine runs over and over again forever:
void loop() {
digitalWrite(led, HIGH); // turn the LED on (HIGH is the voltage level)
delay(1000); // wait for a second
digitalWrite(led, LOW); // turn the LED off by making the voltage LOW
delay(1000); // wait for a second
}
-to the Arduino
I did not make this code /i got it on the Arduino website
Step 4: Plug Your LED In
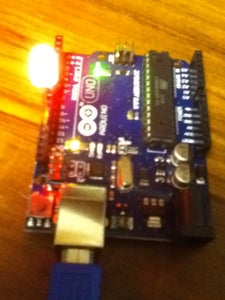
Put the positive terminal of the LED in pin 13 and the negative terminal to GND. Your LED should start blinking away! Congratulate yourself with some snacks.
Step 5: External Battery Power

If you want to power your Arduino using battery power just plug the Negative wire into Ground in the Power section of the Arduino and the Positive one to 5V. Your LED should start blinking if you uploaded the sketch correctly.
Sorry it's crooked I'm to lazy for retakes.
Step 6: Other Stuff...


These are the icons that you will see when your writing a sketch.The checkmark means Verify. Click this if you want to know if your sketch isn't totally messed up. The next icon means Upload. The third one is to start a new sketch and the fourth and fifth are Open and Save Sketch.
It is nice to put rubber or felt "legs" on your Arduino. This just doesn't mess up the Arduino or scratch the surface the Arduino is on.


