

Introduction: Brass Industrial Lamp


In this instructable we will go through the process of creating a pretty cool industrial/steampunk lamp that is controlled by a valve dimmer switch. The cool thing about this project is that while the core build is fairly well essential the actual lamp body is very customizable so you can add your own touches.
I have compiled a list of components in two sections. A lot of the brass fittings and specialty parts I could not find at local stores (or cheaply) so I sourced a lot of stuff online. For ease of use and browsing I have compiled a list of components that will most likely need to be sourced online. I have also included this list as an Excel file:
- Impeller blade x 1 -
- Brass 1-1/4" x 1" female coupling x 1
- Brass 1" nipple 2" length x 1
- Brass hex 1-1/4" x 3/4" x 1
- Brass hex 1-1/4" x 1" x 2
- Brass T 1-1/4" all sides x 1
- Dimmer switch x 1
- Brass Gauge x 1 or 2
- White Metal Gauge x 1 or 2
- Lamp Kit
The rest of the materials can be found at Home Depot or Lowes or other local hardware stores:
- Some sort of epoxy/adhesive. I have had really good results with the Loctite Plumber Marine adhesive. You don't have to mix it and applies and dries clear. Doesn't dry quite as fast as the others either so if you need to readjust or pull apart you can. I have also really enjoyed working with both the Loctite and Gorilla Glue expoxies.
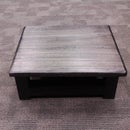
- Wood base. You can either make yourself one or (as I did) pick up a pre-cut and routed square/round/oval piece from a hobby shop. This is part of the project that is up to you. Mine was just a plain pine piece that I stained and finished to my liking. It just needs to be big enough to fit the impeller above (about 4" square).
- Tap/tap wrench and machine screws. The impeller sits sandwiched between the wood base and bell coupling (picture later). To attach this part I used a size 4-40 tap and accompanying screws.
- Wire stripper/cutters - just your favorite wire strippers (nothing fancy needed)
- A handful of butt splices for wire joining.
- Philips head screwdriver
- Flat head screw driver
- Drill bits
- 4 x 3/8bolts and brass acorn nuts.
- 3/8 wrench/socket
- 1/2" waste valve/garden valve
- Flexible tubing (size dependent) 1/4" ID
- Wire wheel for drill
- Copper/metal polish
- 1 - ought steel wool ( 0 steel wool)
- Accompanying copper fittings and pipe. The copper pipe and fittings you choose are completely up to you and the design you would like but if you like to follow along with my lamp acquire the follow fittings:
- 1" copper threaded male
- 1"-3/4"-1" copper tee
- 3/4" 90 degree
- 3/4" to 1/2" female threaded
- 1/2" male to 1/4" female brass bushing
- 1" - 3/4"
- 3/4" tee
This is a lot of materials and can be expensive but this is a rock solid piece that will probably outlast your grandchildren and looks amazing to boot.
Attachments

Step 1: Polish Brass Pieces


First step is to make the dull and blotch looking brass fittings look nice and shiny.
Chuck up a wire brush drill attachment in a drill press or drill. If you are using just a drill clamp your brass fitting in a vise. I am using a drill press and just press the fitting to the brush and it removes the oxidized layer of brass and really cleans everything up.
Brush both the tee and hex bushings. They will clean up nicely.
Additional: you could add a clear coat after cleaning up the metal to preserve shiny-ness.
Step 2: Readying the Base: Feet


Items needed for this step:
Wood base
3/8" x 1/2" length bolts
3/8" brass acorn nuts
5/8" wrench and socket
3/8" (forstner not required) ,
Wrench and socket for bolts and nuts
Drill/drill press
Transfer punch set (optional)
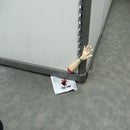
Drill 4 holes on each (or where it please you) of the corners of the wooden base using the 3/8" drill bit. These will be the holes for the 3/8" bolts to go through. Push the bolt up through the hole so the threaded portion is coming through the top of the base. Thread a 3/8 brass acorn nut onto it. Use two wrenches or a socket and wrench to tighten the nut. Put the base on a level surface and try to take any rocking motion out of the base by tightening one or more nuts.
Center your impeller on the base and drill a 3/8" hole through the center. This will allow your cable to come up through the bottom of the base and through the lamp's body.
Step 3: Readying the Base: Adding the Bell Coupling


In this step you will need
4-40 tap and wrench
3/32" drill bit
1/8" drill bit
3/8" forstner
Transfer punch or finishing nail punch
First we need to drill two 1/8" holes in the impeller. As you notice the bell coupling should be fit somewhat snugly in the depression. Chose any points to drill in this depression as long as rim of the bell will be on the other side. Once the two holes are drilled you can use a transfer punch or something sharp to scribe a point onto the rim of the bell coupling. These two marks will indicate where you need to drill.
Second we need to drill two holes on the edge of the bell coupling using our 3/32" drill bit. The holes need to be drilled in about 1/4" or less. This bit gives us a hole that is slightly smaller than a 4-40 screw will fit but the tap will cut out threads in this hole allowing us to thread our machine screws in.. These will then be tapped using a 4-40 taper tap. . If you don't know what tapping is or how to tap I suggest watching this video:
Make sure you can thread in your machine screws through the impeller into the bell coupling
Step 4: Finishing Base


4-40 machine screws
1/8" drill bit
3/8 drill bit
Flathead screw driver
Once we have the bell coupling threaded we need to make holes for the machine screws to go through in the wood base to clamp everything down tight.
First we need to center the impeller on the wood base and use a transfer punch to mark the holes that we drilled in the previous step in the wooden base.
Use a 1/8" drill bit to drill these holes. On the bottom of the base use a bit that is bigger (like a 3/8 ) and drill down a quarter inch or so to counter sink the hole.
Push the two machine screws through the hole and through the holes of the impeller on top. Lining up the holes that were drilled in the bell coupling with the screws coming out of the base can be tricky. You may need to widen the holes drilled in the wooden base to get the screw to line up with the bell coupling holes.In the end your screws should thread into bell coupling snugly and keep the impeller from moving. There should be no play in base assembly.
Congrats. The hardest (i think) part is over. Let us move on.
Step 5: Building Up the Dimmer Unit


Items needed:
2" brass nipple
1-1/4" - 1" hex coupler
1-1/4 - 3/4" hex coupler
1-1/4" tee
Dimmer switch
Knob assembly from 1/2" gate valve
Screw the 1" x 2" brass nipple into the completed base.
Next screw a brass hex 1" threaded to 1 - 1/4" female onto the nipple.
Step 6: Building Up Dimmer


This step might feel questionable while doing it but I have done it a few times and haven't broken anything. Pointing the dimmer switch knob downward first push the dimmer switch into the brass tee piece. The cardstock paper that wraps the switch will get caught on the threads on the way down so it feels like it is stuck; if you keep giving it pressure you will end up with a dimmer switch in the tee.
To get it in, it feels like you might be using too much force but that switch board is pretty strong.
To take the dimmer switch out reverse the process.
Step 7: Getting a Dimmer Knob


This step will require some elbow grease. The knob assembly we want resides in 1/2 and 3/4" gate valves that can be found at home depot. Because we don't need the valve housing itself by the 1/2" valve and save yourself 3 bucks.
The "nut" that we need to force out of the housing is 3/4". I have found that using a 3/4" deep wall socket with a breaker bar is the best way to get this out. I have gotten it with an adjustable wrench but you run a good chance of severely marring the brass beyond use and stripping the "nut"
Loosen the nut on the end of the knob (the one keeping the red handle on). Take the red handle off and then there is a loosely secure nut below that. Take that off.
Vise up the gate valve securely. Even with a 1 foot breaker bar I had to exert a high amount of force to free the threads from whatever industrial thread locker these guys use. This is why I advise not using the adjustable wrench.
Once the knob assembly is free remove the actual gate from the end of the shaft. It can be remove by rotating clockwise off the shaft.
Cut yourself a 2" length of the clear flexi tubing pictured. The ID allows for it snugly fit over the end of the gate valve shaft and (with some epoxy later on) over the dimmer switch knob. Fit the tube over the end of the gate valve shaft as far as you can.
Thread this gate valve into the the 3/4" female to 1 1/4" hex bushing. While the threads of both are not exact they provide a nice snug fit that won't be easily seperated. Perfectly fine for our purposes.
Step 8: Test the Dimmer Tube Fit


Now that you have the gate valve nut in the hex bushing test the fit by screwing it into the side port of the brass tee. Using the top of the brass tee as a guide, fit the tubing over the dimmer switch knob. What you want is the tube to fit almost to the base of the dimmer switch or a little shorter. If it is too short or too long take the gate valve portion out and trim the tube or fit a new tube accordingly.
You'll notice if you turn the knob from side to side you can (for a time) make the dimmer knob turn but we are going to add epoxy later on so there will be no slipping.
Step 9: Continue Building Up


Now this where your creativity can really come into play We now have for the most a working lamp, but we need to build up a cool design and add the light socket.
Continue this by adding another 1-1/4" male to 1" female hex brass bushing.
On top of that starts the copper portion of the lamp. Screw into the bushing a 1" threaded to 1" smooth copper adapter. Use 0-Steel Wool to polish up all copper pieces. This will give it a very nice polished look.
Now using a pipe cutter, hacksaw or bandsaw cut yourself a 1 to 2" section of 1" copper pipe to fit into the part. From there connect the 1" tee with 3/4" port.
Step 10: Continue Building Up.


Cut a 2 or 3" inch piece of 3/4" copper tubing and plug that into the side of the copper tee.
Then add a 3/4 90 degree piece.
Once again cut another 2 or 3" piece of 3/4" tubing and plug that into the angle piece.
Add a 3/4" to 1/2" female copper piece and thread in the brass 1/2" threaded to 1/4" female piece.
Into that brass female piece add your 1/4"NPT threaded gauge.
We are done with the first offshoot.
Step 11: Continuing Upward


Cut another coupling and plug it into the top of the tee from 1" pipe.
On top of this coupling slide on a 1" to 3/4" slip adapter. I am choosing to move from 1" to 3/4" tubing and couplings because the price of 1" pipe and couplings is significantly more expensive with not a whole lot of added visual benefit. You are more than welcome to continue this in 1" if you have the deep pockets.
Cut a 3/4" coupling and plug a 3/4" tee into that. Doing in much the same way as the last step make another offshoot. There is nothing different about this step except that it is pointing down.
Step 12: Making the Lamp Curve


Cut another 3/4" coupling and add that to the top of the tee.
Attach a 90 degree piece
Another coupling
Another 90 degree piece
Another coupling. This coupling will determine how far down the light will hand.
Step 13: Attaching the Lamp Socket


From here we need to take the 3 components from the lamp kit we will need.
The light socket itself (which is two pieces), the threaded rod and the white round thing. There will be three white round things. Pick the one that fits inside the 3/4" pipe loosely.
Start by screwing the threaded rod into the white piece so that the end of the rod is flush with the back end of the white piece.
Then screw the threaded rod into the socket base. Pull the wires through this assembly.
Tie and underwriter knot with the wires so that very little wire is past the knot itself. When we have to compress the assembly if the underwriter knot was made too low there won't be enough space for the socket base to connect to the socket and make a compression fit.
Slide the sheath off the socket itself and loosen both terminal screws on either side.
Now take note that there is a silver and gold terminal. There is also a smooth wire and wire that has a line or bumps running along it. This bumpy wire will be connecting to the silver terminal. Also consult the back of the lamp kit you buy. It should have instructions on specific wiring.
Slide the wire in between the screw and terminal itself and tighten down the screws. The wires should be held in place.
Gently pull the wires at the base of the lamp out so you can eliminate any slack in the wiring and that the whole assembly now slips up into the copper tube and makes a flush connection. The assembly should hang a little bit when left hanging though.
Step 14: Wiring the Dimmer


We will now wire the actual dimmer. There is wiring instructions of the back of the dimmer I included, on how the circuit is completed.
Firstly, unscrew the top most brass hex bushing. Rest the top assembly on something relatively level to this or let it hang.
Find the smooth wire and make a cut in the middle of it. Using your wire strippers strip off a quarter inch or so of insulation to expose the copper beneath.
Take one end of the black wires from the dimmer switch (it doesn't matter which one) and connect the lamp wire to it using a butt splice (pictured) or a twisty cap to connect the two. Clamp the butt splic down hard so the wires stuck inside. For a little bit of added saftey wrap the connection up in electrical tape.
Do this for both sets of wires so that the loop is made. Before assembling everything plug the lamp in and get a light bulb and see if the lamp is working. (you might have to turn the dimmer knob all the way up)
Now gently tuck the splices into the tee and hex bushing and screw everything back together.
Once it is back to together try turning the light on again to make sure none of the splices came loose.
Once you have confirmed the lamp is working the lamp is essentially complete.
Step 15: Epoxy the Knob/and Lamp


Unscrew the gate valve knob from the tee. Mix up a little bit of 2 part epoxy and jam some into the tubing. Make sure at least 1/4" of the tubing is full of epoxy.
Guide the tube back into the tee assembly and fit the epoxy laden tube onto the dimmer switch knob. This will need to cure for a little while (different for different epoxies). You can open the tee back up on the top to make sure you connected with the knob itself. I go on the safe side and let this assembly cure for a couple of hours before fiddling with it.
Now epoxy together all loose copper pipe joints. Mix up the same epoxy and start applying it fairly liberally to all inside faces. Have a rag handy to clean up spills and oozing. Most 2 set epoxies will dry fairly quickly so make sure the lamp is how you want it before committing to epoxying it. Make sure all fittings are facing the right way and all gauges are facing the right way and in the location you want. This is why I left it till the last step. This will be a permanent bond.
The next part that will need to be epoxied in place is the lamp socket.
Utilizing the same epoxy, really gunk up the white piece with all the ridges on it. Slide this piece back into the tube and hold in place till it sets or clamp in place with a tiny quick grip. If you gunk up the white piece enough with epoxy it should form a really nice bond with the inside of the lamp pipe and provide a very stable fixture.
Let it cure for a few hours. You now have a fully completed lamp!

Second Prize in the
Metal Contest

Runner Up in the
Lamps and Lighting


