

Introduction: Clean Leash/Line....Attn: Dog Walkers and Dog Enthusiasts


You know when you're on a hike with your dog and maybe your dog isn't a 100% trained or trustworthy so you keep the leash or a long line on them while they go traipsing through the woods? And of course they get their leash all nasty in the muddy stream or they pee on it, or worse. If you have a dog, then the answer is probably and hopefully YES. Hopefully, because all dogs should go for hikes with their person and get all dirty and roll around in something that we as their people are never happy about. But hey, that's what dogs do.
What I have noticed is that I hate touching their wet and muddy leashes or lines after the hike. The problem is that most leashes are made of materials that absorbs moisture. I noticed while hiking on trails that some of the professional dog walkers use a different kind of line than the ones I'm used to. I inquired about them but found them to be pretty expensive so I did some digging and found the material they used and ordered some along with some hardware.
These lines are great. They are super easy to clean. A wet rag is all you need and it dries within minutes.
The thing is unless you need about 7-14 leashes and lines it may not be economical. Though, if you have friends with dogs, it's an excellent holiday, birthday or spontaneous gift. The line (100ft) was $50 with shipping. The hardware for 10 lines and leashes was roughly $20. So each line was between $5 an $10 depending on how many you make and how long you make them.
This is a super easy project. The hard part for me was finding the material for the line so I'm happy to be passing the information on.
Step 1: Material... and Where to Find It


Materials
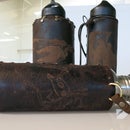
- Biothane line 100 ft. min. purchase (you can look at the photo above to see the information on the specific type of Biothane I used or speak with someone to figure out what is best for you) I chose a thicker line but some prefer a thinner line
- Round eye slide bolt spring swivel snap, nickel plated zinc, 3/8" snap opening, 1/2" eye diameter Clip (3913T12)
- Brass 2- piece press fit tubular rivet. 3/16" diameter, packet of 10 (you will need 2 for each line and 4 for each leash) (96082A100)
- Scissors
- Measuring tape if you want it to be exact
- Leather punch
- Hammer
I purchased the Biothane from:
Fairview Country Sales
Mr. Merle Mast
3062 CR 160
Millersburg OH 44654
Phone: 330-359-1501
Fax: 330-359-0501
But you can check out the Biothane website to find other distributors
http://www.bioplastics.us/contact/bioplastics-nort...
I bought the hardware from McMaster-Carr but you can also find it at a local hardware store
Step 2: Getting Started


- Open up and pull out your line.
- Measure the desired length adding an additional 3" for a line and an additional foot or so for a leash depending on how big you want your handle.
- Cut the ends rounded to give a more manicured look
Step 3: Hole Punching


- Punch two holes about 1/2 " to 3/4" apart and about 3/4" up from one end.
- Fold it over with the clip in place to measure where the second set of holes go. Use a thin pen and mark the holes
- Punch second set of holes
Step 4: Rivets


- Take the female rivet part and push it through the two holes
- On a hard surface like metal or concrete, place the male rivet part into the female and hammer them together
Step 5: Leash

- If you are making a leash instead of a line you are going to follow the same process as the previous page but add another step with the loops. this part really depends on how big of a loop you want
Step 6:


I hope this was useful
Happy dog walking


