

Introduction: Command Shelf for Under 10 Bucks, If You Have Scrap Wood.


I rent an apartment and I like to avoid damaging the walls, but I really wanted a small shelf to keep some often used items off my tiny desk.
This shelf is rated for approximately 20 pounds (~9 KG), and thanks to the magic that is (are?) command strips, when I get ready to move they ought to peel off cleanly.
As a note of reference; about a year ago, I bought a large command hook to hang my college book bag on the wall. I think the hook I was using was rated for 10 pounds, but it held at least 25 pounds with no problems at all, and at the end of the semester, the sticky came right off. So, I am confident that my command shelf will be secure and not damage the wall.
materials needed.
Command hooks, I got a 4 pack of hooks rated at 5 pounds (~2.2 KG) each for $8.88 at the wally world-mart.
Rope (or chain, para cord, high strength fishing line) I happened to have some cotton clothesline cord. I would recommend a natural fiber cord, cotton, hemp, manila, sisal (but I detest working with sisal). I recommend natural fiber cordage because most synthetic ropes have a pretty large stretch factor, especially compared to manila.
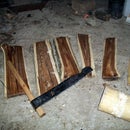
Shelf. I just happen to have some half inch plywood scrap lying around, I was able to get a 20 inch long piece out of it, it's a little less than 9 inches deep. for metric users out there, that's something around 50 CM by 23 CM, or and 12.7 mm thick.
)
You will also need a drill
drill bit, 3/8 (~9.5mm) seems to be a perfect fit for these particular command hooks
saw
a sharp slicing object to cut the rope.
optional:
sander and/or sand paper
stain
wood finish
I intentionally didn't finish this as finish costs extra money and I can always do it later if I feel like it.
Step 1: Measure, Cut; Measure, Drill; Look, Drill


The Pictures say it better I think. I cut the wood to size, held up the command hook and marked the board where the center of the hole should be, then measured it to discover that 3/4" (19.05 mm) back from the edge was about perfect, so I measured in 2 inches (51 mm) from the edges, and 3/4" up from the wall side of the shelf.
I drilled the holes, then drilled two more for the rope, I just eyeballed the location. My final step was to sand the surface from 80 grit up to 120, I seem to be out of 220 sheets for my sander, pro tip, store your sandpaper in a labeled accordion file folder holder.
Step 2: Hang Time


I used some rubbing alcohol to clean the wall to insure good adhesion of the command strips, I placed one hook, then put the board on and used it to line up the second hook, then placed the next two hooks about 20 inches (50 cm) above the first hooks, and slightly wider apart.
I tied a taut-line hitch to top end of the rope (knot instructions on the next step) and two half hitches at the bottom. The taut-line will allow me to adjust the tension in the suspension lines, so I can adjust the shelf to get it nice and level-ish
And, hey, it's a shelf!
I reckon you could use cardboard, MDF, solid wood, etc for the shelf, and chain instead of rope, basically they only thing you might actually need to buy to make this is the command hooks
Step 3: Bonus Knot Trying "instructions"


I say "instructions" because here are some pictures of me walking through the tying of the taut-line hitch. The two half hitch is basically the same minus an inside loop.
I have tons of experience teaching knot tying to various age groups, and I think I'm pretty good at it, but I have no idea how to convey it well over an Instructable without video.
Step 4: Concluding Inconclusive Thoughts, Nothing Is Ever Truly Finished.
Well, I hope this proves useful to some of you, especially students in dorms. Command hooks are a wee bit pricey in my opinion, but not having that extra charge on the school bill, or getting the full deposit back from your rental makes this a potentially useful shelf.
If I were to do this again, I'd get another pack or two of hooks, and make a tiered set of shelves with 4 total hooks for the suspension, and run ropes down from the first set. I think each level should have it's own taut-line or some adjusting method.
I considered using chain, but I wanted to keep this as inexpensive as possible, both for me, and for y'all. to further reduce cost of materials and ease of material procurement, I think a torsion box made, say, and inch thick out of cardboard might be sufficient for a light weight shelf. I might delve into that at some point in the future.
Thank you for reading, I try to answer all questions asked in comments, even from my previous Instructables, so if you have any questions feel free to ask.

Participated in the
Shelving Contest


