

Introduction: Corner Office Desk


When we purchased our home nearly 4 years ago, I purchased an office desk from a local furniture store that I believed would last me a while until I had time to build all new furniture for our house. Well, the rest of the house is pretty much complete so, now it's time to finally get around to my office area! You can view most of those builds here Kev's Woodworks but, some of those builds are also right here on Instructables!
This project will be in the same room as my last Instructable so, will need to match that particular style. There will be some changes and deviations as we go but, we'll get into that in the appropriate step.
A special thanks goes out to Mtairymd who has collaborated on all my Instructables as well as produced most of the plans that you see in my Instructables! He has an amazing Instructables channel of his own and I would encourage you to check it out!
Step 1: Plans


Although bits and pieces of the plans will appear throughout the Instructable, you can get the full set of plans here or on my website.

Step 2: Build Videos
The videos go into a great deal more detail. If you still have questions, you can ask them in this Instructable, ask them on my forum site, or send me an email and I'll be happy to help.
Step 3: Tools, Equipment, and Supplies

Tools:
- Jointer
- Planer
- Table Saw
- Bandsaw
- Miter Saw
- Router (Edge guide as well as straight bits and profile bits)
- Sanders
- Router Plane (Optional)
- Chisels
- Hand saw
- Festool Domino (Optional)
- Oscillating Spindle Sander (Optional)
- Clamps
- HVLP (Optional)
- Grinder with Holy Galahad Shaping Disc (Optional)
Material:
- 4/4 African Mahogany (Or, lumber of choice)
- 8/4 African Mahogany (Or, lumber of choice)
- 6/4 African Mahogany (Or, lumber of choice)
- 1/2" African Mahogany Plywood (Or, species of choice)
- 3/4" Baltic Birch Birch Plywood
- 1/2" Maple
- Blum undermount drawer glides (7 Sets - These can be changed to suit your wants/needs)
- Dominos (Optional)
- Drawer Pulls (7ea - These can be changed to suit your wants/needs)
- 2ea Desktop Power Grommets (Optional)
Finish:
- General Finishes Arm-R-Seal Oil Based Topcoat, 1 Quart, Satin
- General Finishes High Performance Water Based Topcoat, 1 Gallon, Satin
Other:
- Sandpaper - 80, 120, 180 grit
- Glue
- Red and Black Transtint Die (Optional)
- Rubbing Alcohol (Optional)
- West Systems Epoxy (Optional)
Note: The linked items above are affiliate links that help support me and my sites.
Step 4: Milling the Parts


The first step is to mill all the parts to rough sizes. It's best to leave all the parts just a little oversized and do final milling just before using the individual part. This will reduce issues with wood movement during construction.
I nearly always flatten one face and square one edge at the jointer, mill to rough thickness at the planer, and clean up the final edge at the table saw.
Additionally, it's important to label these parts to avoid confusion. I like to affix a piece of blue painter's tape and then write the information on that. Once the milling is complete, I will write that information on the ends so, will never show in the final project.
Step 5: Initial Joinery


With all your rails and legs milled to final size per the plans, layout, and cut all the domino locations in all the rails first. Then, lower the domino depth by 1/8" and cut the corresponding leg dominos. This will ensure the proper set back from the legs to the rails.
We'll route the grooves in a later step once the rails are done. This will ensure that our leg grooves will match up perfectly with the rail grooves.
Step 6: Rails


Before the first dry fit, it's important to groove the rails. Per the plans, all the grooves are 1/4" deep. The only change to this are the grooves in the rails with curves that also accept a panel. Those grooves need to be 1/4" deeper than the apex of the curve. This allows a square panel to fit in the curved part and identifies the actual location on the legs for their grooves in a future step. This was done at the table saw using a dado stack.
See the plans for specific dimensions.
It's important to orient the show face of the rails to the table saw fence when grooving to ensure that all the grooves are in the same location on all the rails.
Step 7: Dry Fit


With all the domino joinery cut and the grooves in the rails, a dry fit is next.
With the dry fit in place, mark the locations on the legs of each groove. Additionally, mark the insides of the rails at the tops of the legs as this will be used in a future step.
Note: As these pieces will be assembled and disassembled several times, the domino makes that fairly easy. However, sometimes those dominos can be difficult to get out of the mortises. I usually keep several dominos on hand that I have sanded their edges slightly to help with this issue. Just be sure to change them out for fresh dominos during the final glue up.
Step 8: Rail Curves


I created templates from 1/4" plywood for all the rails. I used the template to mark out the individual rails and then rough cut them at the bandsaw. These were then cleaned up at the oscillating spindle sander and hand sanded to fine-tune.
Note: If you don't have an oscillating spindle sander, rasps and sanding will also get the job done. These templates could also be used to flush trim each rail with a router and a flush trim bit as well.
Trick: For template routing, many use double sided tape to affix the template to the work piece. Blue painter's tape and CA glue will perform the same function. Simply apply the blue tape to each piece in corresponding locations. Apply CA glue to one of the taped areas and spray the corresponding taped area with activator.
Step 9: Top Leg Notches


Utilizing the marks in a previous step, mark a depth line that is the thickness of the plywood being used for the top. This will complete the corner notch that needs to be removed to accept and support the top panel.
Use a hand saw to cut as much as possible and then clean up with a chisel.
Step 10: Leg Grooves


Utilizing the marks from the dry fit, set up a router and an edge guide to cut a 1/2" groove in the legs to accept the side panels. This groove should be 1/4" deep and match the marks created during the dry fit.
Although the plans give full details for each leg, it's best to do them in the order suggested in this instructable and the videos to account for any error along the way. A misaligned rail to this groove on the leg would not allow the panel to fit and parts would need to be remade.
Step 11: Leg Tapers


The last step with legs is to create the tapers on the bottoms of the legs. Follow the dimensions on the plans for measurements and rough cut them at the band saw. These can be cleaned up in a multitude of ways. Hand plane, disc sander, belt sander, etc.
Note: These could also be cut with a hand saw or by using a taper jig at the table saw.
Step 12: Glue Up


The glue-up should be done in 2 phases. Glue up the side panels first and then glue up the rest of the case. This allows ample working time to ensure that the case is square. Being square will be very important when fitting the drawers.
Titebond 1 was used for this glue-up.
Step 13: Top and Bottom Supports


The top and the bottom are supported by thin strips that are glued and brad nailed to the rails. They are recessed to accept the plywood used for the panel.
The bottom support only requires the inner frame to install the 3/4" Baltic Birch plywood.
The upper frame is a little more complicated in that it has 2 supports added to the perimeter frame. These 2 supports are half-lapped into the sides of the frame approximately 4" from each end.
See the videos and the plans for more details.
Step 14: The Top and Bottom


Taking measurements from your actual cabinet (relative dimensioning), cut the top and the bottom panels to fit your case.
Top - The top is cut from 1/2" African Mahogany (or your choice of material) plywood. This should be a completely square panel that fits perfectly in the leg top notches leaving no gaps.
Bottom - The bottom is cut from 3/4" Baltic Birch plywood and notched to fit around the legs. Although the goal is to have no gaps, this piece will never be seen when completed.
Step 15: Drawer Glides


My hardware of choice was the Blum under-mount with Bluemotion. However, side mount hardware would work just as well as long as you account for different hardware when building your drawers.
Regardless of the hardware you choose, "filler strips" will need to be added to the side panels to mount the hardware to.
These strips are milled to the dimensions called for in the plans.
Note: Although these are the measurements per the plan, your strips could be slightly different. It's important that the strips fit between the legs and are milled to a thickness that is flush with the legs.
Once the pieces fit correctly, they are glued and pin nailed onto the side panels for the location of each drawer per the plan and the drawer glides are mounted flush with the inside of the leg.
Step 16: The Drawers


The drawers are all made from 1/2" maple milled per the plans. The final widths of each drawer are taken directly from the actual piece and not the plans (relative dimensioning).
The 1/4" wide by 1/4" deep groove for the bottom of the drawer is located 1/2" up from the bottom and cut in 2 passes at the table saw. This placement is a requirement for the Blum hardware called for in the plans.
I've inserted a video below on simple drawer construction. The only difference between those drawers and the ones built for this project is that dowels were used instead of screws.
I created my own dowels from African Mahogany using a dowel plate. Standard dowels would work as well. Once the drawer box was constructed, I cut a piece of 1/4" maple plywood for the bottom and secured it at the back with screws.
Note: I never use glue on a drawer bottom so that they can be replaced in the future if needed. If the drawer bottom dados are a little loose causing "drawer rattle", a couple of dabs of hot glue on each side will stop the rattle while still allowing for the bottom to be replaced later if needed.
Step 17: Drawer Hardware


To complete the drawers, Blum hardware was installed using Blum jigs.
Note: Although I used Blum jigs to locate the hardware, there are much less expensive options that work just as well. Using an extra glide set on the drawer, tapping the back with a hammer will give you the rear hole locations. And the catch hardware itself can be used in place of the front jig for those mounting holes.
I prefer to use the more expensive Blum hardware because of the number of adjustments they have to fine tune the fit of the drawer! Additionally, with seasonal wood movement, if there is a drawer that becomes tight in the opening, you can simply adjust the hardware rather than removing the drawer and plaining to fit. This will help keep all the gaps consistent regardless of wood movement.
Step 18: Drawer Fronts


Stock selection for the drawer front material is very important. Whenever possible, I try to grain-match all the drawer fronts. This attention to detail really pays off in the look of the final piece!
I started by fitting each drawer front individually to its particular opening. This allowed me to make any corrections for anything that wasn't perfect with the opening. I then milled them flat and to final thickness at the plainer ensuring they were flush with the bottom rail.
I used precut shims all around the front to ensure the drawer front is located centered in the opening. As this is the driest time of the year for me, I was looking for about 1/8" for the horizontal gaps and 1/6" on the sides. This should allow for seasonal wood movement during the summer months when the wood expands the most.
Note: Wood primarily expands across the grain. This is the reason for the larger horizontal gaps.
Step 19: Installing Drawer Fronts


I didn't film this process on this project because it's exactly the same as the Massive Chest of Drawers Instructable and videos. Apologies for not have the actual pictures from this build but, the steps are the same.
Using the two drawer pull locations, shim (center) the drawer front in the opening creating the desired gaps, pilot drill at the pull locations, and drive screws to secure the drawer front to the drawer box.
Remove the drawer and secure the drawer front from the inside using 1" screws on each side of the drawer box. Center the screws top to bottom, pilot drill, countersink, and drive the screws. The original screws used to secure the drawer front can now be removed.
Note: On this project, I didn't install the handles until after the finish was applied. I backed the original mounting screws out about 1/2 way and used them as temporary drawer pulls.
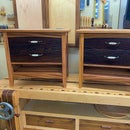
Step 20: Riser Blocks


Riser blocks are added to the top of each cabinet to support the desktop. I chose Wenge as the wood because of its dark color giving the "illusion" that the desktop is floating.
These risers are essentially a picture frame with mitered corners attached to the top of the cabinet. They are sized and centered to leave a 3" reveal all around the top of the cabinet.
Note: I used a custom-made picture frame sled at the table saw to get perfect miters. I previously released an Instructable for building this sled and have added that link here if you wish to build the sled.
https://www.instructables.com/Miter-Sled/
They're attached to the top using a countersunk screw centered on each side.
Note: 2 1/4" screws should be used to ensure that they do not protrude to the inside of the cabinet.
Step 21: Designing the Top


Using a large piece of cardboard, I created the shape that I wanted for my location. This shape will be used as a template in a future step.
Note: The cardboard used came on the plywood purchased for this project to protect it during shipping.
Step 22: The Top Glue Up


After milling the lumber to the thickness called for in the plans, I laid the boards together to find the best possible grain match across the entirety of the top. Once I selected the order of the boards, I used the template to determine the length to cut each board.
Note: All the boards were left extra-long and not cut to the final shape and size until after the glue up.
Dominos were used to ensure the boards remained aligned during the glue up reducing the amount of sanding needed to get the top flat later. A biscuit jointer or dowels would work as well.
I did the glue-up in a few different stages. This was done to ensure that each board added was as flat as possible to the previous board.
Step 23: The Top Shaping


Once the top was glued up and out of clamps, I used a track saw to cut all the straight parts and a jigsaw to cut the curve in the front.
Additionally, I wanted 2 desktop power plugs with USB charging ports. The locations for these on your desk will be dependent on your outlet locations for power. Once mine were located, I used a 2" Forstner bit to drill holes in the top to add these later.
Note: It's important to locate these about 4" (to center of the hole) from the edge of the top to account for the support rail in a future step as well as the mounting hardware.
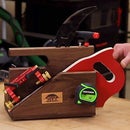
Step 24: Faux Live Edge - Shaping

Using a grinder equipped with a Holy Galahad grinding wheel, I randomly carved and marked the entire front edge of the desktop.
Step 25: Faux Live Edge - Coloring


I mixed a few drops of red transtint die in a few ounces of rubbing alcohol and randomly applied small amounts to the carved surface. I then repeated this step using black transtint die.
Once dry, I sanded the entire front edge with 120 grit paper on a sanding block. This left most of the color in the low-lying areas and removed or faded the color from the high spots as well as removed any sharp edges that may have been created in the carving process.
The final step is to coat the edge with epoxy. Once the epoxy is cured, the entire top was completely sanded starting with 80 grit paper on a random orbit sander and progressing through the grits to 180 grit.
Step 26: Live Edge Shelf - Bonus

In my attempt to clear up the clutter on my new desk, I wanted to create a live edge floating shelf for my laptop, router, and dish TV box.
Utilizing the previous steps and some floating shelf hardware, I created this shelf to go along with the desk.
Step 27: The Finish


My preferred method of finishing fine furniture is to start with an oil-based wipe-on polyurethane. I really like the added coloring from the oil-based material. For this, I use General Finishes Arm-R-Seal in Satin.
After that is fully cured, I sprayed 5 coats of General Finishes High Performance in Satin.
I sand with 400 grit sandpaper between coats.
After the final coat of High Performance is cured, I'll wipe all surfaces with a brown paper bag. This will remove any dust nibs that may have gotten into the finish without damaging the finish.
Step 28: Installing the File Hangers

The file drawers are sized perfectly for hanging file holders. I used a piece of 1/16" thick by 1.5" wide aluminum cut to the length of the inside of the drawer.
After painting the aluminum black, I pilot drilled 4 screws and fastened it to the inside of the drawer ensuring to leave about 1/8" protruding above the top of the drawer.
Step 29: Installing the Desk

Two each 8/4 x 4" boards were milled flat and square and then cut to length. The short side was cut to approximately 50" and the long side to 57". The ends that could potentially be seen were rounded over purely for aesthetic reasons.
These two boards were mounted to the wall using 3" lag bolts at the walls stud locations.
On each long rail, one hole was drilled to attach the desktop to this rail using a 4" long Spax screw.
Note: Be sure to pilot drill the desktop before driving the screw to prevent splitting the top.
Step 30: Closing


As I sit here at this new desk working on this instructable, I can't help but think I should have done this project long ago! No cords in my way, power were I need it, it certainly looks awesome, and it's so much more ergonomically correct than my last desk. Plus, I can actually get my office chair under the desk with its arms still on the chair! And, yes, that last picture was actually taken as I typed this line! And, I'm really liking that floating look from adding the riser blocks!
Super fun project! The power carving certainly opens up some possibilities for some other projects.
I'm looking forward to seeing some of you build this project as well!
Late Update: Now that all the furniture in this room is complete, I wanted to come back and add a quick wrap-up videos I did for the entire room.

First Prize in the
Woodworking Contest


