

Introduction: Cupcake Box (3D Printed)


This is an old project, but I thought it might be nice to share.
I designed and made this box for a school project back in 2012, when 3D printing was a new and mystical technology. I was quite lucky in that my school's IT department bought a MakerBot Thing-O-Matic for us all to use. This cupcake box was my model of choice to print.
Step 1: Model


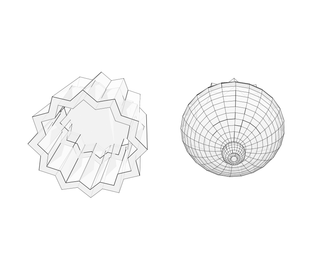
The model comes in two halves– the lid and the base and was designed in SketchUp.
The base is 50mm high and looks like a standard 'crinkly' paper cupcake case. The lid itself is slightly taller, at ≈57mm and is made of a hemisphere of 'cake' with a small 'cherry' on top. The tolerance between the size of the opening of the base and the lid is quite large. The model I used is attached.
Attachments
Step 2: Printing

This is the easy step! Because of the Thing-O-Matic's small build volume, I had to print the base and lid separately. Every 3D printer differs, though. The box is printed in MakerBot's 'natural' ABS filament, and it took about a day to print both halves.
The Thing-O-Matic's layer resolution is quite large, which makes the print somewhat 'bitty', but again, more modern 3D printers will differ. I used a raft (essentially a base lattice) for the prints, which are freestanding and don't need any supporting material.
Step 3: Painting


To paint the model, I used Humbrol model paints from my favourite model shop here in Bristol (Antics).
- Cherry on top
- Cake 'dome'
- Cupcake case
- Inside base
If you need help painting, Humbrol have some useful guides on their website . The model took a couple of coats to get a decent covering. Beware that enamel paints smell quite strong and require something stronger than water (e.g. white spirit) to clean your paintbrushes with afterwards.
Step 4: Finished
If you've been following this Instructable along and have actually now made one, you've finally finished. My cupcake box has been storing paperclips on my desk for the past two years and has served me well. How do you use yours?


