

Introduction: Custom DM Screen


If you've been a Dungeon Master in an RPG, then you have likely formed an opinion about the need or utility of a Screen that separates you and your notes from the players' side of the table. There is a dedicated maker industry to making very cool custom RPG accessories, such as dice vaults, dice towers, and DM Screens. You can see really remarkable examples from vendors .
I always wanted my own custom screen, so decided to give it a try. This instructable outlines my first custom screen, both the construction, but also my tables I use in my games, which you can adapt for yourself or use as inspiration to make your own versions.
Step 1: DM Screens I Have Used


In the Olden Days, adventure modules had the main maps printed on the inside covers of the cardstock sleeve, which was wrapped around a staple-bound booklet containing all the information about the adventure. I spent many an adventure with the module cover stood up between me and the players as my DM screen -- it hid my dice rolls and the adventure booklet, and let me always able to see the map. But Modules and Maps got more complicated (I6 - Ravenloft and TWO covers of maps; the DL Dragonlance modules had POSTER maps!), and the need for a dedicated DM screen that wasn't the module.
DM Screens began to be commercially available, and I show several of the ones I've used in the images above. All of them had things I liked and things I disliked, and have informed how I approached my custom screen. A few comments:
- The first two images are the pre-DM screen era, using an adventure module for a screen (in this case my very well loved copy of B2: The Keep on the Borderlands). The DM side of the module cover had the map, which the players could not see, so you had to have it set up as a screen if you had no other way to hide it!
- The second two images are my 1e DM Screen. It is made of heavy cardstock, and has all the tables you might need (there were a lot in 1e!). The fatal flaw of this screen was when opened up, one set of tables were facing the players!
- The third set of images are my 3e DM Screen. Like the 1e screen it has a vertical profile, which puts a substantial barrier between you and the players. There were still lots of tables, but they all faced the DM!
- The last set of images are the current 5e DM Screen (Reincarnated). All things being equal, this is an excellent Screen. It uses a horizontal profile so lowers the barrier between you and the players, and has great artwork (though I really like the Wilderness Kit DM Screen art too). The only problem I encounter with this screen is it is 4 panels wide (which I like), but on some tables that is too wide.
Having all of these screens over the years has helped me formulate what I wanted in my screen:
- Definitely a horizontal profile
- It would be nice if it could be configurable to 2, 3, or 4 panels
- Custom tables of the information I know I use most at our table
- Way to attach my own notes to the screen
Step 2: Materials
The materials I used for this incarnation of my DM Screen include:
- Colored 1/4" thick MDF panels (I used blue, but toyed with the idea of red too)
- Inlay strips (optional -- used to "fancy" up the player side of the screen)
- Small screw eyes (4 for each panel interface)
- Thin dowels that fit through screw eyes (1/16" dowels used here)
- Small beads (dowel tips)
How you display information on your screen can be done in a variety of ways. I show two options in Step 6 and Step 7. For those steps:
Step 3: Screen Artwork


I contemplated a variety of ways of putting art on the player side of the screen, including glueing and varnishing printed art or maps. In the end, I wanted to learn to work with the inlay strips (practice for a future project) so I opted for figuring out what could be done by carving line art using my X-Carve.
I experimented with a wide variety of motifs. I very quickly decided I didn't like any design that had words on the player side, and eventually settled on not having any design that displayed dice, opting for scenes I could build up.
Easel (the software that drives the X-Carve) has quite a bit of built in artwork in its library, and even more if you have a pro subscription. You can also import line art from external files as well. The panels shown here with the cave and castle were created from the Easel library. The Vines and Sword were drawn in illustrator and combined with the Crown from the Easel library, and the Beholder I worked up in Photoshop and Illustrator.
MDF is a very nice material to use with the X-Carve. Each of the panels took about a hour to carve out using a 1/16" bit. The longest time is carving out vast areas (like the Beholder body). Around each image I carved a shallow channel the width and depth of the inlay strips I had, so I could glue them into the final panel and they would be flush with the surface.
Step 4: Inlay Strips


I had originally thought to use purfling used to inlay patterns on guitars, but Inventables had long inlay strips in various designs and I liked the wide flat strips with a dark center and Maple edges. To inlay the strips I cut lengths with 45-degree corners using my utility knife, then glued them into the MDF using wood glue. The 45-degree cuts make them meet up nicely at the corners of the panels.
Step 5: Finishing


I finished the panels by giving them several coats of spray on gloss polyurethane. This darkens the MDF a bit, and makes it very shiny, but I wanted to make sure they were well protected on their adventures.
Step 6: Display Option 1: Clear Project Folders


I found these Clear Project Folders at Staples (LINK). They are transparent, open on two sides, and the surfaces are smooth enough to use dry erase markers on.
These are a nice option since you can put several sheets in the folder, one behind the other, and swap their order when you need them.
To attach them to the DM Screen, I put several squares of the thin double-sided tape I use in my shop on the back, and stuck them directly to the DM screen, with the long open side facing up. Now I can just display any sheet I like by placing it in the folder.
Step 7: Display Option 2: Magnetic Dry Erase Boards


You can find small dry erase boards meant for use in school classrooms, but with some careful searching you can find ones that are also magnetic. I found a pack Dowling Magnets that are perfect (LINK).
These are great because I can write directly on them, and attach any sheet I want using a small set of magnets. This was the choice I ultimately went with.
To attach the dry erase panels to my screen, I put a small dab of silicone adhesive on each corner and one in the center, then pressed dry erase board down on the panel.
Step 8: Hinges


One of the problems with hard panel DM screens is you have to hinge them somehow. Conventional utility hinges have the barrel sticking out on one side which requires careful planning to avoid. Additionally, with 4 panels you usually have to make compromises in how to fold the screen so you can carry it around when not in use. I settled on a home-brewed mechanical solution: vertical dowels threaded through screw-eyes inserted into the sides of the panels.
In each panel, I insert two small screw-eyes into the panel edge; on the left side of each panel put the screw eyes at slightly different positions than you do on the right side of the panels -- this insures that when two panels are adjacent the screw eyes don't collide. If you are consistent in the placement, it will also let you swap panel positions!
On the end of each dowel, I glued a small wooden bead to give your hand something to grip when assembling the panels together.
To attach two panels, put the edges together, and insert a dowel from the top, threading through each of the four screw eyes. Once the dowel is inserted, the panels will pivot around each other, and stand up at any angle yout want. This arrangement works great because it means I can display my panels in any order I want, or put in different panels if I want to experiment with different art.
To collapse the screen, simply remove the dowels.
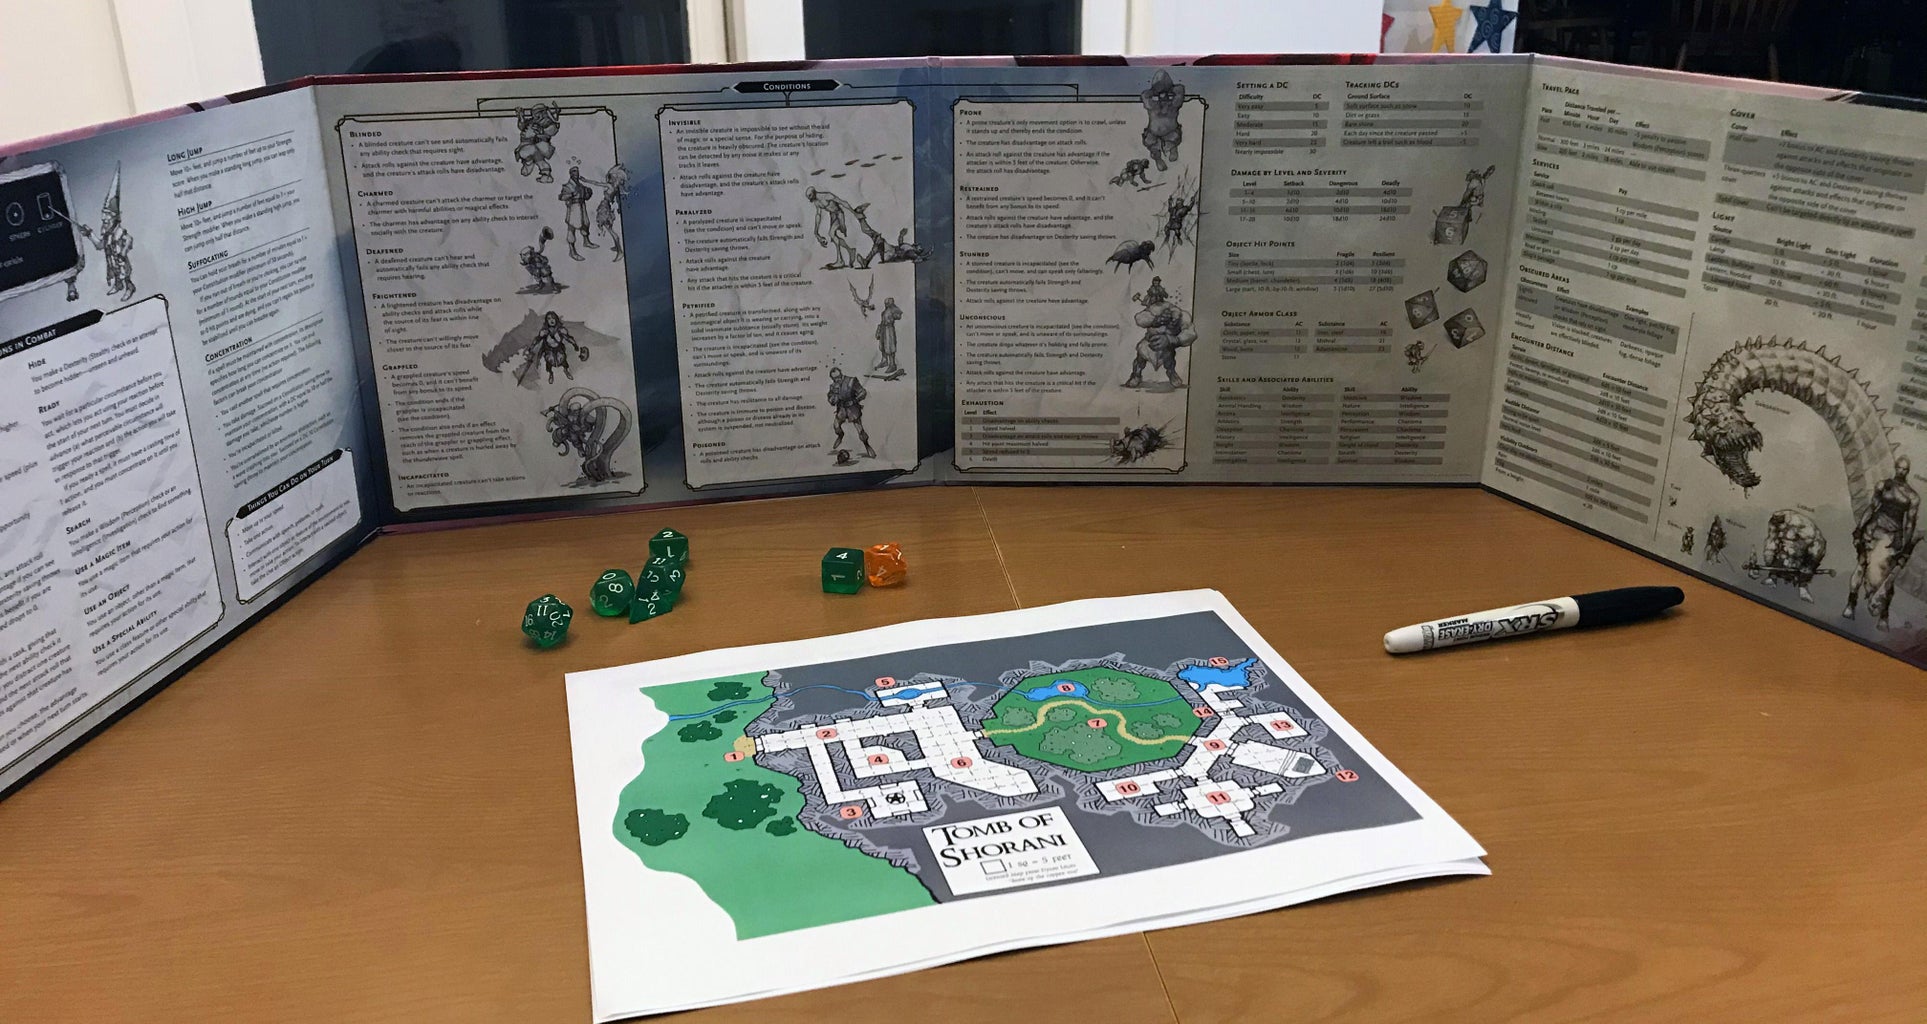
Step 9: Information Tables


One thing you rapidly develop a sense for is what information you always need at your fingertips. On commercial DM Screens, there are definitely tables I use, and others I don't. Moreover, if I look at the pages in my handbooks I've bookmarked, it is also shows what information I find necessary to look up most often.
The advantage of a custom screen is you can design and use your own tables, including the ones you use and getting rid of the ones you don't use! In the images above, I've put screen captures of the 4 standard pages I use; you could easily print these out and simply paper clip them to your commercial screen if you didn't want to make your own custom screen.
I have a variety of auxiliary sheets I use when we're gaming; the last two show my "party tracker" sheet I use, and a hit point tracker sheet for rapidly marking off hit points during combat.
I've attached the PDF files for each of these below.

Step 10: New Initiative Trackers


If you've seen my New Player Kit Instructable, you've seen the Initiative Trackers I use with my players there. Those are designed to be used on a thin DM screen, and did not hang well on the this screen, since it has a substantive width.
The solution was redesign the Initiative Trackers slightly to have two folds, so they have a wide space that fits over the top of the DM Screen. The new file for these trackers is attached below.
Step 11: DM Side


I attach sheets and documents to the screen with small magnets. Magnets in the upper corners seem to be enough, though you could also put some on the bottom corners. I also keep a few extras around for temporarily sticking stuff to the screen.
The magnets on white boards are strong enough I can usually stack two or three sheets on a screen if I like, which is convenient for putting up dungeon maps without taking down my DM tables.
Step 12: Smaller Configurations


Because the hinges can be removed to completely disassemble the screen, you can opt to use smaller configurations if you are playing at a smaller table, or simply don't need the full screen for your game.
Step 13: Time to Game!


This new screen was designed and built during the Coronavirus Pandemic, so at the time of this writing I have yet to use it with my group at the table. But I can't wait to use it when we are all back together again.
I hope this provides a bit of inspiration for you to make your own custom screen. If you have new ideas, or suggestions for tables, or just want to show off your own screens, drop a comment and picture down below.
Happy adventuring!

First Prize in the
Role Playing Game Challenge


