

Introduction: Custom Gaming Mouse


The deal was that last week I killed my MAD CATZ RAT 7. It refused to track at random and would totally crash my machine. I got mine at a crazy deal to start with. Now they were going to be double the money to replace.
So I went and bought a DLAND Professional LED Optical 7200 DPI 7 Button USB Wired Gaming Mouse for $10 it was the only mouse that fit my requirements for features.
I was very impressed with the quality of this mouse considering the cost. There were a few turn offs at first. The mouse was just too slick for my taste. It needed a gripping surface. Plus it lacked the weight I was looking for at about 170-180g. If memory serves me right it was about 110g.
With all that said NEVER buy a MAD CATZ mouse. Apparently the dead tracking is one thing all models have in common no matter the price.
Things you will need:
1. Sandpaper - 200 and 100 grit
2. Hot glue gun
3. Rustoleum Flex-i-dip
4. Plastic spudger tool
5. Mini spatula
6. A dental pick or other sharp to remove excess rubberize material, etc.
Step 1: Disassemble the DLAND Mouse


This guy is pretty straight forward on the disassembly.
1. Take the center panel out of the mouse. Use the spudger and lift straight up.
2. Remove the rear panel (heel) - Also lift this straight up.
3. Lift the click pads (buttons) off the shell. Be gentle.
4. There are three screws on the bottom. One under each of the two rear skate pads and one under the right side of the manufacturer label. I used my spudger to lift the skates and then lifted just the edge of the label to access the screw. Because I was not using new glue care had to be taken to not let debris get on the glued side of the skate pads.
5. Now insert the spudger in the seam at the rear of the mouse and pry it open. Think of the assembly as hinged by the front. After you lift it partly open slide it backwards and the shell will release. There are two tabs at the front that will snap off if you force this part.
6. Now that the shell is free remove the side buttons (they are an assembly), left function button as well as the DPI selector button. For the side ones you have to push them into the shell while lifting them up from the pedestals. The left function button it rides on a triangle that is located by two pins with tab locks. Push the tab aside at each point and lift straight up off the pins. Truth in this step is if you break the tabs you can just super glue it in place when you reassemble it later. The DPI selector is on one pin Slip a thin spatula under the strip and pry up off the pin.
7. Remove the light lenses. These only require a little prying to free them. They are just interference fitted.
Now your upper shell should be naked.
Step 2: Disassemble RAT 7

The RAT 7 is super easy to take apart. It looks complicated, don't let it scare you.
1. Remove the adjustable rear rest and then remove the RAT tool out the back of the mouse.
2. Unscrew the weight holder and the spring. Now look down into the mouse from the rear and you will see there are two Torx screws. Remove these.
3. Flip over the mouse and remove the two screws right and left. I think they are 000 Phillips screws.
4. Use the RAT tool to to remove the pinky sled if it is installed.
5. You can continue to disassemble if you like. I did so i knew where the weight was.
6. Remove the side scroller pot. There are two silver screws holding it in place. Once the screws are out minor wiggling will make it come loose from the roller. The roller stays in the housing. Lift the board straight up and wiggle. There is a socket that the side scroller goes into.
7. Unplug all cables from the main board. A light tug and a wiggle and they should come right out.
8. Remove three (or four) black screws that hold in the main board. At this point the scroll wheel will most likely fall loose too. The main board should be loose at this time. Remove it.
9. Remove the black insulator strip in the bottom and remove the two screws that fasten the housing to the sled.
Like I said you could have stopped at just removing the pinky sled and the weights. It is just nice to know what else is in the RAT 7.
Step 3: Surface Prep and Planning


I decided while 'interviewing' the mouse it's surface was just too slick and the mouse over all seemed too thin.
Then I thought 'I like big mice, I can not lie'
There were features on the RAT 7 that I wanted to bring over to the new mouse. First was the weight. The RAT 7 was almost perfect in it's weight coming in at about 170g. The DLAND came in at about 105g; so we had to make up some weight. I also almost immediately gravitated to the pinky sled when setting up the RAT 7 when I first got it. This feature absolutely had to make the transition. And lastly I need a similar surface I had with the RAT 7. It was just slightly grippy.
After some research I arrived at an aerosol rubberized spray Rustoleum Flexidip.
To get the shell ready for the bonding of the new pinky sled and the rubberized spray you have to sand it on all the surfaces on the top shell part. Do nothing with the lower part of the shell. No modifications will be made to it aside from adding weight.
I started with 100 grit general purpose sand paper and then once the whole shell was scuffed I moved on to 220 grit paper.
Step 4: Fit the Pinky Sled


Here is the order I did it in.
1. Remove all the guts from the lower shell.
2. Snap the upper and lower shell together. This is very important; if you do not use both pieces your pinky sled will not line up at all.
3. On a flat surface start by laying out the parts in a relative orientation to get an idea of what you are going to do next.
After a bit of positioning I was finally able to arrive at a position that would work for me. To resolve some fitment issues I cut the locator pins off the pinky sled with a Dremel as I would not need them in this application.
4. Set your pieces on the table in the positions you want.
5. Use a dot of hot glue to mock up the sled to the shell. Do not use a lot because you will have to pick this out later. And NO the hot glue no matter what kind will hold the sled by itself.
6. While the glue is hot and still soft move the sled and adjust it to the final position. If the glue sets before you can get it in position you can still pick it apart easily and start over.
7. Mix up your epoxy plastic bond in small batches. Like double the size of a pea. You will only be able to apply a small amount and then you will have to wait for it to cure before you add more. Once I had two dots of the epoxy in place I picked out the hot glue. A sharp metal pick did the job nicely. Once you have the hot glue out of the joint continue to apply the epoxy until the joint is full. Make sure to apply just a little more than it takes to fill it. This can be sanded down once it sets. In this step take your time. This is to be a marriage to your hand and you will use it more than any other part of your machine. It took me a full 3 hours to shape the joint exactly the way I wanted. In this I also shaved a bit off the top of the sled to add comfort to the ring finger position.
Once again and very important....
Give the upper shell, right and left mouse buttons and center panel a follow up sanding and then clean with rubbing alcohol.
Step 5: Adding the Rubberized Texture


Follow all the directions on the can of the rubberizer you buy. And please don't try to taste it. Eat crayons; they are safer.
Here I applied very thin coats and followed continually with my heat gun on low. This allowed for rapid drying and quicker working time.
I applied about 4 coats.
As you can see in the photos I could have added a bit more epoxy to make the joint look better. This is a place where automotive body filler may be of use.
Again follow the directions. Wait the specified curing time.
Wash you hands and start into the next step.
Step 6: Adding Weight


As I had indicated in the previous steps the DLAND is a bit on the light side. Truth be it I like my mice about 200g if at all possible. The DLAND started at 110g while the RAT 7 was about 170g. Using every weight I had I was able to bring it up to 142g. Were was the missing weight that I could not transfer? It was the aluminum sled for the RAT 7. It was 39g. This fact still bugs me so I may take this apart and switch the weights for lead ones.
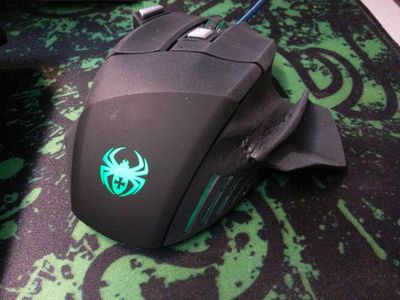
While the inside of the DLAND is rather spacious it also connects the buttons on the main board via long plastic sticks. So the weights had to hot glued on the rear edge of the circuit board (forward of where my pic shows) so it would clear the rear panel (one with the spider on it) when it was installed. Four were installed at the rear of the mouse and one was installed next to the pinky slide (see the last two photos).
The weights were hot glued in place. I figured they would stay where they are because they mouse would never see a rage quit in a game.
Step 7: Final Assembly


Now snap the small buttons into the shell. Take your time because breaking these at this time will make the whole project well..........................suck.
The last two pics show the mouse fitted with the upper pieces installed. This is just a mock check at this point.
1. Install the upper shell to the lower one. Remember those two tabs in the front I mentioned before? This is when you should be looking for them. Slip the top under these two tabs in the front and then close the shells together. You should not have to force any part of this. Make sure all the wires are clear of interference. The board should be on its 4 locator pins solidly.
2. Once the shell is snapped together install the three screws on the bottom and reinstall the skate pads and push the label back down.
4. Flip the mouse over now
5. Install the front two mouse buttons. While doing this click them a few times to make sure they are properly seated before moving on.
6. Install the rear 'spider' panel and then finally install the center panel. The center panel only goes in one way. Look at the shape of the pins. This is the only part that will require some force to lock down.
7. Check all buttons with the mouse unplugged and make sure they feel right. If they don't back up and correct it now.
Step 8: Final Testing

Here I just plugged in the mouse and checked all functions. Don't live with a marginal button; go back and fix it now.
Lastly my boss here giving me the stink eye had to check my work.


