

Introduction: DIY Adjustable Router Template


I made this adjustable router template based on Festool's MFS Multi-Routing Template http://amzn.to/1QaqWtM.
Building this thing out of plywood keeps the cost down SIGNIFICANTLY compared to the commercial aluminum model, but fulfills the same features and works with the same clamps!
Specifically, these clamps:
- The ratchet-style http://amzn.to/1Qarfos
- The screw-style http://amzn.to/1Qarn7j
- (technically, you don't even need these special clamps as long as you don't mind a clamp directly on the surface)
This system offers the most versatile template routing setup that I am aware of, and it can be had with just a couple hours in the shop + a few bucks worth of plywood.
Stuff you'll need to build this:
- Some 3/4" plywood
- 4 of #10-32 x 3/4" machine screws
- 4 of #10-32 hex nuts
- A router (preferable in a router table)
- 1/2" keyhole router bit http://amzn.to/1Qassfp
- 3/8" keyhole router bit http://amzn.to/1o27rGW
- Pocket hole jig http://amzn.to/1QasqEu
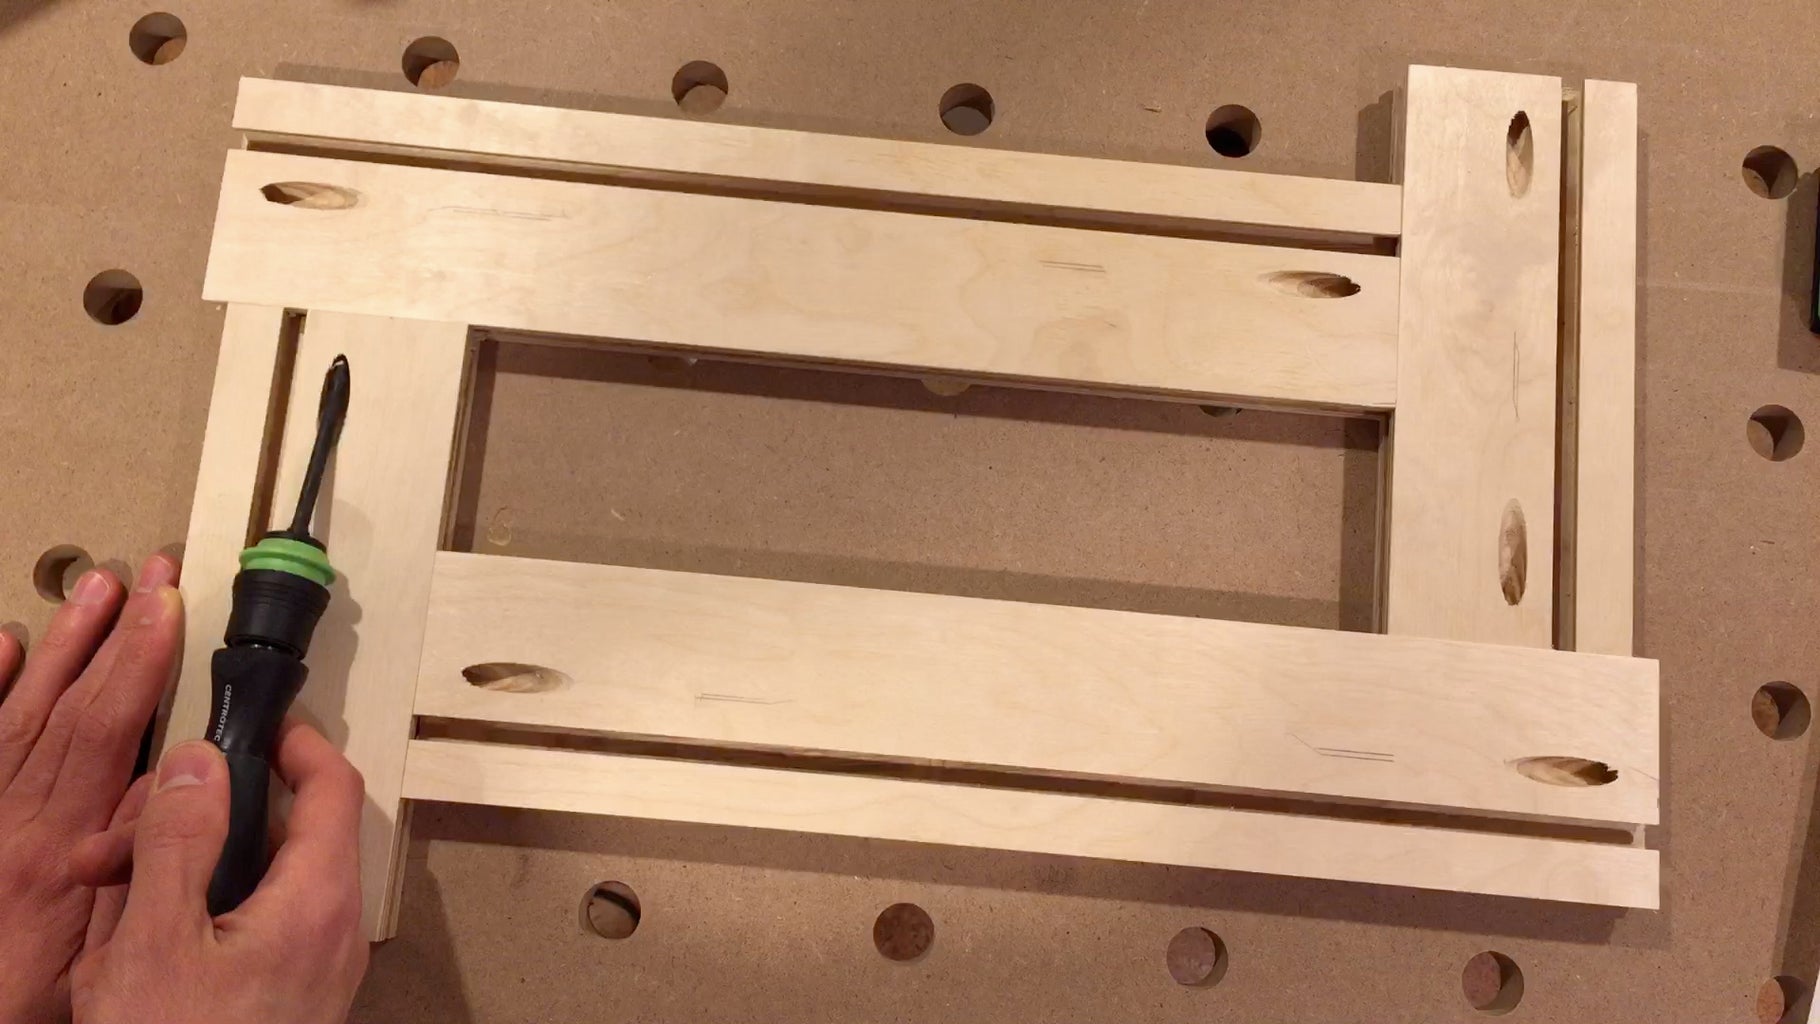
Step 1: How It Works


T-tracks on the edges of each profile provide the size adjustment, and pocket holes (with machine screws) lock in any specific size.
The hardware used is:
- #10-32 x 3/4" machine screws
- #10-32 hex nuts
For a detailed look at the profiles, check out the SketchUp model in the next step!
Step 2: SketchUp Model


Here's a dimensioned view of the profile.
You can download this SketchUp model from my website: http://fasteasysmarttool.com/template/
Step 3: Cut the Plywood

Now to build it! Ripping an 80mm wide board off a sheet of 3/4" plywood.
Step 4: Sand the Plywood

I take this opportunity to smooth the plywood. Best to do this now, as the surface becomes too intricate after all the T-tracks are cut in.
Step 5: Route T-tracks on the Faces


Using the 1/2" keyhole bit (http://amzn.to/1Qassfp), I make T-tracks for the clamps.
Step 6: Test Fit the T-Tracks

The clamp should fit in the slot and slide freely (when not engaged, of course).
Step 7: Route T-Tracks on the Edges


Pockets holes are on a 15° angle, so I set up a 15° fence on the router table for this step.
Now I'm using the 3/8" keyhole bit (http://amzn.to/1o27rGW).
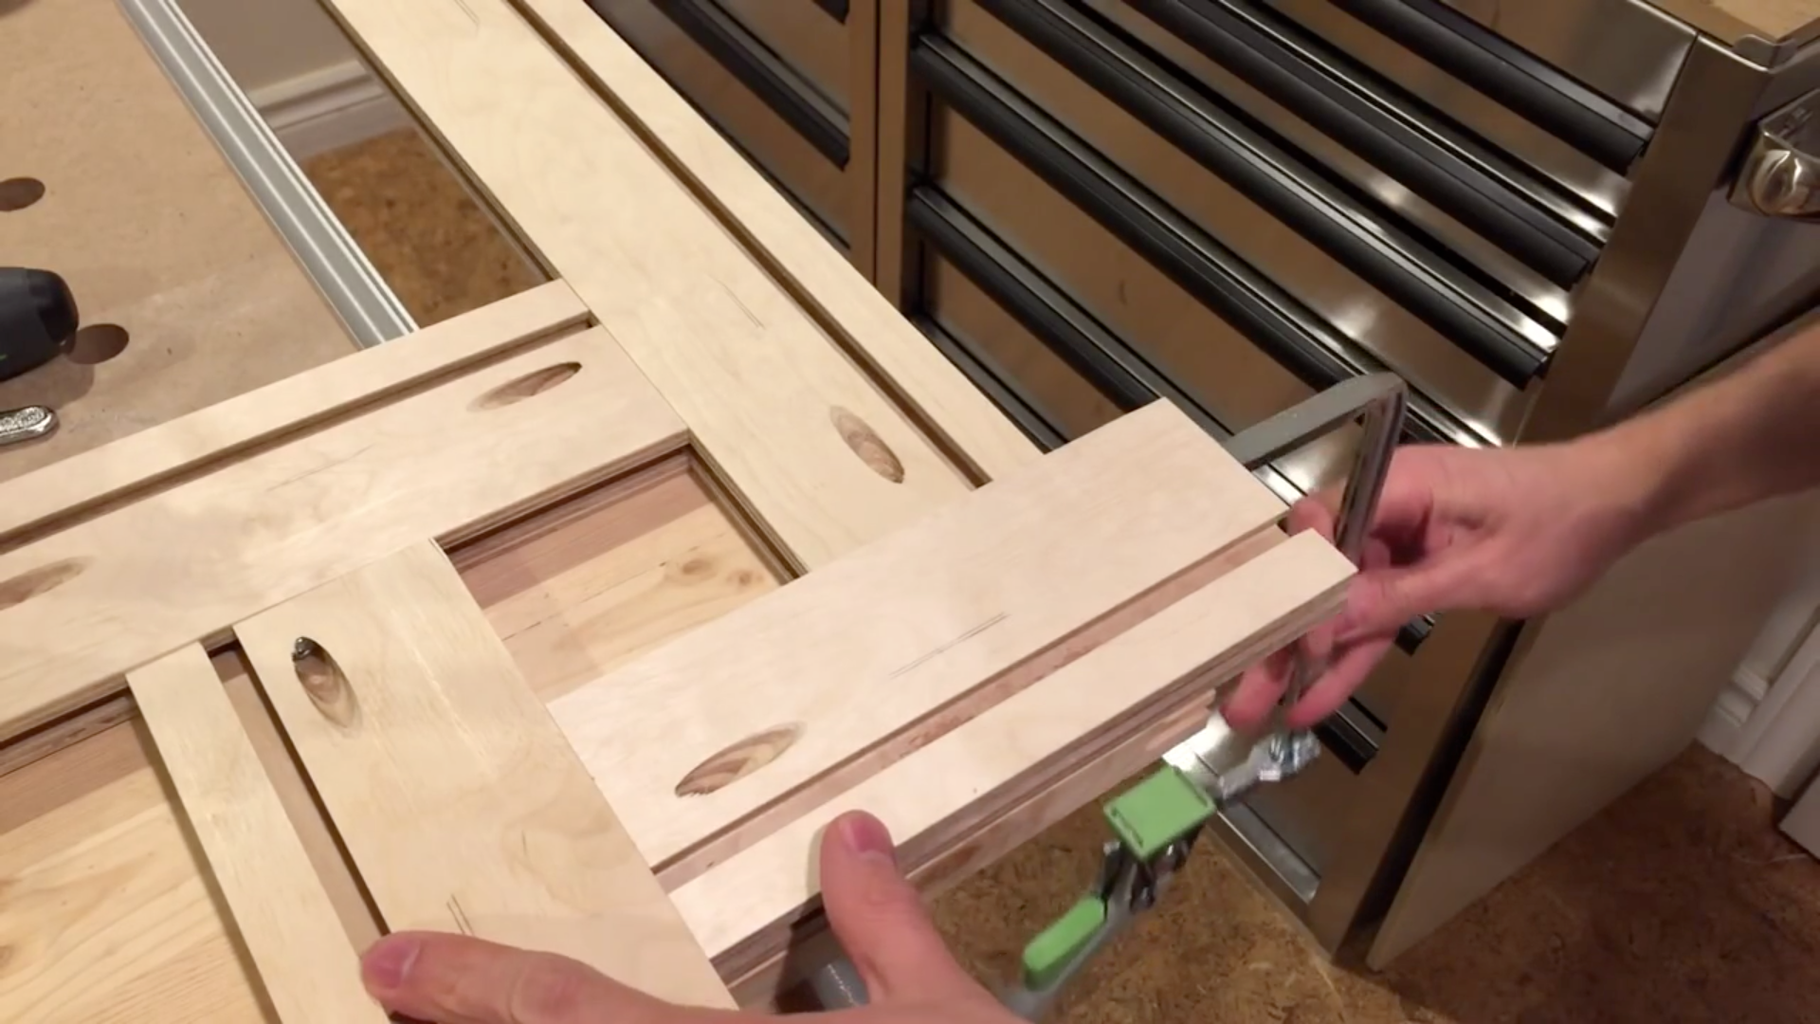
Step 8: Drill Pocket Holes

It may take some trial and error to get the position of the pocket holes just right so it fits in the T-tracks. Just be patient.
Pocket hole jig: http://amzn.to/1QasqEu
Step 9: Cut to Length


Make as many of these as you want, and cut them to any length.
Step 10: Assembled and Complete
You're awesome!
Thanks for reading :)

Participated in the
Plywood Contest


