

Introduction: DIY Cardboard Robot


Create your own cardboard robot to use for display, as a float decoration, or just for a fun creative craft
Step 1: Step 1: Gather Materials


- 2 different sized boxes (1 for the head and 1 for the body).
- various sizes of cardboard tubes.
- 2 packages of aluminium foil. I used the 25' stuff but you could use something wider depending on the size of your box.
- packing and clear tape.
- sharp scissors.
- 1 solo cup.
- plastic bags
- any other materials you want to use to decorate your robot.
Step 2: Step 2: Cover Boxes


Cover each box in a few layers of aluminum foil, using clear tape to secure edges. Ensure all corners are adequately covered. Using multiple layers makes your robot more durable as the aluminum foil can easily rip around the edges.
Step 3: Step 3: Prepare Tubing.

A wide, thick piece of cardboard tubing was used to create the robots arms.
The tube was measured and cut in half length wise using a pair of scissors.
Each piece was covered in aluminium foil and a bag was shoved in each end of the tube to keep the foil from ripping at the ends.
Step 4: Step 4: Attaching the Arms


Figure out where you want the arms to go on your robot body. Use the sides on the boxes that are flat, not the sides that have the flaps overlapping.
Once you know the placement, measure from the top and edges and mark the spot on each side of the box, so that the arms are even.
Peel the aluminium foil back around the spot where you are going to cut.
Cut a hole slightly smaller than your arm in the box. Cut slits outward from the hole.
Stick the arm in the hole you've just created. Position the arm and then use the packing tape to secure it in place.
Step 5: Step 5: Attach Neck to Head

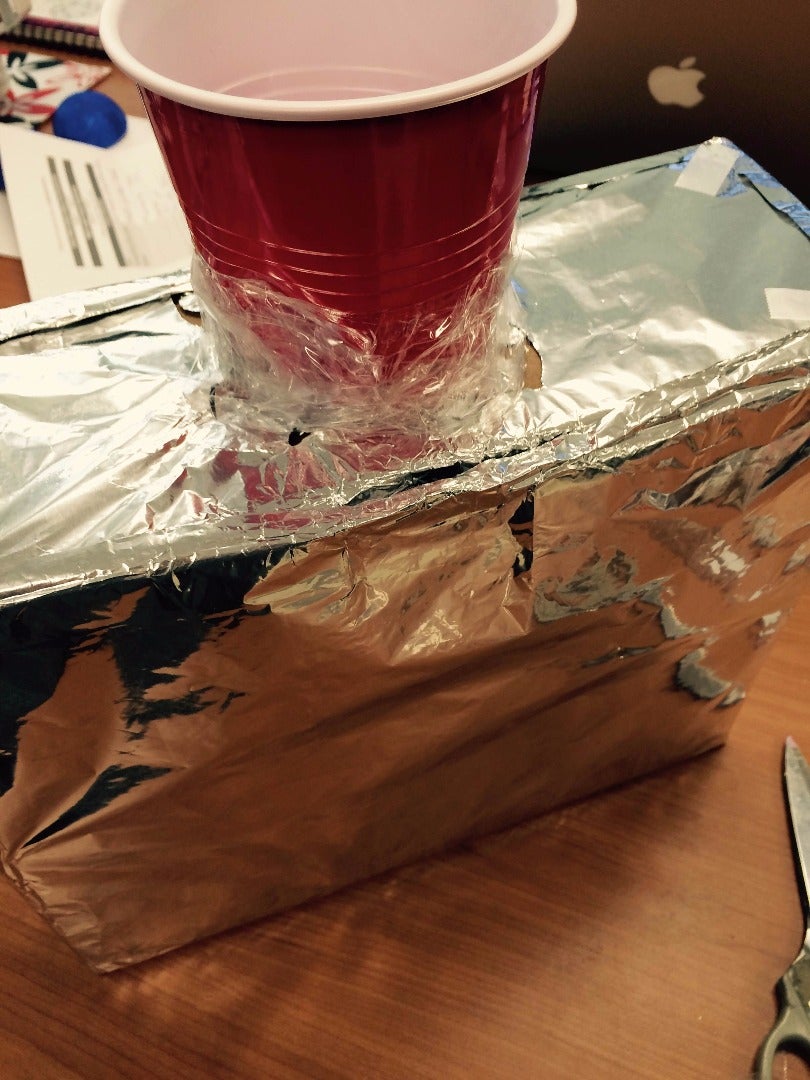

Decide where the neck (solo cup) is going to go on the head.
Once you decide where the neck should be, mark the spot and begin cutting. I made the hole smaller than the solo cup and squished the cup a bit to get it in the hole. This made the neck a bit more secure. Once you have the cup in the hole use the packing tape to secure it in place.
Step 6: Step 6: Attach Head to Body


On the top of your robot body in the centre peel back a small piece of aluminum foil.
The top of the robot body will have the flaps of the cardboard box. Make small cuts where the edges meet and pull them back, so that the tube will fit through. Secure with packing tape.
Wrap plastic bags around the tube and then shove the solo cup attached to the head down over the tube and bags.
Once you have the head positioned how you like, secure with tape.
Step 7: Step 7: Aluminium Foil

Cover the neck and around the arms with aluminium foil, using clear tape to attach.
Step 8: Step 8: Finishing Touches
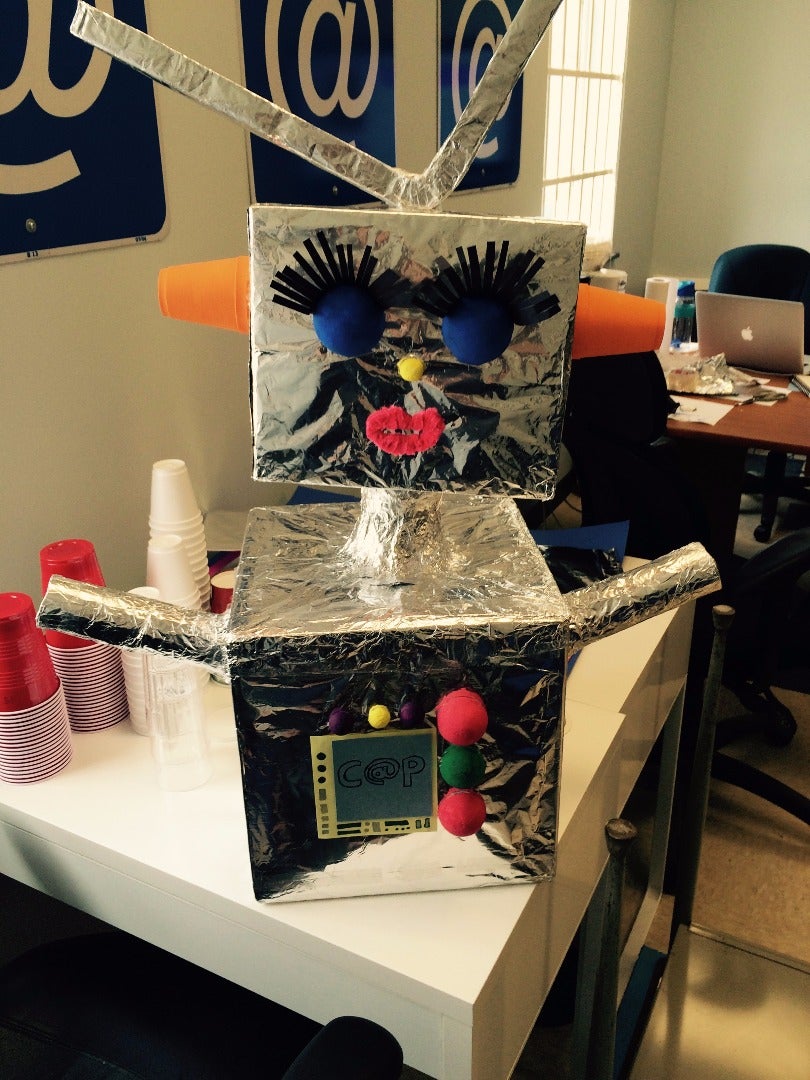
You have now completed the robot, all that is left to do is great creative and decorate!!


