

Introduction: DIY Cheap Safety Alarm System W/ Raspberry - a Smarter Way to Stay Safe


The Internet of Things has made it easier than ever to set up a smart home in which you can remotely control your door locks, lawnmowers, lights, thermostats, vacuums, and even pet feeders, using your smartphone and an app. It's also made it very easy (and relatively affordable) to monitor your home from just about anywhere with a smart security system. Depending on your needs you can go with a system that you monitor yourself, or pay a subscription fee to have your home surveilled 24/7 by professionals who will contact your local fire and police departments when alarms are triggered. Of course, the more coverage you have the more you can expect to pay. Smart security systems are highly customizable and are available as full-blown setups that include professional installation and monitoring. But they all come at a very steep and high price ( more than 100$ to up to thousands of dollars).
But today we wanna offer you to find a way to build and secure your precious stuff or house in an easier and cost effective way. This DIY Alarm system can be easily made using the components and devices which you can easily find in your house or can buy from your electronic store at a very cheap price. Inexpensive yet effective system. Remotely monitor and protect your home or get notified for any movement in your house instantly.And the best part, you can have all this in less than 50$ !!!
This DIY is really great for:
- People who want to secure their house but cannot afford to use really expensive systems.
- DIY enthusiasts who are enthusiastic to challenge their DIY skills into a new undiscovered world
- Tech geeks who want to discover home automation and want to explore their creativity on smart devices and DIY tech
Our DIY projects are specifically aimed to achieve these goals :
- NO PRIOR SKILLS NEEDED - START FRESH - We will guide you through each and every step in detail to ensure you can understand and implement it well.
- NO BIG EXPENSIVE PROJECTS, CHEAP AND EFFECTIVE - Depending on your budget. Use items which you have at home or buy them cheap, try to do all in less than $50! TIME FRIENDLY - Everything can be done in one hour !!
- ROOM FOR CREATIVITY - We always try to leave a room for some creativity so that you can customize this DIY as per your needs and use them effectively.
FEATURES OF SMART ALARM SYSTEM
- Smartphone camera connected online for monitoring your house from anywhere.
- Get even the slightest motions in your house detected
- A smart hub that can send you snapshots of your house when you request for a house view.
- Remotely trigger an alarm when intruders have been spotted in the house or if you want your pet to not go to a particular room
Step 1: NECESSARY COMPONENTS

- Raspberry Pi 2 or 3 - 25$ ~ 35$
- 16Gb SD card - 8$
- An old web camera
- PIR or laser sensor + jumper wires - 9$
- An old unused smartphone
- Philips Hue - optional
Step 2: SETTING UP YOUR PROTA SMART HUB
Prota OS is available on RPi B, B+ 2, 3. It can be downloaded for free from here . It’s only 3.8GB and easy to burn on an SD card (make sure to use a 16GB card).
Follow the instructions of Raspberry Pi foundation to write the OS image on your SD card. Extract the .img file from the zip in your SD card. Download and open Etcher, select the image and the drive and start the process.That’s it!

Once Prota OS is burned on the SD card, you can follow this simple installation guide to set up your Prota hub (less than 1 minute!). You only need to define its name and password, your time zone and your email address and the rest is completely automatic!
That’s it! Within 10 to 15 minutes and with no hassle, you transformed your Raspberry Pi into a Smart Office automation hub!
Step 3: SET UP YOUR PIR SENSOR

As you can see, next to your sensor’s pins are small indications on what each pin is made for:
- OUT is for Data
- VCC is for the current connection
- GND is the ground connection
Simply connect as in the picture below to set properly.

For the quick explanation, the RED cable is connected to a 5V pin (PIN 02), the WHITE cable is connected to a ground pin (PIN 06) and the YELLOW cable is connected to GPIO04 (PIN 05).
You can look at the map below if you need any direction.

Now let’s open Prota Space.
- If you haven’t done it yet, download the GPIO app in App Libraries.
- In GPIO app, click on GPIO 04. Select “Interrupt” and “Pull down”. Click on “set”.

The sensor is now set up.
Move your hand around, you should see notifications of “rising interrupt” on the GPIO app page.
Step 4: SET UP YOUR WEBCAM AND TELEGRAM BOT

Using Prota OS, you can easily turn your webcam into a smart cam for monitoring with Prota OS!
It’s simple and setting up takes just one minute and just a few clicks.
- Plug your old webcam
- Open App Libraries
- Download Webcam app
- Open Webcam app
Now that your webcam is turned into a smart cam, you’ll be able to get a snapshot from it whenever you want, by simply triggering an automation workflow that would take the snapshot and send it to you.
A Telegram Bot is a virtual assistant that you can create on Telegram messenger app. You can use this app to receive snapshots for your office easily through the webcam app.
- Download Telegram app on your smartphone and create an account
- Download Telegram app on your Prota Pi (in App Libraries)
- Open the Telegram app on Prota and click on “Request Authorization”
- Set a name and username for your bot, then click on "Create

Your bot is now created!
Step 5: CONNECT YOUR PHILIPS HUE BULB TO YOUR PROTA PI
You can connect Philips Hue light bulbs to your Prota Pi to scare away a pet or signal blinking light effects when in case someone enters a particular area.
To do so:
- Go to App Libraries and download the Philips Hue app
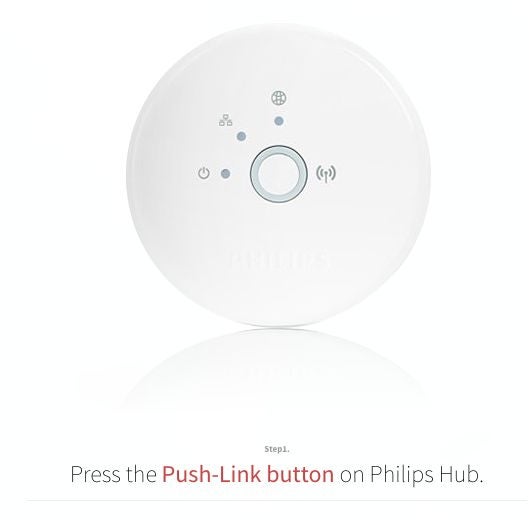
- Open the Philips Hue app. You will be requested to press on the Push-link button of your Philips Hue bulb.
- As soon as you do that, the lights paired to your Hue hub will be integrated into your Prota Pi Hue app.
Make sure your bulbs have been paired with your Hue hub beforehand. You can follow this guide to better understand how to use and pair Hue bulbs with Prota Pi.

Now that it’s paired, you can directly control your Hue bulbs through the app interface.
Step 6: TURN YOUR OLD SMARTPHONE IN a WEBCAM WITH MANYTHING
ManyThing is a web service that allows you to turn any smartphone or tablet into a smart camera by simply adding their app. You can also view a Livestream and record particular moments when motion is detected, and since it is free for one camera, it’s a perfect service for our project!
Any phone that let you install this app can be used, and if it even has a frontal camera, you can make it film both sides, which is a great way to recycle your old smartphone!

- Download the app on iOS or PlayStore depending on the smartphone you will use as a webcam.
- Sign up and choose “Camera” to put it in Webcam mode (Viewer is the mode to use on the device from which you want to monitor).
Your phone will switch to camera mode and as soon as you press the red button it will start recording and live streaming.

- Go to manything.com or open the app on another device to monitor what is happening
- Have a look at the settings to define the threshold of motion (from 1 to 10), the notification and recording parameters and the detection area.
Step 7: CREATE AND CONNECT YOUR IFTTT ACCOUNT

We now need to use IFTTT, the platform that connects smart devices and web services together, to connect our old smartphone and telegram app with your Prota.
- Download the IFTTT app from your Prota’s App Libraries
- Go to IFTTT.com or on the IFTTT app, create an IFTTT account and search for the “Prota” channel. Click on connect and select your Prota to grant access to your Prota Space to the device you’re using.
- Search for the “Manything” channel and connect your Manything account to it
- Search for the “Telegram” channel and connect your Telegram account to it.

Step 8: AUTOMATE USING STORIES AND CREATE IFTTT APPLETS

Now it is time to create all the automation workflows for this project in order for setting up various automation rules for your smart Alarm system!
The core challenge of a perfect automation is writing to have the right automation rules that will fit perfectly suit your needs and all possible situations. Prota OS provides you with a flexible and intuitive tool with Stories app where you can have all sorts of automation rules just perfectly suited to your needs. Combining Stories with IFTTT, it allows you to connect to hundreds of other services and devices together in many different ways.
For Alarm System, we will now create the following automation based on some scenarios:
- When PIR sensor detects a motion in a particular part of your house or a specific location, send a notification to my cell phone and a snapshot of the room to Telegram Bot.
- When my smartphone camera detects motion, send me a notification to my Telegram account with a link to the video.
- When PIR Sensor detects a motion, Send a notification and Light starts to blink.
- Trigger an alarm when intruders have been detected.
1. When PIR sensor detects a motion in a particular part of your house or a specific location, send a notification to my cell phone and a snapshot of the room to Telegram Bot.
This scenario can be used when you are away from your house and you want to set up a trigger for motion detection and get notification and snapshot to check.

- Open Stories app
- Click on + and on “When” to start writing your storyline
- Select “GPIO detects rising interrupt on PIN GPIO 04” as sensor event
- Select “Receive a notification message” as action
- Click on “then” and add “Webcam takes a snapshot” with “Alert !! Motion detected. !!”
- Click on “then” and add “Telegram bot sends a photo”. Select the snapshot file and yourself as recipient

Here is the Story Link.
2. When my smartphone camera detects motion, send me a notification to cell phone and a link to the video to my Telegram account.
- Open IFTTT and start a new applet
- Search Manything and select “Motion detected”. Select your device.
- Search Telegram and select “Send video”. The default message will provide all necessary information, but you can edit it if you want.
- Click on finish

Next, we set up the story for getting a notification on your cell phone instantly.
Here is the story link for it.

For this, we also need to set up an IFTTT applet.
- Open IFTTT and start a new applet
- Search Manything and select “Motion detected”.
- Select your device.
- Search Prota and select “execute storyline”.
- Select the story you created earlier.
- Click on finish.

3. When PIR Sensor detects a motion, Send a notification and Light starts to blink.
This scenario can be good when you want to scare away your pet from a particular room or area or if there is a place in your house where there are dangerous things which are harmful to your children, then this scenario can be really useful for you. You can set up the blinking light for your that area and can scare away your pets as well. Let’s start making the storyline.
- Open Stories app
- Click on + and on “When” to start writing your storyline
- Select “GPIO detects rising interrupt on PIN GPIO 04” as sensor event
- Select “Receive a notification message” as action
- Add Instructions as “Motion detected”
- Click on “AND add another story” and add “Philips hue” with “Alarm rapidly”Here is the cite link for the story.


4. Trigger an alarm when intruders have been detected.
Let’s say that the intruders have gotten to your house and you want them to get frightened as soon as some motion is detected. A good way to frighten them could be either to play a recorded message to make them think someone is present in the house or to play an alarm sound. With IFTTT, you can trigger your phone to play alarm sound!
You can find many alarm sounds for free with a quick research. We recommend you this high pitch sound, highly disturbing! You can edit it to make it last a long time or to add a vocal message.
Download it and put it on the old smartphone that you are using as a camera. Make sure its name is recognizable, such as “High Pitch Alarm”.
For this, we also need to set up an IFTTT applet.
- Open IFTTT and start a new applet
- Search Manything and select “Motion detected”.
- Select your device. Search Android and select “Play a Specific Song”.
- Add the Song name which you added earlier.
- Click on finish.

Step 9: INSTALLATION AND TESTING
Your smart Alarm System is ready. All you need to do now is to install your two cameras( Webcam and Old Smartphone) and the PIR sensor to start using your smart security system.
You can install each of the cameras in different places or parts of your house as per your use and needs, keeping in mind their purpose.
- Your #1 smart cam will be attached to your Raspberry Pi and is great for having an overall view of your room or an area.
- Your #2 smart cam will have to stay plugged into a source of power and can be remotely started. So it is great for monitoring a very specific part that you want to care for the most.
To make it even better, you can hide or mask these cameras as a disguise so that the other people cannot notice it. The webcam can be placed somewhere high on the wall and the smartphone camera can be installed somewhere on the shelf.
This project can be customized as per your needs, depending on what you have at home or even at the office and what use you’re expecting. For Example:
- Use a laser sensor instead of the PIR sensor
- Create more scenarios and add more applets and storylines
- Use other smart devices such as a smoke detector.
- Connect your smartphone to a speaker system using headphone jack or Bluetooth so that the voice sound level can be very high and enough to irritate the intruder.
All it takes is your creativity and the applications of this endless and the advantages for this is priceless.
“Safety comes first. “
We hope this project should have helped you to understand how you can easily add smart alarm and monitoring system at your home and make your life safer.
Do make sure to check out our previous Instructables to get more inspirational ideas. Don’t forget to support us by leaving a “favorite” heart and do keep following us on both Instructables and Twitter.
JOIN OUR BETA PROGRAM TODAY!
You like Prota OS and want to test our newest apps before their release? Subscribe us to enroll and get more information on our Beta program. LIKE OUR PROJECTS? Make your own interesting ideas and show us your creativity!
LIKE OUR PROJECTS?
Make your own interesting ideas and show us your creativity! We are currently running a maker contest until September 30. Show us the creative projects you can do with Prota OS and win amazing prizes! Find out more info about the Maker contest here: https://support.prota.info/hc/en-us/community/topi...

If you have any question, please use our forum!


