

Introduction: DIY – Origami Magic Ball Lamp
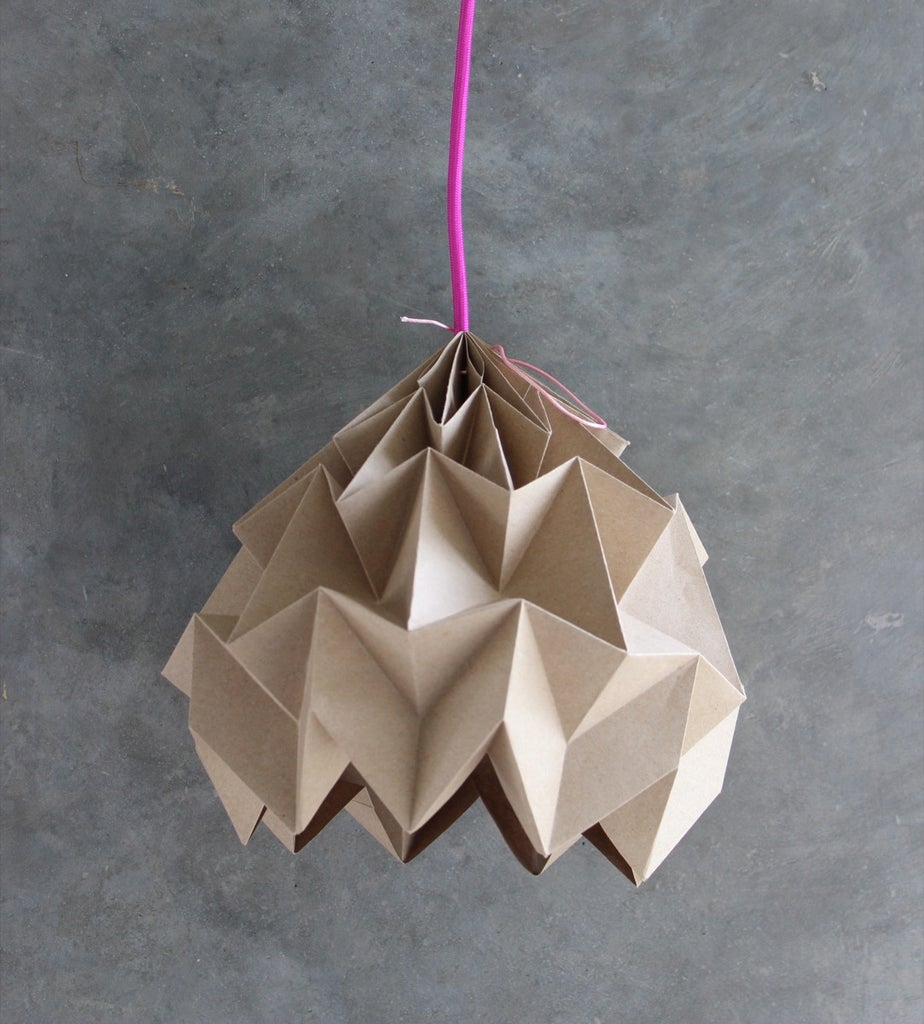


Finally I have finished my first lamp project: Folding lamp with magic balls.
I have dealt me the last two months very intense and so there are many different variants and templates created (which can be seen in my Flickr account). I had to try a lot, with the paper, with different intervals. So I get it, and here are some versions that can be easily implemented.You need:Paper (120 gr. min.)rulerfolding bone (or a needle)gluecable
Step 1:

I started by I folded the paper in half, and then keep going, came to the same wide bars.
After folding, I have drawn using my ruler and the folding bone above the pattern. You can also just fold, but I find it is easier to define the lines in advance, so that the folds will be easier.
Step 2:

Once the lines are drawn, you can start with the folding.
Step 3:

I always start, as can be seen in the picture below, the corners.
Step 4:

Go ahead with the folding as you see it on the picture.
After folding glue the paper at the ends or staple them together, depending on the strength of the paper. At the the end punch some holes for the string. You need this, to hold the Lamp together. (Possibly with a lamp holder)
Step 5:


It is important that you use energy saving lamp with not more than 30 watts or LED lamps in order to prevent the generation of heat. (EU Norm)
More of my instructables on my blog http://ludorn.wordpress.com/

Participated in the
Featured Author Contest: Tarun Upadhyaya


