

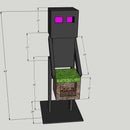
Introduction: DIY Playhouse & Swing Set


Now that my oldest is in elementary school, having her friends come over to play is a new trend. The problem is our backyard had nothing all that fun to play with. So my wife said build a Playhouse! Oh and make sure there’s room enough for friends. And don’t forget swings! So I designed and built this DIY Playhouse With Swing Set!
Playhouse and Swing Set Materials
Estimated Build Cost: $1,000-$1,500 including accessories. Affiliate links to follow. Playhouse Dimensions are roughly: 6’x6’x10′ with an additional 12’x 8′ for the swing set. Total footprint: 8’x20.
Lumber:
- Pressure Treated 2x4x8: 12
- Pressure Treated 2x4x10: 2
- Pressure Treated 2x6x8: 9
- Pressure Treated 2x6x12: 10
- Pressure Treated 2x2x42” Baluster: 34
- Pressure Treated 5/4”x6x12 Decking Board: 12
- Pressure Treated 5/4”x6x16 Decking Board: 2
- Pressure Treated 6x6x10: 4
- Pressure Treated 4x6x8: 1
- Pressure Treated 4x6x12: 1
- Pressure Treated 4x4x823/32” x4x8
- Pressure Treated Plywood: 8¾” x7-1/4×8
- PVC Board: 1¾” x2-1/2×8 PVC Board: 8
Supplies & Materials:
- Simpson Strong Tie Galvanized Standoff 6×6 Post Bases (4)
- Simpson Strong Tie 5/8” Wedge Anchor (4)
- Simpson Strong Tie 2×4 12 Gauge ZMax Medium L Angle (2)
- #10x 2-1/2” Exterior Screws
- Exterior ½” x 4-1/2” lag screws (3 packs of 25)
- Exterior ½” x 6 Carriage Bolt (2)
- ½” hex nuts (1 pack of 50)
- ½” washers (50 pack)
- ½” x 12” Eye Bolt With Nut (1)
- Creative Cedar Designs Climbing Rocks (2 packs)
- Swing N Slide- EZ A-Frame Bracket (1)
- Gorilla Play Sets 16” Metal Safety Handles (1 set)
- BETOOLL Heavy Duty Swing Hangers (2 sets)
- Eastern Jungle Gym Heavy Duty Trapeze Bar
- Eastern Jungle Gym Easy 1-2-3 A-Frame Swing Bracket
- Eastern Jungle Gym Swing
- HugglePod Outdoor Hammock Chair
Cut List
- Pressure Treated 6x6x10” Posts (4)
- Pressure Treated 2x6x69” (7) Base Frame
- Pressure Treated 2x6x72” (2) Base Frame
- Pressure Treated 2x6x58” (2) Inner Base Frame
- Pressure Treated 1x6x69” (9) Decking boards
- Pressure Treated 1x6x58” (2) Decking boards
- Pressure Treated 2x6x69” (7) Upper Frame
- Pressure Treated 2x6x72” (2) Upper Frame
- Pressure Treated 2x6x58” (2) Upper Inside Frame
- Pressure Treated 1x6x69” (9) Upper Decking boards
- Pressure Treated 1x6x58” (2) Upper Decking boards
- Pressure Treated 2x4x65-3/4” (2) Door Frame
- Pressure Treated 2x4x24” (1) Door Header
- Pressure Treated 2x4x58” (4) Lateral Window Support
- Pressure Treated 2x4x17” (8) Window Frame
- Pressure Treated 2x4x31-3/4” (2) Middle Bottom Support
- Pressure Treated 2x4x10” (2) Middle Top Support
- Pressure Treated 2x4x68 (3) Framing
- Pressure Treated 2x6x70-1/2” (2) Railing Support
- Pressure Treated 2x6x69” (1) Railing Support
- Pressure Treated 4x6x41” (2) Ladder Support
- Pressure Treated 2x6x 27-1/2” (2) Railing Support
- Exterior ¾” x 34-1/2” x 66-1/2” plywood sheets (2) for side B
- Exterior ¾” x 35-1/4” x 66-1/2” plywood sheets (2) for side C
- Exterior ¾” x 34-1/2” x 66-1/2” plywood sheets (2) for side D
- Exterior ¾” x 23-1/4” x 66-1/2” plywood sheets (2) for Side A
Step 1: Step 1: Base Frame


Location for the build: The footprint for the Playhouse and swing is large. The playhouse has a footprint of 6’x6’ while the swing base extends 13’ and opens 8’ wide. You will need about 22’x 8’ to fit the entire structure comfortably.
Beam support: If you are sinking your 6x6 support posts into concrete, make sure you take that in consideration for the height of the build. I added footers and then used Simpson Strong Tie Galvanized Standoff Post bases with an inset carriage bolt so I didn’t lose any post height.
Once you have the 6x6x120 support posts, spaced 58” apart, leveled and in place, begin building the base. Cut two 2x6x69” base frames for side B and D. Attach and level to the bottom of the 6x6 posts using a carriage bolt or ½” x 4” lag screws with a washer. I use two screws set diagonal. Cut two 2x6x72” base frames for sides A and C and two more 2x6x69” inner frame supports and attach to both sides of the 6x6 posts using ½” x 10” carriage bolts and washers.
Cut three more 2x6x69” inner frame supports and attach to sides B and D spaced 12-5/8” using ½” x 4” lag screws. Cut two 2x6x58” and tack on the inside of the outer frame support on sides A and C. You can use screws or framing nails for these boards that will supporting the decking.
Step 2: Step 2: Bottom Decking

Cut nine 1x6 decking boards to 69” and two more to 58”. One of the 69” decking boards will need to be ripped down on a table saw to fit. Attach to 2x6 frame using decking screws or nails.
Step 3: Step 3: Top Frame

Similar to the frame in step 1, attach the 2x6x69” frame supports for sides B and D, and attach 66-1/2” from the bottom frame. Cut two 2x6x72” base frames for sides A and C and two more 2x6x69” inner frame supports and attach to both sides of the 6x6 posts using ½” x 10” carriage bolts and washers. Cut three more 2x6x69” inner frame supports and attach to sides B and D spaced 12-5/8” using ½” x 4” lag screws. Cut two 2x6x58” and tack on the inside of the outer frame support on sides A and C.
Step 4: Step 4: Top Decking

Cut nine 1x6 decking boards to 69” and two more to 58”. One of the 69” decking boards will need to be ripped down on a table saw to fit. Attach to 2x6 frame using decking screws or nails.
Step 5: Step 5: Door Framing

For side A, cut two 2x4’s to 65-3/4” for the door frame. Center and space 24” apart and frame into decking on the bottom and inner 2x6 frame on the top. Cut a 24” 2x4 and attach 55-3/4” from the bottom for the top of the door frame.
Step 6: Step 6: Window Framing

For sides B and C (material listed for only one side), cut two 58” 2x4’s for the window lateral supports. Attach bottom window support 31-3/4” from decking. Attach top window support 10” from top. Cut four 2x4x17” supports for window frames. Leaving a 6” centered gap, frame a 17”x17” window frame on either side of center. Cut a 31-3/4” 2x4 and attach bottom middle support. Cut a 10” 2x4 and attach top middle support.
Step 7: Step 7: Ladder Side Framing

Cut three 68” 2x4” for side D supports. Notch the top of each 2x4 to fit on the 2x6 decking frame and attach.
Step 8: Step 8: Top Decking Bottom Support

Cut two 2x6x70-1/2” railing supports and attach using ½”x 4” lag screws to sides A and C, 5-1/2” above the decking frame. Cut one 2x6x69” railing support for side B and attach using ½”x4” lag screws.
Step 9: Step 9: Ladder Support

On side D, cut two 4x6x41” ladder supports. Then attach using L brackets on the outside and lag screws underneath spacing the supports 17” apart. Then cut two 2x6x 27-1/2” railing supports and attach using lag screws. If you have not already evened out the height of the other 6x6’s, trim the tops so all support columns have 41” exposed.
Step 10: Step 10: Window Side Walls

For side B, rip two sheets of ¾” plywood to 66-1/2” x 34-1/2” and attach to framing. For side C cut two sheets of ¾” plywood to 66-1/2” x 35-1/4” and attach to frame overlapping side B and D. Using a reciprocating saw, cut out the window frames.
Step 11: Step 11: Door and Ladder Side Walls

For side D, rip two sheets of ¾” plywood to 66-1/2” x 34-1/2” and attach to framing. For side A, cut two sheets of ¾” x 66-1/2” x 23-1/4” plywood and attach to either side of the door frame. From scrap plywood, cut a 24”x 10” piece and attach above door frame.
Step 12: Step 12: Door and Window Side Trim

Note* Before adding trim in step 12, apply primer and paint to playhouse plywood.
Cut trim from PVC boards for windows, doors and plywood seams. For side A, cut two pieces of ¾”x 2-1/2” to 59” for the door frame and attach with exterior brad nails. Cut additional 24” piece of PVC trim and install for door threshold. Cut and attach 31” piece of 1x8 (3/4”x7-1/2”) PVC board for door header. For side D, cut one piece of ¾”x2-1/2”x 66-1/2” and attach covering plywood seam.
Step 13: Step 13: Window Side Trim

Cut trim from PVC boards for sides B & C. Cut two pieces of ¾”x2-1/2”x 66-1/2” boards and attach covering plywood seam. For window trim, you can cut mitered corners on 4 pieces of ¾”x2-1/2” PVC board at 22” for each window. For a Mission style window with overhang on the top and bottom trim, cut the side pieces at 17” and the top and bottom pieces at 24” and attach.
Step 14: Step 14: Swing Set Arm

Install Eastern Jungle Gym Easy 1-2-3 A-Frame Swing Bracket with 12’ 4x6 and 8’ 4x4’s with included hardware. For stability, add a scrap piece of 2x4 between the 4x4 leg supports. Attach to side B second tier railing using Swing N Slide-EZ A-Frame Bracket.
Step 15: Step 15: Top Railings

Cut two 2x6’s to 69” and attach to sides A and C, spaced 24-1/2” above the bottom rail. Then cut one 2x6 to 72” and attach to side B, overlapping the 69” top rails. Cut two 2x6’s to 27-1/2” and attach as the top rails on side D.
Step 16: Step 16: Railing

Cut 34, 2x2 balusters to 35-1/2”. I left the top cut angled at 45 degrees and the bottom flush cut. Pre-drill to avoid splitting and install 10 each on sides A, B and C and two additional on each section of side D. The balusters should be spaced a standard 4” apart.
Step 17: Step 17: Ladder Supports

Cut two pieces of 2x4 to 11” and attach using lag screws and inset ¾” with a 6-1/2” overhang. Cut the two remaining 2x6’s with mitered ends. Measure 24” from base to get the exact angle for the miters, then mark and cut. Depending on the levelness of your ground, its going to be slightly different for each case. Once you have the 2x6’s cut evenly to sit flush with 2x4’s, attach using ½” x 6” carriage bolts. Only using one carriage bolt will allow the ladder to pivot and settle as needed.
Step 18: Step 18:

Cut 11 pieces of 1x6 decking to 20” and attach to the top of the 2x4 support installed in Step 17, flush with the edge. Then add optional rock-climbing hand holds and then install additional 1x6 ladder rungs spacing 3” per set. Cut one 1x6 to 17” and install on 2x4 support to complete the platform.
Step 19: Extra
For Swing Set: I installed the trapeze bar and swing on the actual build using a pair of BETOOLL Heavy Duty Swing Hangers directly to the underside of the 4x6 support beam. For the HugglePod I attached with a 12” eye bolt.

Participated in the
Backyard Contest


