

Introduction: DIY Power Wheels Steering Knuckles


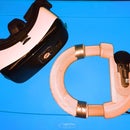


After picking up an old Power Wheels Jeep I found the plastic steering knuckles were warped and made the Jeep unusable. At first I tried to use heat to fix the form on the plastic parts, put they quickly failed again. Then I decided to get serious and put the charcoal foundry to use.
If you're not familiar with a charcoal foundry there are several good instructables and the books that originally got me started in metal castings by David Gingery (see link below) If you enjoy this instructable please consider voting for it in the Black & Decker Fix and Repair contest.
http://www.amazon.com/Charcoal-Foundry-Build-Metal-Working/dp/1878087002
Step 1: Making the Mold


To duplicate the parts, I first needed to get the original plastic parts straightened out. Then I filled in the hollows with clay. This step is optional, but will make removing the original part from the mold much easier.
Once the original parts have been prepped, fill the bottom half of the mold with packed green sand. Then coat the original parts with baby powder and set into the bottom half of the mold. Push the parts in with the 3/8" steel axle in place and pointing up. Press into the sand until the axle is just buried. The top half of the steering knuckle, including the tie rod connection, should be above the sand. leave enough room between the two parts for a 3/4" pipe that will create the fill tunnel.
Before you start the top half of the mold coat the bottom half with baby powder, to help with separation of the two halves. Next place the top half of the mold box in place and begin filling and packing with sand. Now you can loosen up and remove the pipe.
Finally, you need to carefully separate the two halves. If you're successful, then remove the original plastic knuckles from the bottom half of the mold, being careful not to collapse the sand or disturb the axle. The steel axle will stay in place and become permanently fixed to the new aluminum steering knuckles.
You need to cut small channels from the fill hole to the two steering knuckle molds, in order to give the molten aluminum a clear path. Now you can place the top half back to complete the mold.
Step 2: Fire Up the Foundry.


My original foundry was made from a 5 gallon steel bucket. When I pulled it out for this project I found it was completely rusted out and had t build a new one from some sheet metal I had lying around. I kept with the 5 gallon size but upgrading from a shop vac to a small blower motor with a speed controller.
I used a 6" piece of 3" schedule 40 piped with a pipe cap welded on one end to hold the aluminum inside of the foundry.
Allow the charcoal to get going until you have a raging jet of fire coming from the foundry then place the pipe with the aluminum into the foundry and add charcoal around the pipe. Place the lid and wait until the aluminum melts.
Step 3: Time to Cast


After about 10 minutes the aluminum should be completely molten. This step is easy, but it is also the most dangerous so use caution when you remove and pour the aluminum. I used a pair of welding gloves and pliers to pick up the steel pipe and make the pour. Before you pour you need to skim the slag off the top.
Pour in the aluminum until it fills the riser. Allow ample time to cool before trying to remove.
Step 4: Claim Your New Parts


After about 30 minutes the aluminum had solidified, but was still hot. Removal is easy, simply lift your new aluminum steering knuckles out of the mold, using pliers if it is still hot. This will inevitably destroy your mold, but that's okay, we're not mass producing anything here.
You should have two steering knuckles with the embedded steel axles connected to the riser. I used a hack saw to separate the steering knuckles from the riser and a grinder to knock down the rough edges that form where the seam between the two halves of the mold meet. Then just drill a hole for the tie rods and you're ready to go.
Step 5: Reassembly


I assume, if you're considering attempting to cast your own steering knuckles, that the disassembly and reassembly of the steering linkage needs no explanation. Not to say I had an easy time of it, but I managed to figure it out. I did forget to replace the support strut at first, which did not work out well. If you need help with any of the standard Power Wheels stuff, I would recommend visiting Modified Power Wheels forum. They have lots of helpful discussions.

Second Prize in the
Fix & Repair Contest


