

Introduction: DIY T-shirt Design: Spider Web - No Sew


Make your own spider web design by cutting and weaving a T-shirt. Use a black T-shirt and wear a contrasting color underneath like red to make it stand out. Fits the Halloween theme!
I made this shirt at TechShop San Jose. They have an adjustable mannequin dress form that makes it easy to work on the shirt and see how it looks and fits without trying it on.
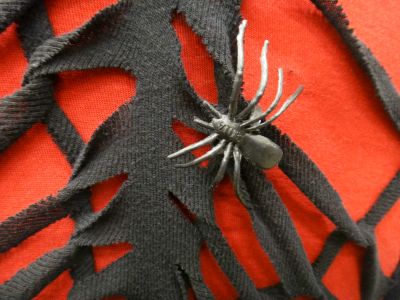
Fashionable outfit idea or costume suggestion: Pair the spider web shirt with a see-through black mesh top underneath to give it a more web-like effect. For gals, wear a flesh-colored nude bra underneath the mesh top and web shirt. Add short black skirt, black fishnet stockings and boots for a goth chick/vampy look! Makeup: white face, thick eyeliner, black lipstick. Attach a plastic spider ring as an accessory to your shirt to complete the look. Or just wear the spider on your finger.
Step 1: Items You Need


- Black T-shirt, or any colored cotton shirt you have available.
- Scissors. Sharp shears work best.
- Pins or safety pins to secure the weave. Or you can use needle & thread. (optional)
- Tape measure (optional)
- Adjustable mannequin dress form (optional). TechShop San Jose has one which I used to make this shirt.
Step 2: Mark and Cut


Use the pins to mark the 6 spokes of the spider web. If you don't have pins, you can try chalk or soap (something that will wash out).
Start with one pin to make the cuts and then go clockwise to the next pin for cuts until you have done all six.
For each pin, fold the shirt along the pin and have the middle of the web positioned on the left side. Cut slits from left to right starting with small slit and making each cut longer and longer, about half an inch apart. Make 9 cuts total. The 9th cut should be shorter than the 8th because there will be a large gap when you do the weave. If you have a big shirt, you may need more than 9 cuts.
Be careful not to cut over another slit and end up with a broken web. To fix a broken web, use safety pins or sew it to reconnect it.
The last spoke is trickier to cut because you need to fold the shirt to line up the cuts from the other spokes. This way you don't cut unevenly into the other spokes.
The cuts from each spoke don't need to be close to each other. It will look good too if you leave blank space between the spokes.
Step 3: Weave


Fit the shirt over the mannequin to start weaving.
Weave one spoke at a time. Stretch the web "threads" to make them thinner and roll up the edges to hide imperfections from cutting.
To weave: Work from the outer edge of the spoke towards the center.
Step 1: Take the outer strip (strip #1) and pull it under the inner strip (strip #2).
Step 2: Still holding onto strip #1, pull it up.
Step 3: Pull strip #2 down and let go of strip #1.
Repeat steps 1-3 with next strip (strip #3)... Strip #2 goes under #3. Then pull #3 through #2 loop.
When you reach the end (middle of the web), use a pin to secure the end of the weave to the shirt. Or you can tie or sew it closed as you go. To tie it into a knot, cut a small hole, cut the last strip in the middle and thread it through the small hole. Tie the ends in a double knot. You can also sew it to secure it. Use black thread.
For a variation:
You can also weave the other direction. Instead of pulling strip #1 under strip #2, you can pull strip #1 over strip #2 and then pull #2 through #1 loop. This is how it looks. The weave is on the "outside" of the shirt.
You can stick to one style of weave for the spider web or mix it up for different looks.
Once you've weaved all the spokes, your spider web is finished.
Add a plastic spider ring as an accessory to your shirt to complete the look! Or you can just wear the spider on your finger.

Participated in the
Halloween Props Contest


