

Introduction: Dakota Fire Hole


A Dakota Fire Hole is an underground fire that is ideal for heat, stealth camping, and high winds. Because the fire is underground, the flame doesn't have contact with the cold air so the ground acts as insulation for the fire making it hotter than a normal one. The fire is in the ground so the flames are not as visible from ground level which reduces the visibility of the fire. Because the fire is hard to be seen from a distance, it is a good option if you don't want others to see the flame. With a normal fire on the surface, it is exposed to the wind; strong winds can make keeping a fire difficult. Since the Dakota Hole Fire is underground, it is shielded from the wind. Because the fire is underground, there is not as much oxygen for the combustion process; a second hole that connects to the hole with the fire in it is used as an oxygen supplier to the flame.
Step 1: Finding a Location


You need to find a good location to build your Dakota Fire Hole. Any flat surface will work great for the making of the Dakota Fire Hole. Once you have decided on your location, you need to clear the area of any vegetation and debris such as weeds, dead leaves, and rocks.
Step 2: Digging the Fire Hole

The size and depth of the hole depends on how big you want your fire to be. A deeper hole will let less light be visible from the surface and the flame will be more contained. A wider hole means you can make a bigger fire. Once you have made your decision, start digging!
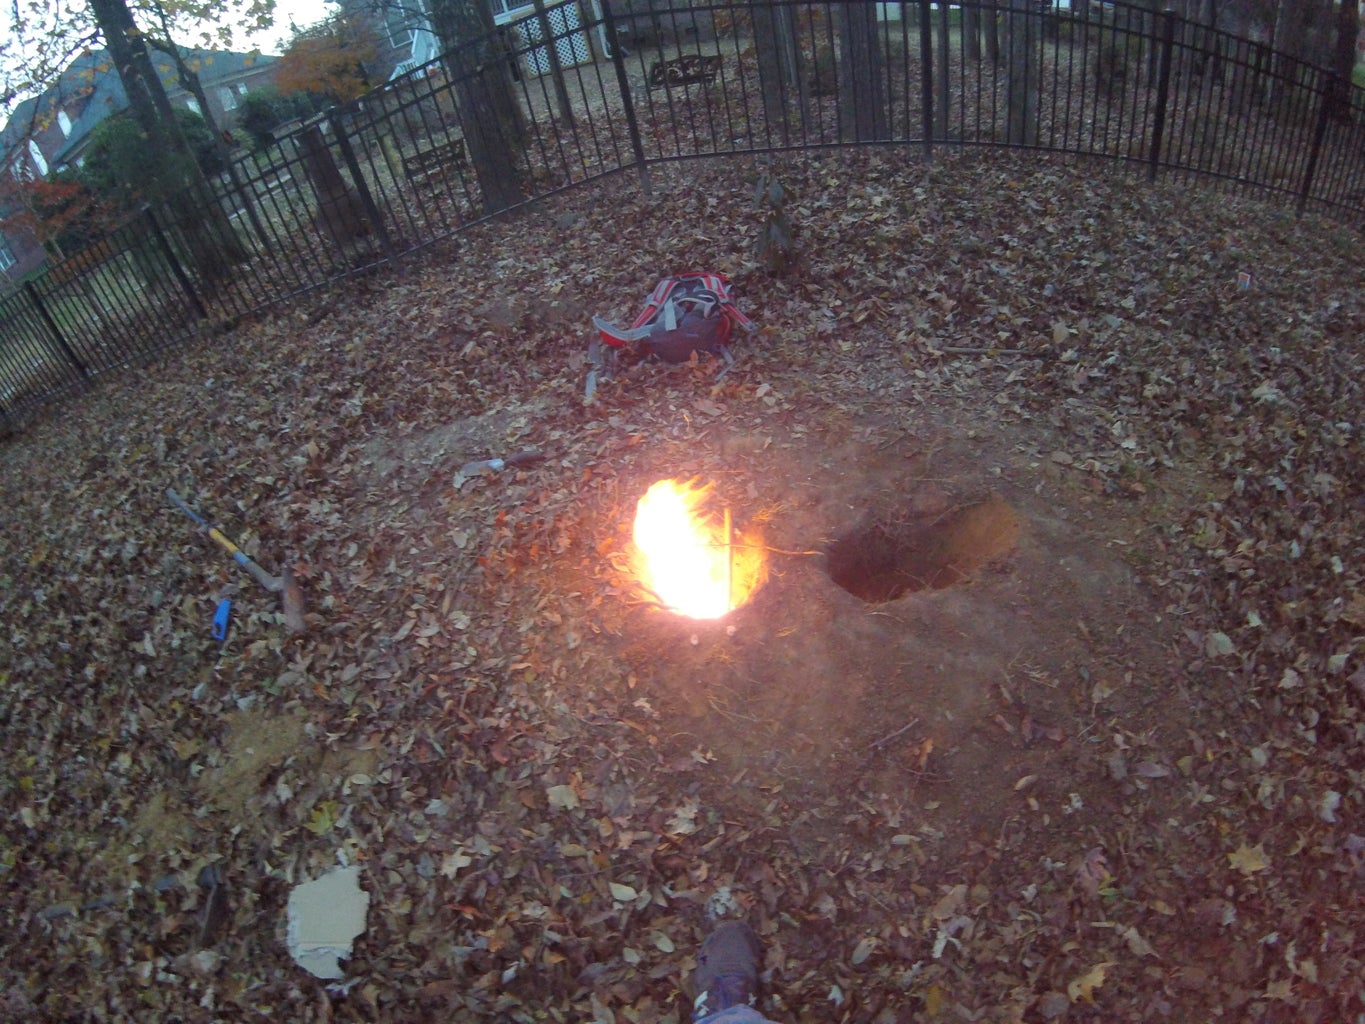
Step 3: Oxygen Supply Hole


When you have finished making the hole that the fire will be in, it is time to dig a second hole to supply the fire with oxygen. The second hole should be approximately a foot away from the fire hole; it doesn't have to be as big as the fire containing hole. If you dig the hole at an angle, it will be easier to connect the holes later because you will have a better position for digging the connection tunnel.
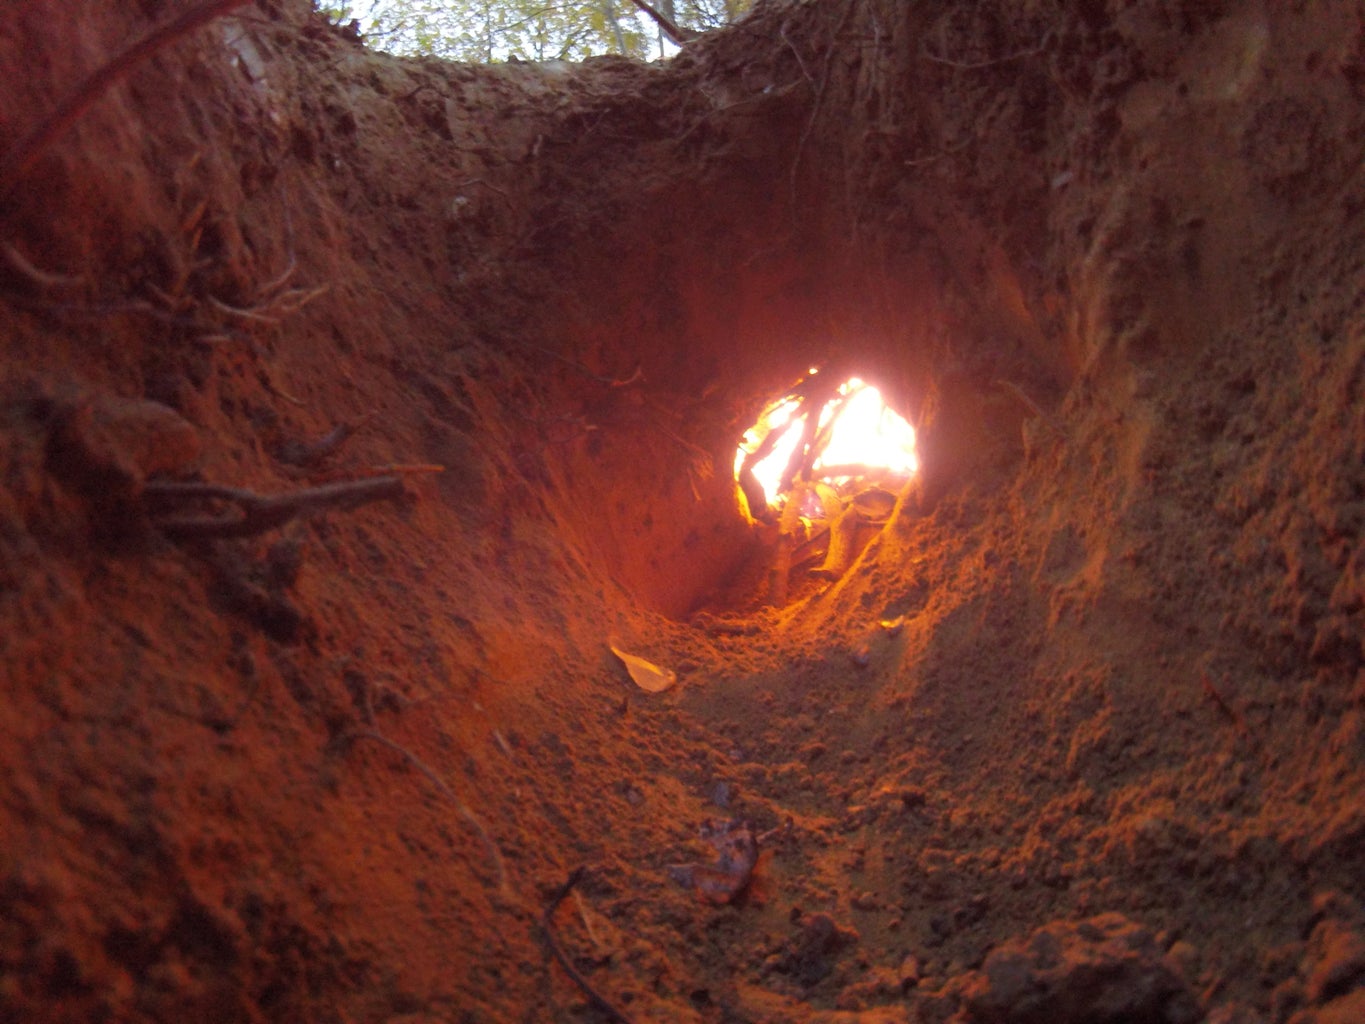
Step 4: The Connection Tunnel

Once you have dug both holes, it is time to connect the two. You will need to kneel on the ground for this step to have a better digging position. The connection hole should be about as big as your fist; This will be where the oxygen reaches the flame so make sure it is the proper size or else your fire will not be properly fueled.
Step 5: Starting the Fire

Starting a Dakota Hole Fire follows the same principles of fire building as a regular fire would. Gather small dry materials to start the fire and gather kindling to build the fire. Soon you will be able to progress to larger sticks which burn slower.
Step 6: Woohoo! You Have Built a Dakota Hole Fire!


It's time to sit by the fire and relax; You don't have to worry about the wind distinguishing the fire. Enjoy the heat and tell some campfire songs!

Runner Up in the
Brave the Elements 2016


