

Introduction: Design Thinking and Tinkercad


This lesson is designed to take place in a middle school classroom but could be easily adapted for any level K-12. The concepts presented have been created around the middle school Next Generation Science Standards, specifically:
Students who demonstrate understanding can:
MS-ETS1-1.Define the criteria and constraints of a design problem with sufficient precision to ensure a successful solution, taking into account relevant scientific principles and potential impacts on people and the natural environment that may limit possible solutions.
MS-ETS1-2.Evaluate competing design solutions based on jointly developed and agreed-upon design criteria.using a systematic process to determine how well they meet the criteria and constraints of the problem.
MS-ETS1-3.Analyze data from tests to determine similarities and differences among several design solutions to identify the best characteristics of each that can be combined into a new solution to better meet the criteria for success.
MS-ETS1-4.Develop a model to generate data for iterative testing and modification of a proposed object, tool, or process such that an optimal design can be achieved.
This unit and the accompanying activities would generally take around 3-5 class periods to complete.
Supplies
Mockups Card Game
Student Chromebooks, laptops, or iPads.
Internet Access
Step 1: Learning About Design Empathy


In this activity. You will be teaching the design process with empathy added to it.
Start by showing this slideshow:
Referenced in the slideshow is a simple card game. You can buy a set of Mockups cards that have been designed for this purpose off of Amazon: https://amzn.to/2MuiyXl
Or else use a similar version that I came up with for free: http://bit.ly/2IEQAXL
The basic premise to the game is to work in small groups and select a design scenario at random. Groups will work on coming up with a solution to their problem by using all the items on the cards.
Step 2: Using TinkerCad to Design


Once each group has come up with a general design for their product, they will create a digital prototype using Tinkercad. There are some great tutorials that pop up when you first start an account on Tinkercad as well as the Tinkercad blog that is full of resources.
You also might find that the kids learn better by just getting into the software. If you are able to explain the function of joining solids to form a larger solid and joining a hole to a solid to form a cutout, the rest will come fairly intuitively. I usually like to let kids play and then once they have a feel for the program, interject some tips and different design methods as we go.
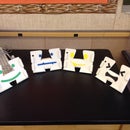
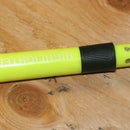
Checkout a few of the examples that some middle schoolers came up with on the cards that they drew.
Step 3: Using CoSpaces to Showcase Your Designs

The last activity in this lesson deals with showcasing your prototype to others. Remember that the NGS Standards for Engineering Design speak to the evaluative and the iterative process of design. This would be a really easy way to have the kids analyze, critique, and get feedback on their designs.
We will use Cospaces to allow the students the opportunity to view their designs using a VR headset or Google Cardboard. The Cospaces app is available for Android, IOS, Oculus Go, Gear VR, and even Oculus Quest by using the Oculus Quest Browser and Firefox Reality.
This short video explains the process of bringing designs into CoSpaces.
Step 4: Final Tips and Considerations

TinkerCad is completely free and there are a few different account options. You can create a TinkerCad classroom and monitor your student accounts (great option for middle school), you can also sign in using social providers such as Google if the students already have a school gsuite account.
CoSpaces has a free trial version as well as a paid version. If you would like to go the free option, it is recommended that you set up a class as the instructor. You will get 29 free seats in the class and can even push the assignment to the kids. I have found the absolute easiest way to share CoSpaces on a VR device is through logging into your teacher dashboard on the app. This way you can quickly navigate between all of the published "spaces" that the kids create to have kids get in and out of the viewer without too many problems.
I'm a huge fan of 3d design and 3d printing in the classroom. By showcasing the product virtually, it scales up really easily to fit the needs of an entire class. Feel free to reach out in the comments if you have questions or want to share your experience running this lesson. :)

Participated in the
Teacher Contest


