

Introduction: Design and Build Steps for a Prefab Shed


During a recent move, I took down my prefab steel shed and brought it to the new house. In our old place, the platform the shed was built on was flimsy and placed directly on the ground. Here, I wanted something sturdier and more weatherproof, so I put it up on piers, level, plumb, and square.
It was also 20" off the ground.
This made it hard to get in and out of the shed, so I knew I'd have to build steps. This is the design process I went through. Total cost for this project was $0. I used lumber salvaged from pallets and building site refuse, and hardware left over from building the shed platform.
I'm entering this into the Instructables Design Competition. If you like it, please vote. Thank you!
Step 1: Measure, Inventory, and Think
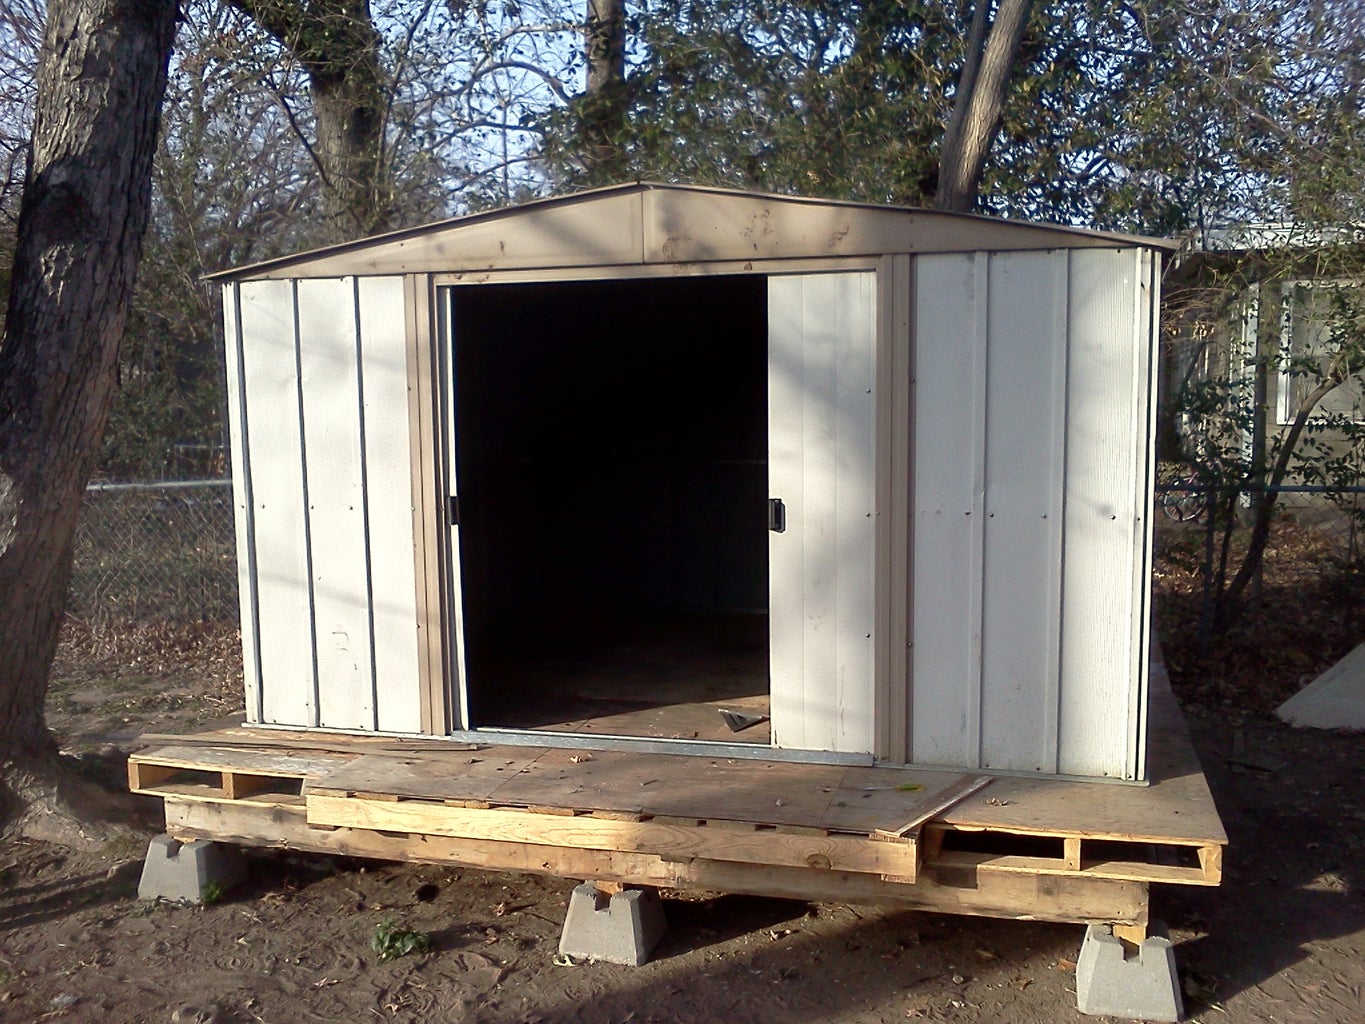


I knew right away that I wanted the treads on my steps to be made from some boards I'd salvaged from a pallet. They were 1" thick, 5.5" wide, and 40" long, with nicely rounded edges. The height of the shed platform off the ground was 20" on average, and it had an overhang that was 6" thick and extended 6" from the first joist.
I designed the two steps to be a separate structure, in case I ever need to move them out of the way. I wanted them to slide under the overhang, so they needed to be no more than 14" tall. Two steps in 14" meant each would be 7" tall. To compensate for the overhang, I made the upper step one tread board longer than the lower step.
I planned to use standard 2x4 lumber for the supporting structure. I lack the tools to make mitered cuts in a 2x6 or similar, and I hoped that the design I chose would be sturdy using just 90º angles. It should be noted that 2x4 lumber is not actually 2" by 4". I drew the design as if it were for the sake of simplicity. In the actual construction, I measured everything from what was at hand, not relying on the measurements in the drawings.
Step 2: Build Frames for Each Step


The upper step treads would be supported on a simple rectangular frame with butt joints screwed together. An additional stretcher would span the middle of the rectangle to add strength and another attachment point for treads and legs.
The lower step treads would attach to the front 11" of a larger rectangle built in the same manner. This would attach to the legs of the upper frame so that the entire assembly was one piece.
I began by cutting the short sides of each rectangle, using the drawings as my guide. The upper would be 16", the lower 26". This is the only measurement I took from the drawings for these rectangular frames.
Once I had cut the short sides, I used those to mark the tread boards. I set each short side in from the edge by the width of another 2x4 and drew a line on the inside of that short side. Measuring between the marks gave me a length of 34". All four long sides were that length.
Now that I had all four sides of my rectangle, I used the long sides to mark the short sides, measured the space between the marks, and cut two stretcher pieces. I assembled both frames using 2.5" wood screws, two per joint. The frames were very sturdy.
Step 3: Attach Legs to Frames


I assembled the top step first. Using the flat shed platform to make sure each leg was flush with the top of the frame, I screwed everything together with 2.5" screws. Everywhere a leg met a frame member I used three screws in a triangle pattern. This might be overkill for such a small structure, but I want it to last and to resist racking forces as the steps are used.
Once the top step was together, I attached the lower frame to its six legs. This gave me some trouble, as I started in the center, went to one end, and then discovered that the other end was too low. I had to remove the screws from the middle legs, attach the second end, and then re-screw the middle.
Finally, I attached the four 6" legs to the lower step frame. At this point, I couldn't easily turn it upside down on a flat surface to keep them flush with the top, so I used a clamp to hold each one in place while driving the screws. I should have done that from the beginning, as it made the process much easier and kept the screws from pushing the legs out of alignment.
Step 4: Attach Treads


I attached the treads with 2" screws, two in each place where the tread rests on a 2x4, for a total of six screws per board. 30 screws in all. There are small gaps between treads because I thought it looked nice and I know outdoor furniture is always built that way. I assume it's to keep water from settling between the boards and causing rot. I didn't measure the gap, merely eyeballed it. I'd estimate it's about 1/4".
The steps feel quite strong. In fact, they are sturdier than the platform edge at that point.
I'm very pleased with the result. Please give me feedback in the comments, and don't forget to vote!

Participated in the
Instructables Design Competition


