

Introduction: Designer Pour Coffee


I had this food presentation board that I wasn't using from a past project, built from the remnants of a backyard fence repair. Therefore, I decided to make my friend a gift. He really likes coffee, and cool coffee making contraptions. Here is my take on a few drip coffee making things that I found on the internet.
Materials:
A board to use as a base
Copper pipe and copper joints
Copper solder
Thick bar top varnish
Spray paint
Masking tape
Tools:
Blow torch
Pipe cutter
Paint brushes
Drill press
Chisel(s)
... and patience... lots of patience for your screw ups and learning curve ascensions.
Step 1: Prepping the Board for Copper Piping


In order to get the board to accept the copper piping that will be holding the the glass funnel, I had to make a few mistakes.
The gist of it is to chisel or drill press the right sized hole to fit the copper piping.
After that is done, the next task is to measure out the right length of pipe to joint, elbow or T, for it to fit in between the 2 holes from the previous step.
Step 2: Cutting the Pipe


Measuring and cutting the pipe is essential to ensuring that the funnel that will deliver the coffee to the cup will fit above the cup and not risk being broken when the mug is removed.
To measure the right length, I used a bunch of mugs around the house to see whether or not the funnel was at the right height and distance from the edge of the board.
Once I was satisfied, I cut all the pieces with the pipe cutter, and laid them all out for the next step.
Step 3: Prepping the Pipe


To prep the pipe to be soldered you'll need the following from your materials and tools list:
- Copper pipe sand paper
- Inner copper pipe cleaner
- Small paint brush
- Flux
- Copper pipe pieces, and joints
Once you have assembled all your parts, materials, and tools, the following must be done for the solder to hold better:
PRACTICE!!! - Also recommended to watch this video and others:
Basically, you need to sand the ends of the pipes, and clean the inside of the joints that will be receiving the pipes. Once every single piece has been prepared, flux has to be "painted" on to the inside of the joints, and the outside of the pipes.
Now you are ready for the next step, the coolest one, the step with FIRE! - It was fun!
Step 4: Getting to Soldering


As the video in the previous step mentions, it is easy to figure out how much solder you need if you know the size of your pipe. I believe I was using half inch pipe, and that is why in the first picture you can see that I marked (with a sharpie) every half inch of solder.
I assembled to cleaned, sanded and fluxed bits in a vice and started up the blow torch to heat the pipes and the joints.
TIP: the solder will want to go towards the heat source. So to get the solder to go into the joint and fit snugly in between the joint and the pipe, you will want to attract the solder into the joint by directing the torch flame to the centre of the joint.
As I mentioned in the previous step. PRACTICE. Before assembling this all I had copper piping and joints that were different levels of soldered or broken before I moved on to assembling the final product.
You can test your joint strength by trying to pry the pieces apart with pliers.
Step 5: Finishing the Board


In order to finish the top of the board, and secure the piping to the board, I used a Varathane finish.
This is the equivalent to a few dozen coats of varnish the will level itself as long as the board is kept level as it sets.
I taped up the sides of the board so the Varathane wouldn't run away from the board.
TIP: tape up the bottom of the board as well seeing as the varnish is going to run no matter what and it is easier to take the tape off than to pry the board off your workbench.
My friend is very into politics, and as we got a new Prime Minister at the time this was being built, I added a leaf from the parc where he was inaugurated to the board.
After all this I spray painted a "hammered copper" paint on the base to cover up the cheap-ish board that holds the base together.
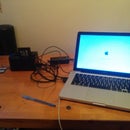
Step 6: Finished Product


Here are the pictures of the finished product.


