

Introduction: Draw Your Own Fantasy Maps


One of my favorite things about playing tabletop RPGs is that it inspires me to create art that fits into that world. Whenever I play a Dungeons and Dragons campaign, I always feel compelled to create a very detailed world map to help me envision the place I'm in. This may seem complicated, but broken down step by step, anyone with some patience should be able to do it.
Supplies
High-Quality Paper- I prefer watercolor paper because the thickness and weight make it seem more like a real, "old-timey" map
Pencil- any pencil is fine, I use mechanical. Something on the hard side would be best.
Felt Tipped Pens- I like Micron or, like I've used in this example, Zig Millennium pens for Drawing and Scrapbooking.
A Good Eraser- I have a Moo Eraser that I love. It is not just a normal eraser (although that will work). These are awesome. Get one.
Optional: Dice- I've written this assuming you will use dice, but you could drop any collection of small items or alter the first step so that instead of letting chance create randomness, you just make up the continent shapes yourself.
Step 1: Roll for Outlines

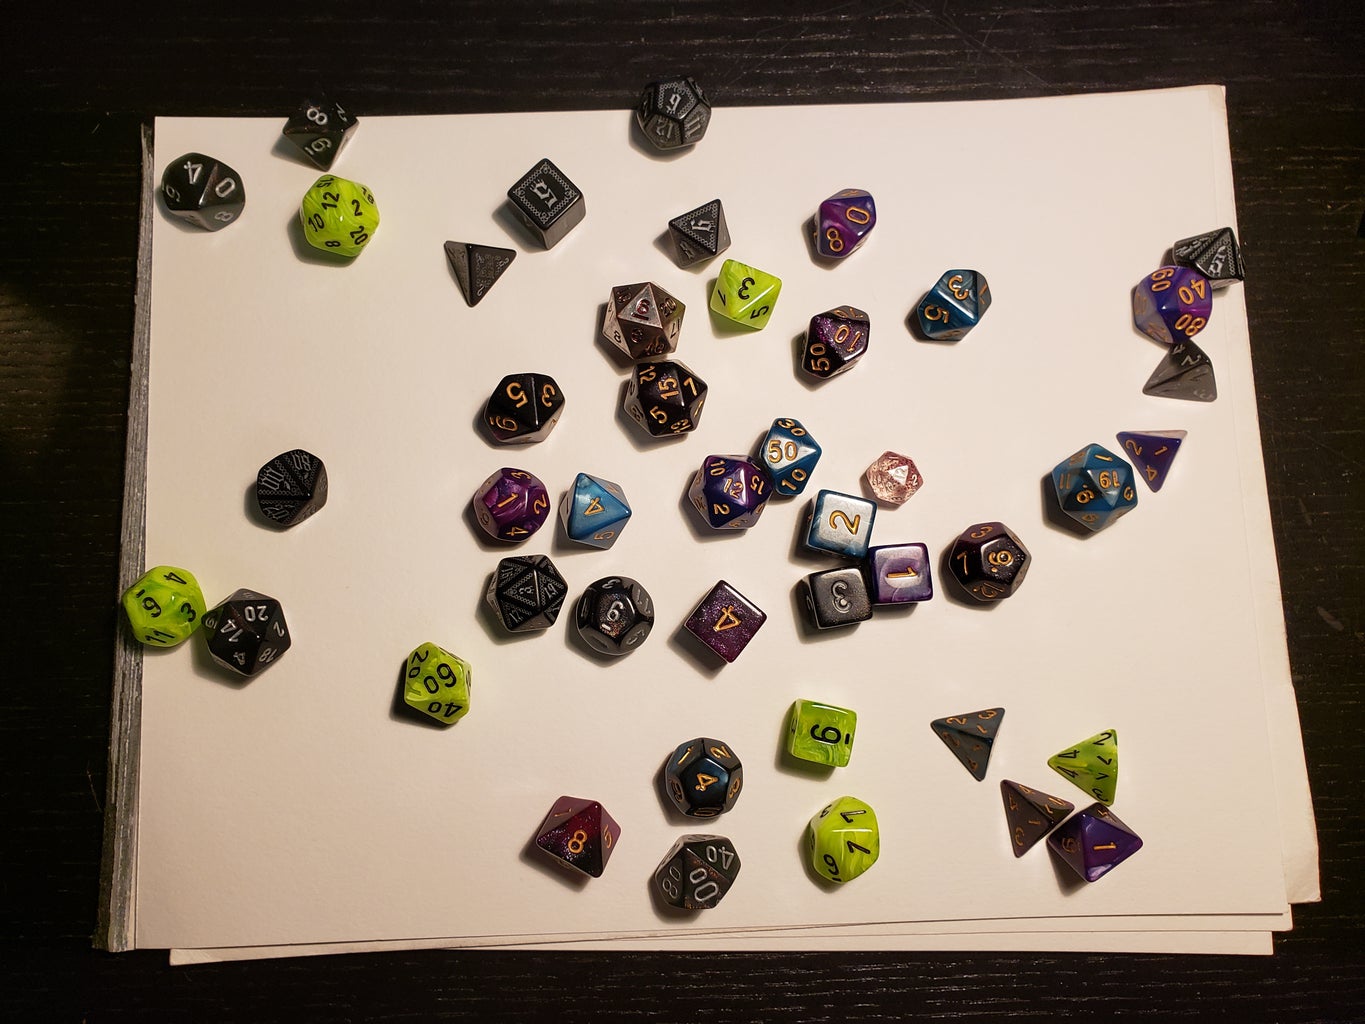


Grab a handful of dice. I usually just hold them a few inches above the paper and roll them gently.
You can adjust the position of the dice a bit if something looks off. Then, using a pencil, trace lightly around the dice. You'll need to make some decisions about which parts should be connected, what should become islands, etc. I also recommend letting the lines be jagged or wiggly to approximate a coastline.
Step 2: Solidify Continent Shapes


Go back with an eraser and refine the outlines you drew. You might want to add a few details, like tiny islands, or create some bays along the coast.
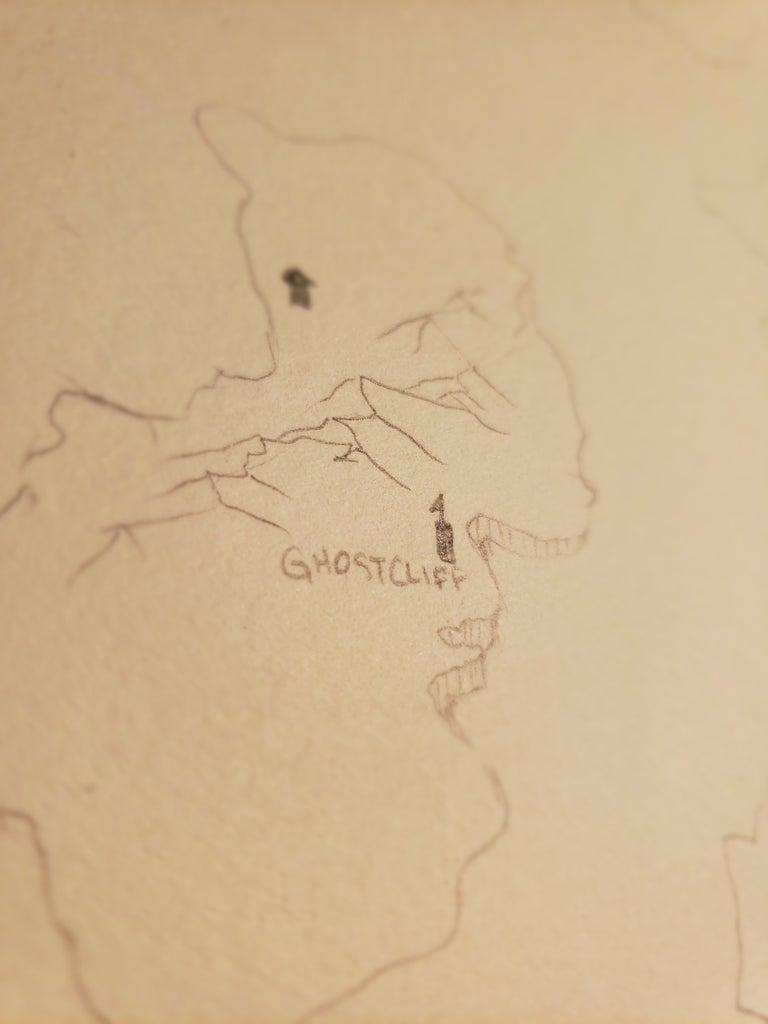
Step 3: Mountains


To select the location of mountains, I like to place dice on the page. This helps to visualize what a mountain range might look like on the continents you drew. In the example pictured, I set out dice and traced a rough line under them.
Then, you will draw a zig-zag line along the path you want the mountain range to follow. These can vary in length and can intersect, as you see in the example.
Finally, draw a small line angled down from every point in the zig-zag line. If the point is to the left, draw a line to the left. If the point is to the right, draw a line to the right.
Step 4: Rivers, Lakes, and Forests


Draw a single line to represent rivers and outline any lakes. The more you try to keep in mind realistic geography while doing this, the more believable it will be. Often rivers in real life begin in the mountains and flow into the ocean.
Sketch out where you would like the forests to be. You will add more detail to these in a later step, but for now, just lightly draw an outline.
Step 5: Add Cities


Again, thinking about where cities are located in the real world, place some city and town markers across your map. You can use any symbols you like for these. I like to have a few different types on my maps to indicate different size cities.
Name and label your cities now before inking so that you know you'll have room for the entire word. You can label every city if you want or leave some blank. Since I use these maps for D&D, I've found that it is nice to leave some room for future discovery.
For name ideas, I really like fantasynamegenerators.com. They have hundreds of categories of names that let you get really specific in what type of feel you want for your world.
Step 6: Name Areas and Add Final Details

Name any areas that are important to you. This might include oceans, bays, forests, mountain ranges, continents, and more.
You will also want to add any final details now such as cliff faces, volcanoes, large solitary mountains, or any other special landscape feature.
Step 7: Ink Coastline


Using a thicker pen, (I used a 0.8mm) trace the entire coastline and any rivers or lakes.
Then go back with a thin pen (0.3mm here) and follow the coastline again twice. On the first round, I like to draw almost a solid line with just a few breaks and then the second time, put much more space between lines. This should create the appearance of waves along the coast.
Step 8: Ink Names


Continuing to use the 0.3mm pen, carefully write the place names. For larger words, like the continent names, I've also included a serif to make it look fancier.
Step 9: Ink Mountains.


Trace the lines you made earlier to create the mountains. Then, on the right side only, add some short lines to indicate a shadow.
Step 10: Ink Forests


For the forest, start by drawing the outline. This will be a wavy line. I try to make mine look a little like the edge of a cartoon cloud, just to give the idea that it is a really dense area of trees. Then, draw lines straight down from the treetops to make it appear to have depth.
Finally, add a few lines within the borders of the forest to suggest treetops sticking out.
Step 11: Erase Pencil Marks and Add Finishing Touches


Erase any pencil marks.
Finishing touches might include inking any unique features, like the smoke from a volcano. I also typically draw a few individual trees near forests to suggest a thinner forest and some tufts of grass in the grasslands. You might also want to add in a compass rose or border to the map.
Congratulations! You've got a completed map!
Second Prize in the
Maps Challenge


