

Introduction: Dremel Chop Saw


You may have seen displays for K&S Engineering Metals tubing in some hobby stores.
What I like about this tubing is that the OD of one size just fits inside the ID of the next size up. I use this feature to make journal type bearings for some of my sculptures.
While the tubing can be cut with a small pipe cutter, I find that it slightly crimps the tube at the cut. The slight crimp prevents the smaller tubing from fitting inside the larger crimped tubing.
So, I cut the tubing using abrasive discs in my Dremel.
For the application where I use the tubing, I needed several hundred cut tube pieces. Each needs to be 0.20 inch long.
While I tried cutting the tubing free hand, I found I needed a third hand and there was a huge variation in size which required a great deal of re-finishing.
What I needed was a small chop saw.
I have access to a 60 watt Universal Laser through Techshop. So, I designed my own chop saw.
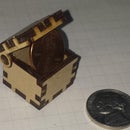
The attached file makes a chop saw out of my 300 Series Dremel. The small cabinet has a drawer to hold Dremel parts and a drawer to catch bits as they are cut. It has a scale on the cutting table that helps me consistently cut pieces to the same length.
I thought the file would be universal, but I found that Dremel tools have different size bodies. In order to accommodate them all, the holes in the arm would have to vary for each model type (you can modify the file to do this if you want). I then found that the Dremel flex shaft fits most (if not all) of the Dremel tools.
So, the two adapter plates in the kit hold the Dremel flex shaft head to the arm.


Step 1: Laser Cut Pieces


Bill of Materials / You’ll need:
Software to read the attached file
PDF file can be downloaded to Corel Draw or Adobe Illustrator or . . . ?
Note: I work in Corel Draw which can export to several formats. If PDF does not work for you, and if Corel can export to a format you can use, let me know.
Scale the illustration in your file so the box in the lower R/H corner on page one is 0.210 inch square
Laser Cutter
With enough power to go through ¼ inch plywood
Note: The Cabinet and Drawers are cut from different materials. Do not cut the drawers out of the 1/4 inch maple plywood. Do not cut the cabinet or arm from the 1/8 inch Baltic birch Plywood.
¼ inch 3-ply Maple Plywood (common: ¼-in x 4-ft x 8-ft . . . for the cabinet and arm
I buy from Lowes (check the link for details) / My experience is that the thickness may vary. Link says 0.203 inch. My experience is that the thickness is usually around 0.210 inch. The attached design assumes a plywood thickness of 0.210 inch.
1/8 inch 3-ply Baltic Birch plywood for the drawers
I get mine from Woodworker's Source (check the link for details)
K &S Engineering brass tubing for the hinge
Available at most Hobby and model stores
I get mine at Industrial Metal Supply (Check Link for Details)
Bushing: Large 5/16 (0.3125) OD 0.2845 ID (do not cut with pipe cutter)
Shaft: Small 9/32 (0.281) OD 0.25325 ID (can be cut with pipe cutter for this application)
Note: The tubing usually comes in 12 inch or 36 inch lengths. You’re only going to use about ½ inch of the 5/16 tubing, but the rest will give you something to hold on to while cutting.
Wood Glue
I’ve tried using CA glue, epoxy and wood glue to hold the pieces together. They all work, I prefer white Gorilla brand (Gorilla Glue) non-foaming wood glue.
4ea 1/2 inch length #8 Button Head Wood Screws for the adapters
Step 2: Assemble the Cabinet


Note:
Dry-fit the pieces for the cabinet base initially. It is possible to put the pieces together in the wrong order. Using glue right away will likely prevent assembly of the remaining pieces.
The brass tubing is press fit into the hex shaped holes in the panels. While you can glue the bushings in to position, I have never seen the need.
Again, do not glue the pieces together until you have dry-fit them together at least once. It is possible to put this together wrong. Once glued together, there is no going back (Believe me. I know)
Special Note:
If you look at a Mirror image of the pictures, I believe you will find that it is possible to make a left handed version of this chop saw with these parts. Think about it. Dry-fit the parts before you start gluing it together.
For the central panels, one edge of two panels has smaller tabs. Both sides fit side-by-side into the one set of slots in the cabinet central panel.
Note: There are two possible positions for the side-by-side tabs in the slots. Only one will allow assembly of the remaining pieces. Dry-fit the pieces to verify the orientation.
Install the Hinge supports
Then install the back.
Step 3: Assemble the Cabinet (Part 2)


Install the remaining side and the bottom
If all the parts fit together during the dry-fit, take it all apart and this time, use glue sparingly to assemble. If necessary, clamp the cabinet together until the glue dries.
Step 4: Assemble the Arm


Note: It is possible to install the arm assembly side panels backwards. Carefully note the orientation of the Arm side panels in the pictures (relief cut is up).
Dry-fit the Arm assembly and install 5/16 x 0.20 Bushings into hex holes.
Step 5: Install the Long Shaft Through the Hinge Supports and Arm


Install long bushing through hex holes in cabinet side panel, through Arm assembly and through hinge supports.
Special Note: It is possible to install the arm assembly upside down on the hinge in the cabinet. Carefully note the orientation of the Arm in the next Slide.
Slowly. This requires some patience to line everything up.
Step 6: Add Deflectors/ Guards

Add Deflectors/Guards
Step 7: Build the Drawers and Check Them for Fit


Special Note: The drawers are cut from a different thickness material
Note: Do not re-scale the drawing to cut the drawers. The drawing assumes 1/8 Baltic Birch has a plywood finished dimension of 0.113 to 0.115 inch.
Cut the drawers from the 1/8 inch Baltic birch
Assemble drawers and check for fit
Note: Dry fit the parts once before gluing them together.
Note: The size of the finished drawers is a slip fit inside of the cabinet. The drawers will only fit in the cabinet if the joints inside the cabinet do not have a great deal of glue oozing out of the joints and if the joints in the drawer are pressed together tightly while drying. After drying, the drawers will require sanding of the edges and corners to clear any glue residue left inside the cabinet.
Note: Additional smoothness of operation can be attained by using floor wax or furniture wax on the drawers AFTER (AFTER) the glue has dried and the edges and corners have been sanded.
Step 8: Assemble the Cutting Table


Assemble the cutting table so tubing can be inserted through the holes
Set the table in place.
DO NOT glue the table down. The table is meant to be removable.
Step 9: Install the Dremel or the Flex Shaft in to the Arm


At this point, if you have a 300 series Dremel or have sized the holes in the Arm for your Dremel, the Dremel can be inserted into the arm.
On mine, the holes in the arm are sized to a slight interference fit (hence the need for the relief slot in one of the arm panels) The press fit squeezes the Dremel and holds it in place. So, no extra clamping is necessary.
If you are using the Flex Shaft, the adapters clamp and hold the flex shaft to the arm.
I've used the chop saw to cut small consistently sized pieces for some time. It works pretty well.
If you get stuck during assembly or make some improvements to the design, let me know.
HTMF: Havin' Too Much Fun

Participated in the
Full Spectrum Laser Contest 2016


