

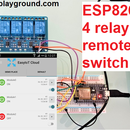
Introduction: ESP8266 $5 Internet Connected Switch - Improved


In this tutorial we will show how to build WiFi internet controlled switch connected to EasyIoT Cloud. This tutorial is improved version of ESP8266 internet connected switch. We will use ESP8266, solid state relay and Arduino IDE. AP name and password can be configured in WEB interface.
This internet controlled switch uses few components and it's connected to EasyIoT Cloud. You can control your devices on computer in EasyIoT Cloud WEB interface or with native Android application. Internet controlled switch is connected to internet with WiFi connection. Switch can also be controlled locally with push button.
This tutorial is improved version of ESP8266 internet connected switch. It works with latest version of EasyIoT Cloud MQTT broker. Two main improvements regarding previous version of switch are that this uses switch information to update state of UI interface. If connection to switch is broken, then state in UI will not update. Next improvement is that in this switch you can configure AP username and password with mobile phone or computer. This internet switch is "plug and play" - it will automatically set all EasyIoT Cloud settings, so no configuration in EasyIoT Cloud is needed.
WARNING!! You will play with LIVE MAINS!! Deadly zone!! If you don't have any experience and are not qualified for working with MAINS power I will not encourage you to play around! Do NOT use it without proper Knowledge about MAINS circuits ! Do NOT use it without a proper FUSE on MAINS line! Max current for solid state in this tutorial is 2A - suitable for room light only.
Step 1: Materials
Materials:
- ESP8266 WiFi module
- Solid State Relay 2A 240V
- 3.3V 600mA AC-DC step down module
- Push Button switch
- NPN Transistor TO-92 2N2222
- 1000uF electrolytic capacitor
- resistor, 1K, 47K
Step 2: EasyIoT Cloud Configuration
No EasyIoT Cloud configuration is needed, just register to EasyIoT Cloud service. You will need username and password to access your internet switch on WEB application or in Android application. Switch will be automatically added to EasyIoT Cloud and will be visible in WEB interface or in Android application after power on.
Step 3: Program
Program is written in Arduino ESP8266 IDE. See Arduino ESP8266 IDE tutorial how to connect ESP8266 module to computer to upload program. Program can be downloaded from our GitHub. You will also need MQTT client library. Add this library to library folder in Arduino IDE. Program uses EasyIoT Cloud MQTT API.
In program change following lines EasyIoT Cloud username and password:
#define EIOTCLOUD_USERNAME "xxx"
#define EIOTCLOUD_PASSWORD "xxx"
You can also change access point name and password, but this is not necessary. You can later change AP username and password in WEB interface.
At beginning of the program it reads EEPROM settings. Then it tries to connect to AP. If connection to AP is not successful after 10 s switch to AP mode to change configuration. If connection to AP is successful switch checks module ID. If module ID is 0 it means switch is not configured on EasyIoT Cloud. In this case it adds module to EasyIoT Cloud and saves module ID to EEPROM settings. After successful configuration module subscribe to specific topic to listen switch changes.
The easiest way to test program is to use ESP8266 LUA node MCU board. Just connect it to USB port and you can test program. If you use this board you can also uncomment #define DEBUG to see debug messages. Flash button on ESP8266 board will work as button to manually change switch state. Onboard LED displays switch state.
Step 4: Hardware


In our case we use ESP8266 01, but you can use any other type of ESP8266. GPIO2 is connected to NPN transistor to control SSR. Max current for our type of solid state relay is 2A - this is suitable for room light and not for applications which consume more power - for example heater.
For power supply we use 3.3V step down module. It's very important to add 1000uF capacitor to 3.3V power line - in our case switch didn't work if we skip this capacitor. GPIO0 is connected to push button for local control of internet switch.
After power on, switch will be automatically added to EasyIoT Cloud and it will be visible in WEB interface or Android application.
You can manually rename name of your switch and group in EasyIoT Cloud configuration to suits your need.
Step 5: Configuring ESP8266 Internet Switch

When internet switch is switched on it tries to connect to AP. If after 10 s connection to AP is not successful it will switch in AP mode. With mobile phone search for AP named Thing-xx-xx-xx-xx where xx-xx-xx-xx is random value. Connect to this AP and then in WEB browser address enter 192.168.4.1. In WEB page displayed you can configure AP name and password. After changing AP name and password click submit button and internet switch will reboot and connect to AP.

Participated in the
Automation Contest 2016


![Tim's Mechanical Spider Leg [LU9685-20CU]](https://content.instructables.com/FFB/5R4I/LVKZ6G6R/FFB5R4ILVKZ6G6R.png?auto=webp&crop=1.2%3A1&frame=1&width=306)


