

Introduction: Electronic-Lab in a Box


Since I work in a small flat with no separate space for handcrafts i struggle always with building before and cleaning up afterwards just for simple electronic work. There were always the same tools to search in boxes and cases, plug them in, find wires and solderin tin and so on. So for only 5 minutes work comes together just an hour or so for the setup time. For me the solution was a box where everything can be found at the same space where it belongs to.
Simple philosophy: Everything has a space, everything has its own space.
This Instructable should be more a watchable, because for myself I don't read the long text instructables. But I believe I took around 80 pictures that give you an Idea what could be done and how to do the important parts. If there are any questions left, just put them in the comments.
Step 1: Get an Idea

First question: What I really need everytime?
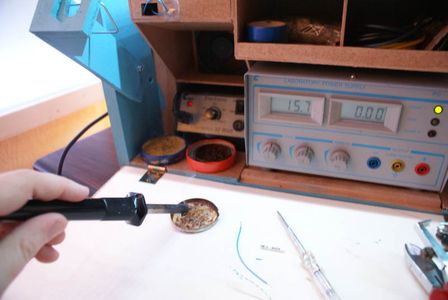
- soldering Iron and holder
- lab-power supply
- Multimeter,
- some wires and soldering tin
- cleaning sponge and flux
- fume-extractor (i don't have one but always wanted to build one)
So I begin with the heavy thing, the power-supply put it in the middle and arranged everything around it in mind and constructed everything in sketchup. It need to fit on the desk and on the storage-space.
Since I don't move much around with that stuff and have a lot of wood waste I didn't bother weight. So I took a mix of hardwood (for main support frame), plywood, MDF and 3mm HDF and mainly express-wood-glue and a mix of screws.
I will not give measurements here, because every part is fitted around what needs to be put inside the box and where it should be stored. The tunnel for the fume should be at least 12x12mm.
Part list:
- 18mm glued hard wood plates for the upright plates (the only type that holds screws in grain direction properly!)
- 13mm mdf for top and bottom
- 10 & 6mm light plywood for back and front
- 3mm for inner parts, backplate and fume extractor
- sinkable wood screws from 12mmx3mm to 40mmx3,5mm, a M4 for the iron holder foldout
- express wood glue (one can not wait long enought with that huge ammount of parts)
- small color varnish
- 12V AC adaptor
- 40cm of LED-Strips (I used RGB as white light)
- 12V PC-case fan (I used an 80mm but recommend 120mm for better performance) for the fume extractor
- a small ammount of fleece as fume-filter
- cables, wall plug and suitable plugs for all devices, everything is connected paralell
- hinges for frontplate, backbox and wire-dispenser-coverage
- magnets for frontplate and coverage
Most parts should be found in a good sorted Hobby-room. I believe that everybody that want to build something like this should knew where to get this or allready has it. My aim was to use as most as possible parts from scrap.
I only used a few tools:
- cordless screwdriver
- drills and the thing to sink screw heads (don't know the correct english name)
- a really good handsaw (I recommend to invest good money to one, it won't be wasted!)
- electrical tools (solder iron and the common suspects for the wiring)
- brush
- screwdriver perfectly suitable for your screw-heads (a pozidirve is not phillips and a Torx T10 should not be used in a T15 head, evend when it fits ;)
- files to clean the saw cuts
- a dremel for round corners in the mdf plates (files will also do)
- sharp pencils and good rulers!!! You should be able to draw lines as precise as possible! A milimeter error will let the result look horrible!
So let the build begin...
Step 2: Saw and Glue and Screw and Saw and Glue and ....


I don't have an electric saw and in this tiny flat using one is not recommendable. But I'm very trained with my crosscut-saw, it is quiet and much more precise than every other hand-guided saw, even any electrical!
Step 3: Saw and Glue... No Screw Version


3mm HDF is really good to glue edge to edge, holds perfect and is really stable, I used it for the inner part, mainly for the fume-extractor.
Step 4: The First Gimmick: Wire-dispenser


One side gimmick is to handle wires and soldering tin, always wanted something like this.
Step 5: Second Gimmick: Soldering-iron Handling


so my old iron holder died years ago and so i build a new one as a foldout in the main room, also for cooling issue the iron is mounted outside so that i don't need to bother when packing everything together.
Step 6: More Sawing and Glueing: Back-, Top- and Frontplate


not much to remark here...
Step 7: Wiring and Fume-Filter


Okay, there is not much to say, but it was really hard to hardwire the iron since one can not cut the cable of the station and solder them because you need that it runs to solder them... hard stuff, creative solution...
Wiring is simply straight forward paralell everything. The fan and the LED-Strips are connected to the AC-Adaptor output, but the fan will get a switch to interrupt.
Step 8: Done!


So here's the result

Third Prize in the
Portable Workstations Contest

Participated in the
Woodworking Contest


