

Introduction: Ember Printer: Creating and Printing Models Using ShapeJS


ShapeJS is a voxel based scripting tool created by Shapeways that lets you create printable models using Javascript. Everything from shapeways exports in .X3db format, but using conversion tools, you can convert the file into an .STL and print it on the Ember printer from Autodesk. So why do this? Ember can print with incredible resolution and creating complicated geometries that take advantage of this with CAD can be quite laborious. ShapeJS lets you script models in the cloud with no expensive software or downloads. By "weaving" together groups of helical "fibers" my goal was to try and achieve flexibility using classically brittle resin. Let's explore the scripting process using ShapeJS and printing on Ember !
(Second photo credit: Autodesk)
Step 1: Getting Started With ShapeJS


Head on over to http://shapejs.shapeways.com/ and click on "Try it Now". This will take you to a screen where you'll see a snippet of code and an example geometry. I found that orienting myself with this code helped with my project.
A great starter project is working on an individual fiber as you can see above. Either copy the code featured, or work with the documentation to explore on your own. Play with voxel size and args to see what's possible!
Just a few pros and cons about ShapeJs
Pros:
Easy to manipulate once you're used to the library. The documentation was a but tricky to follow from time to time, but overall, I was able to get running pretty quickly!
Cons:
Timeout for models is 3min with ShapeJS, so it can be a bit a tricky to render large geometries. I would suggest not running any other tabs or programs while rendering to take advantage of your computer's memory.
Useful Resources:
My Github (if you'd like to download scripts to play with. Suggested Args included in the files)
Step 2: Exploring ShapeJS


Now that you've gotten your feet wet, let's get helical. By using a helical shape for each individual fiber, we can achieve a bit more flexibility. When printing this in resin (which can be somewhat brittle), this allows a bit more malleability with the material.
In ShapeJS, creating a helix or a spiral is a matter of using the spring function. See the code snippets above to see how changing spiral period and fiber size effect our outcome.
Step 3: Downloading Your Model


Once you've gotten to a point where you like what you've created, you can download this as an .X3db file. You can also upload directly to shapeways using the buttons below your model.
Step 4: Converting Your Model & Uploading to Ember
In order to print your model on Ember, it needs to be an .STL file. I've found that net fabb is great for model conversion. You have to sign up for an account, but it's worth the extra few moments.
If you'd like to avoid conversions, feel free to use my .STL files (attached).


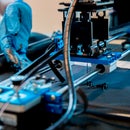
Step 5: Printing

If this is your first time printing with the Ember SLA printer, here's a bit of a walkthrough using instructables that are part of the user manual by Shalomo:
1.) Ensure that your file is the right size by using MeshMixer
Installing Meshmixer for Ember
2.) Upload your .STL to the portal
3.) Slice and send via USB or Wifi - Either:
a.) Directly plug your computer into the port on the front of the machine and visit your printer's IP address here. You should be prompted with a file search and upload button.
b.) When you received your printer, you should have received a URL that allows you to add your printer to the portal. If this was done correctly, there should be a "send to printer" option in the portal after you slice.
4.) Calibrate your printer and check for enough clean resin
Calibrating your Ember Printer
5.) Press Start!
Step 6: Flexibility


The final swatch and fibers came out to be fairly flexible and resilient for resin.
Step 7: Finishing


I'm still experimenting with finishes, but have found that nail-polish provides a nice lacquered finish. Due to the helical structure, painting with a fine layer of polish creates a "candy-cane" striped effect.
Step 8: Other Outcomes


I gave this file a print in several materials with different helical segment size. The Elastoplastic heeded the best result, but even Nylon SLS wasn't too shabby!
Enjoy scripting, printing and exploring flexibility with 3d printing and beyond!


