

Introduction: Fold-Out Under-Table Storage Rack


Having an HTPC means you need to control a PC if you want to watch a Movie, play games, etc. This often leads to a messy coffee table with all the wires and keyboards, etc. Even with a wireless setup, you still need to store them somewhere.
Building this allows these items to be out-of-the-way when not needed, but still easily accessible when they are.
Step 1: Gather Materials
So, these are the materials I used. These are more of guide-lines than actual rules.
- Coffee Table
- Ventilated Wire Shelving - Should fit between the legs of the coffee Table
- 1/2" x 1" x 48" wood - straight, sanded, hobby-grade stuff.
- 1/4" x 1-1/2" Stainless Steel Carraige Bolts and locknuts (x8)
- 1/4" x 1" Stainless Steel Carraige Bolts and locknuts (x8)
- 1/4" ID Nylon Spacers
- 1-1/4" Corner braces
- #8x3/4" wood screws (bought a box of 50, used less than half)
- Scrap MDF
- various wood screws
Step 2: Measure, Cut, and Drill


Now, I didn't get any pictures of this step, but I knew I wanted the shelf to tilt down when I pulled it out. I settled on arm lengths of 4" and 6" because they were nice, round numbers. You could do the actual math and figure it out... but I was being lazy.
The end result are two pairs of 5" and 7" arms, with screw holes drilled centered on the wood, 1/2" from the edge. I drilled a 9/32" hole because a)it's slightly larger than the 1/4" bolts and b)my 1/4" drill bit is missing :(
The rest of the wood, I cut into equal-sized blocks, "about" 1in long and drilled another hole in the center.
(In hindsight, I could have also used the angle-brace here and saved some time with the wood blocks)
Step 3: Initial Assembly


Now, because we're not really working from plans, a lot of this was fit in place as the build went on.
Sandwich the nylon spacer between the arm and the small blocks and hand-tighten the carraige bolt. On the other end of the arms, do the same thing with angle-plates. This is just initial fitment, so don't tighten the nuts yet. (Because the angle plates are much thinner than the wood, I went ahead and bought shorter bolts so they wouldn't stick out of the lock-nut.)
Lay them out, and make sure there's enough room to fold the arms. Cut a piece of MDF to screw the small blocks onto.
Step 4: Attach Arms to Shelf

Sandwich the shelf between 2 pieces of MDF. Make sure the arms are parallel with one another or else they will bind when you try to swing the shelf.
Step 5: Drill Holes in Coffee Table


When all arms are attached, lay out the shelf to the coffee table. With the Arms folded, mark where the holes for the angle brackets will go. I had to take the arms apart because they interfered with the screw-holes of the angle-brackets. You may or may not have to do this, depending on how your build yours.
My coffee table is just under 5/8" thick. The 3/4" screws should just barely fit, gripping a lot of wood without punching through. I used the "tape-on-the-drill-bit" trick to make sure I didn't go too deep.
Screw the angle-brackets on, reassemble the arms and flip the table over!
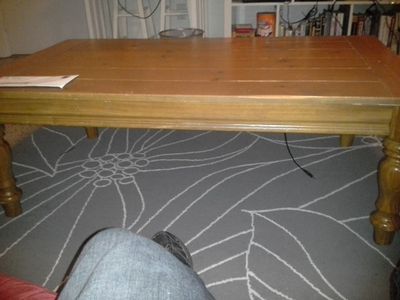
Step 6: Finished!


I attached the largest magnetic cabinet latch I could find to the longer "front" arms and screwed the plates to the underside of the table. Unfortunately, just the weight of the shelf is enough to swing it down, so I will need to find some other method of keeping it hidden when loaded.
I ran a USB extension cable in a wire duct towards the Entertainment center, and now my living room looks much neater.

Participated in the
On a Budget Contest

Participated in the
Small Spaces Contest


