

Introduction: Gathering and Sewing Elastic


Up until now we've been mostly working with fabric lying flat, but you can also achieve some great effects and convenient closures by bunching up fabric to create ruffles, smocking, volume, etc. There are a few ways to do this, and in this last lesson I'm going to show you a few of the most common, then I'll recommend some simple projects that will help you practice your gathering skills.
Step 1: Gathering With a Shirring Stitch

When you want to create a ruffle or gathering in a garment that is permanent, not stretchy, you usually gather your fabric with what is called a shirring stitch. The shirring stitch lets you take a longer piece of fabric and bunch it up evenly to be sewn into a smaller space.
To show you how to to do this, I'm going to cut two pieces of fabric, one that will be shirred and one that will remain flat and be sewn over the shirring to hold it in place. To create a ruffle with a nice amount of fullness, you usually want the shirred fabric to start out 2-3 times longer than the fabric it is going to be sewn to. A ruffle twice the length will be less full and ruffle-y than a ruffle 3 times the length, so you have to decide what will look best in a given project.
I want to create a ruffle with triple fullness, so I am cutting a 10" long piece of my Star Wars fabric, and a 30" long piece of muslin for the ruffle.

To sew an effective shirring stitch, it's a good idea to put a thicker, more heavy duty thread in the bobbin of your machine (I'll explain why in a minute), so wind a bobbin with some heavy duty thread and load it into your machine, keeping the top thread standard weight.

Now turn your stitch length dial to a large setting, at least 4. Sew a line of stitches about 5/8" in from one long edge of the ruffle fabric, without locking your stitches on either end! Cut your threads, leaving at least 4". Then sew another line right between the first line and the edge of the fabric, 1/4" away, also without locking your stitches.


Take the lose ends of the thread on one end and tie them in a knot to hold them in place.


On the other end, take the two thicker threads only, and start pulling them and pushing the fabric to gather it like this:

Push the gathers down the threads and keep distributing them until you have reduced the length of this fabric to the length you want your ruffle to be, in this case 10". The reason it's a good idea to use the thicker thread on the bobbin here, is that sometimes thinner thread will end up breaking as you are pulling it to create the gathering.

Now tie the threads on this end, locking the gathers in place. Make sure the shirring is distributed evenly, and then take it back to your machine, and, with regular thread back in the bobbin, sew a stay stitch over the gathers to hold them in place.


Pin the Star Wars fabric to the gathering, right sides to right sides, matching up the edges. Then sew the two pieces together 3/4" in from the edge, just beyond the gathering stitches.

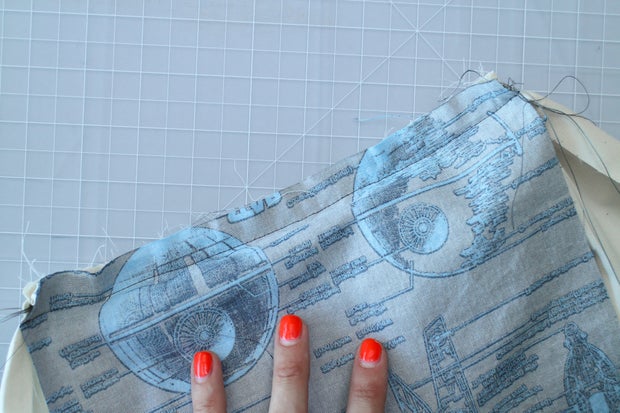
When you flip the Star Wars fabric back, it should look like this:

If your gathering stitches show past the seam anywhere, you can just snip them and pull them out.


If you want you can now topstitch the Star Wars fabric down over the ruffle.

You can use this technique to create ruffles, gathered skirts, and all kinds of other fun sewing details.
Step 2: Types of Elastic

When you want to create gathering that can stretch open and closed, you usually need to use some kind of elastic.
Elastic is a stretch material that is made out of strands of rubber or another stretch plastic encased between woven threads, which makes it stretchy, strong and sewable!

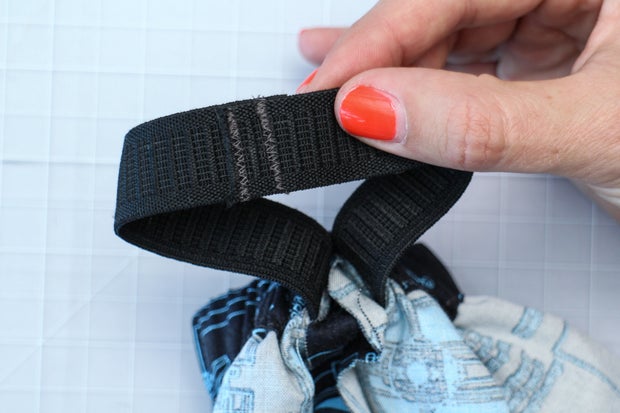
Elastic comes in a few different shapes and sizes, including strips and cord. You will also find a lot of decorative elastics, like this metallic gold one, that can make elastic aesthetic, as well as practical.


Step 3: Creating Channels for Elastic or Cord

One way to attach elastic is to create a channel for it to run through. This method is used a lot on clothes at the top of waistbands or around ankles or cuffs, and it is really a very simple technique.
To show you how to do this, I'm going to sew a loop of fabric. Imagine this is a pant leg, or the top of a skirt.


Measure the width of your elastic so you know how wide to make the channel. My elastic is 7/8" so the channel should be 1".

Now fold and press the fabric down 1/4" on one end, then fold and press it another 1" to form the channel.


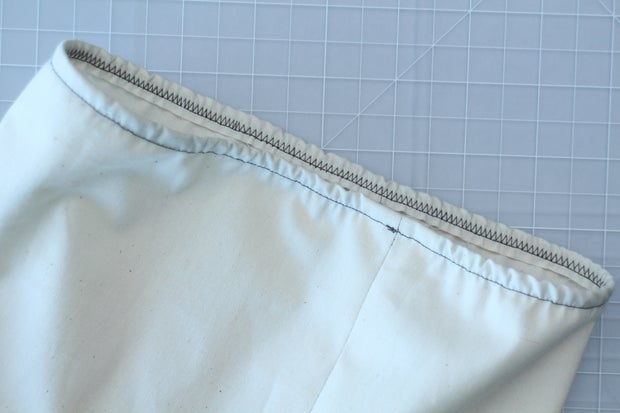
Sew the fold down all around the loop about 1/8" from the bottom of the fold, leaving about 1" open at the seam.


Now measure the distance around your loop of fabric, in this case it's 16". In order to gather your band, you need to make the elastic shorter than the fabric. As with the ruffle, how much shorter you make it is somewhat a matter of aesthetics, but it also depends on what the elastic is going to go around. For example, if you were making a waistband, the elastic should be about 1-2" shorter than your waist measurement. In this case I'm making the elastic 13" long.

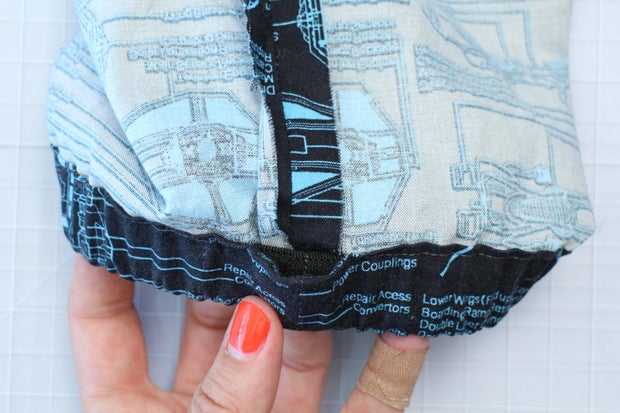
To thread the elastic through the channel, pin a safety pin to one end, then stick it into the channel through the gap.


The safety pin will help you thread the elastic through the channel because you can feel it through the fabric. Keep pushing it forward, bunching up the fabric, then pushing the fabric over the elastic as you move the safety pin ahead.

Before you get to far, pin the other end of the elastic to the fabric right at the opening so it doesn't get pulled into the channel. When you have threaded the elastic all the way out the other side, unpin the back end, and pull both ends out a few inches.


Overlap the two ends and pin them together.

Sew two rows of zigzag stitches over the ends of the elastic to connect them.

Pull the fabric around so the elastic slips back into the channel, and the sew the opening closed on the machine.

Now you have a stretchy waistband!... for a very tiny person :)

You could use this same technique to create a gathered band with a cord punning through it instead of elastic. In this case you'd need to leave an opening for the cord to emerge from so you can tighten and loosen it. You'll see how to do this when we make the pajama pants.
Step 4: Attaching Elastic With a Zigzag

Another way to use elastic is to attach it directly to the fabric with a zigzag stitch. You can use this method to create easy twist-proof waistbands on leggings, undergarments and swimwear, or stretchy areas of smocking on woven garments, and a lot of other things.
To try this on a waistband-like loop, first sew a tube of fabric like you did in the last section. As you did last time, measure the circumference of the loop, then cut a piece of elastic a few inches shorter, and this time, sew your elastic into a loop before you attach it.


Divide both the loop of your elastic and the loop of your fabric into equal quarters by marking each quarter with a pin.

Then match the pins on the elastic up to the pins on the fabric and pin them together at these points. The fabric sections will be longer than the elastic sections.

Starting at one of the pinned points, sew the elastic to the fabric with a zigzag stitch, while pulling the elastic so it stretches to match the length of the fabric. To do this without just pulling the whole thing forward (which would stop it from moving under the presser foot) you have to use both hands and pull equally from the back and front at the same time. It's a little tricky to get this right, but practice and you'll get the hang of it.
When you're done it should look like this. If I had used a piece of elastic that was shorter in relation to my fabric, the fabric would be much more gathered, so choose your elastic/fabric ratio based on your project.

To finish this type of elastic gather, fold it under and sew it down again with a straight stitch this time, still stretching the elastic as you sew.

To create smocking or a ruffled effect that appears on both sided of the elastic, you could sew the elastic in the middle of a piece of fabric, instead of on the edge as I did here. In this case, you wouldn't do this second folding and sewing step, and the zigzag would be visible on the outside of the fabric. A technique like this is sometimes used to create ruffles at the end of sleeves for example.
Step 5: Quiz
{
    "id": "quiz-1",
    "question": "The stitch you use to gather fabric is called:",
    "answers": [
        {
            "title": "a slip stitch",
            "correct": false
        },
        {
            "title": "a shirring stitcg",
            "correct": true
        },
        {
            "title": "a lock stitch",
            "correct": false
        }
    ],
    "correctNotice": "Good Job!",
    "incorrectNotice": "Sorry, try Again."
}
{
    "id": "quiz-2",
    "question": "What simple tool will help you insert elastic into casing?",
    "answers": [
        {
            "title": "a safety pin",
            "correct": true
        },
        {
            "title": "a pencil",
            "correct": false
        },
        {
            "title": "scotch tape",
            "correct": false
        }
    ],
    "correctNotice": "Good Job!",
    "incorrectNotice": "Sorry, try Again."
}
Step 6: What's Next?

If you want to practice using gathering in a sewing project, there are all kinds of great designs you can try. My Instructable on how to Sew Pajama Pants From a Pattern is a good place to start. In this tutorial I'll show you how to use elastic to gather a waistband and make drawstring channels for cuffs. And you'll also learn an extremely useful skill that will take your sewing to the next level: understanding how to use commercial patterns. Being introduced to commercial patterns will give you a whole world of possibilities as you embark on further sewing adventures.
If you've followed this pattern or chosen a different way to practice gathering and elastic, feel free to post a picture in the Class Projects section below!
I hope the skills and techniques I've covered in this class have helped you understand the basic concepts behind working with a sewing machine, and let you practice them in a fun and engaging way. Of course, if you ever have any questions, feel free to ask them.
If you've made it this far and you're looking for even more sewing inspiration, one of the best places to look is right here on Instructables! You'll find all kinds of projects here (especially in our Sewing, Fashion, Decorating, and Costume categories), from extremely basic to quite advanced. So go forth and sew! And when you come up with your own unique projects, post them as Instructables and enter them in our awesome contests so you can win sweet prizes and we can all see just how much you've learned :)


