

Introduction: Ghostface Pumpkin


For the past few years I have been using the craft foam pumpkins and adding my own spin.
Supplies
Craft foam pumpkin
Air dry clay
Acrylic paint
Water
Knife
Marker
Thin translucent black fabric
Hot glue
Candle
Step 1: Cutting the Pumpkin


I started with the plain pumpkin and used a marker to draw on Ghostface's features. I then used a knife to cut out the eyes, nose, mouth and a hole in the back near the bottom large enough to fir my hand in.
Step 2: Laying Down the Clay


I used air dry clay to build up around the holes and to create the features of the mask. This step is optional but in my opinion without the clay the end result won't be nearly as striking. Using a lot of water on my hands helped very much to keep the clay smooth. You will see going forward a few inconsistencies with my photos. I used clay for the face area, then began the paint job only to realize I wasn't quite happy with what I had in front of me. I then added more clay and was happier with the results.
Let everything dry at minimum overnight.
Step 3: Painting

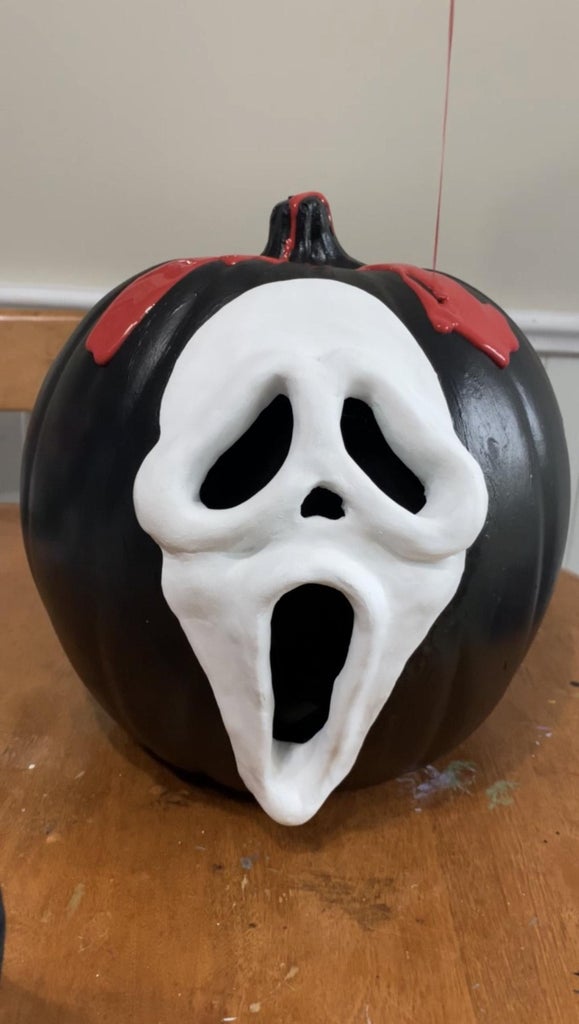
Ghostface has a very simple paint job. I did the entire pumpkin black with his white mask. I mixed up a red colour that I thought would look bloody and gory to pour over and let it drip down.
Step 4: The Backing Inside the Mask


I don't have pictures of me putting the black fabric inside the pumpkin. I used it so the pumpkin could be lit up and glow if wanted but still look really good in the day and not lit. I used hot glue and stretched it along inside the pumpkin while looking from the front to make sure I had everything covered. This step was very challenging to do, almost as hard as it is describing the process. I suggest getting a second set of hands to help!
This pumpkin was very fun and quick to make (minus the backing) but you can really have fun with these!

Participated in the
Pumpkin Challenge


