

Introduction: Green Screen Video Footage in After Effects


You've seen it in Hollywood movies no doubt about it. But you don't need a multi-million dollar film studio to use a green screen; just a handy program called Adobe After Effects.
Step 1: Import Files
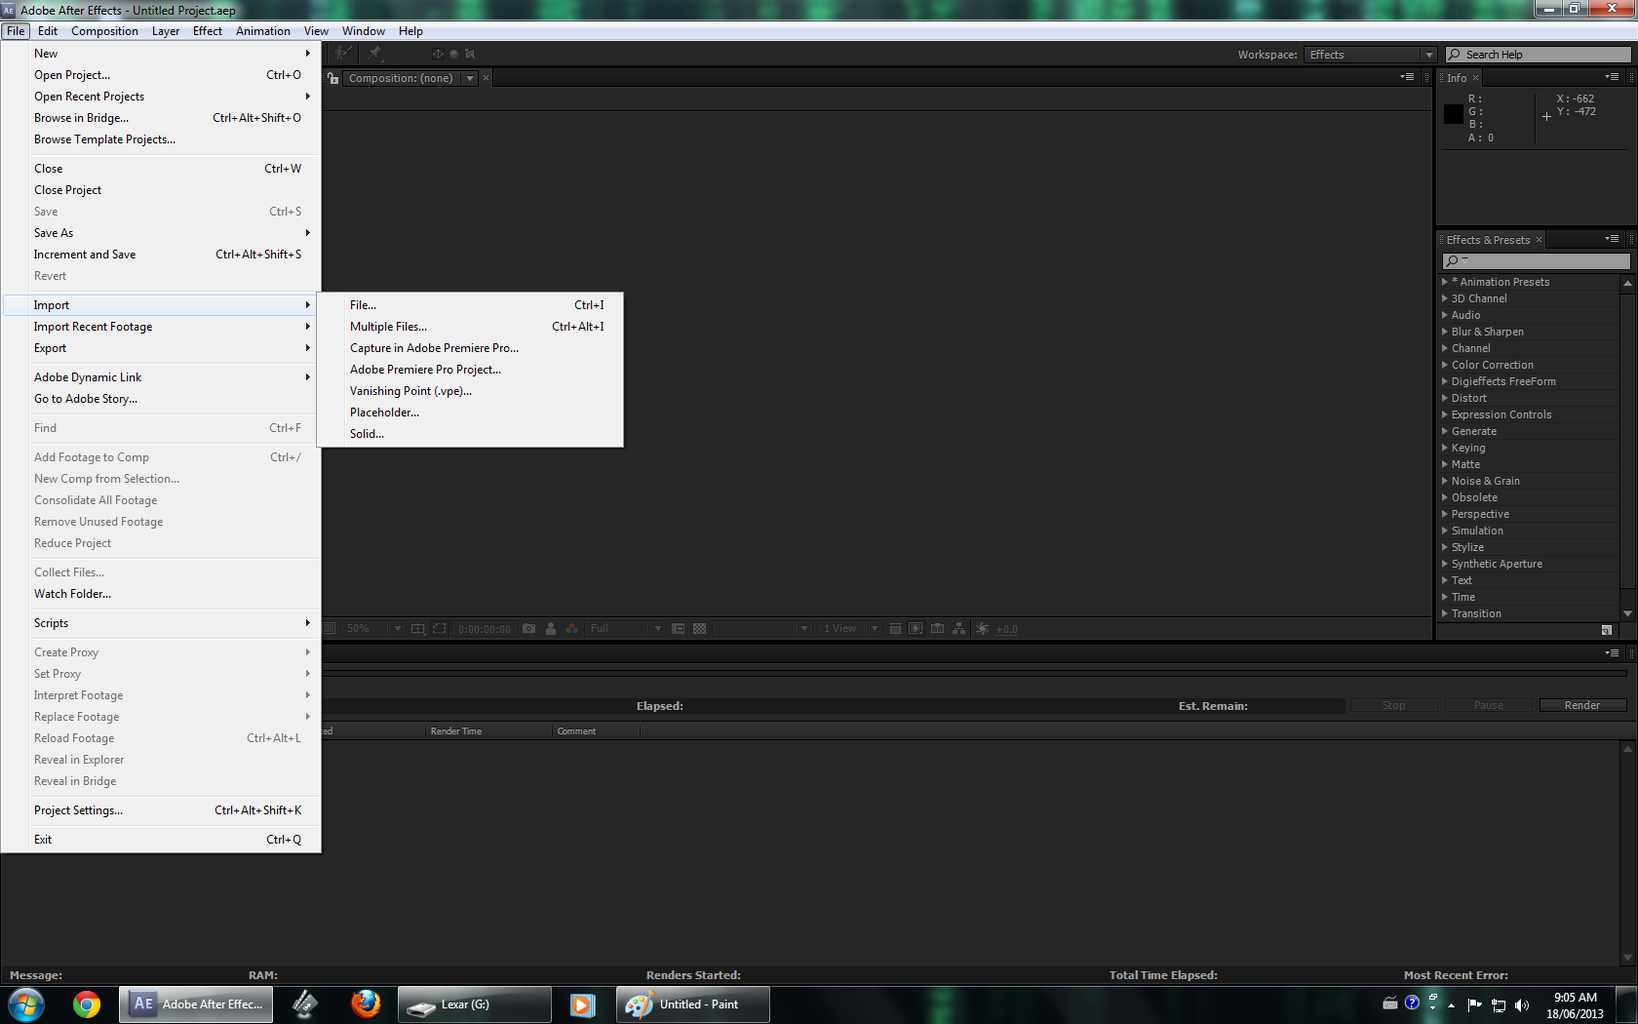
First you need to select File in the top bar and click Import Files to import the footage, the background and any other visual or audio effects you want.
Step 2: Add Files to Composition
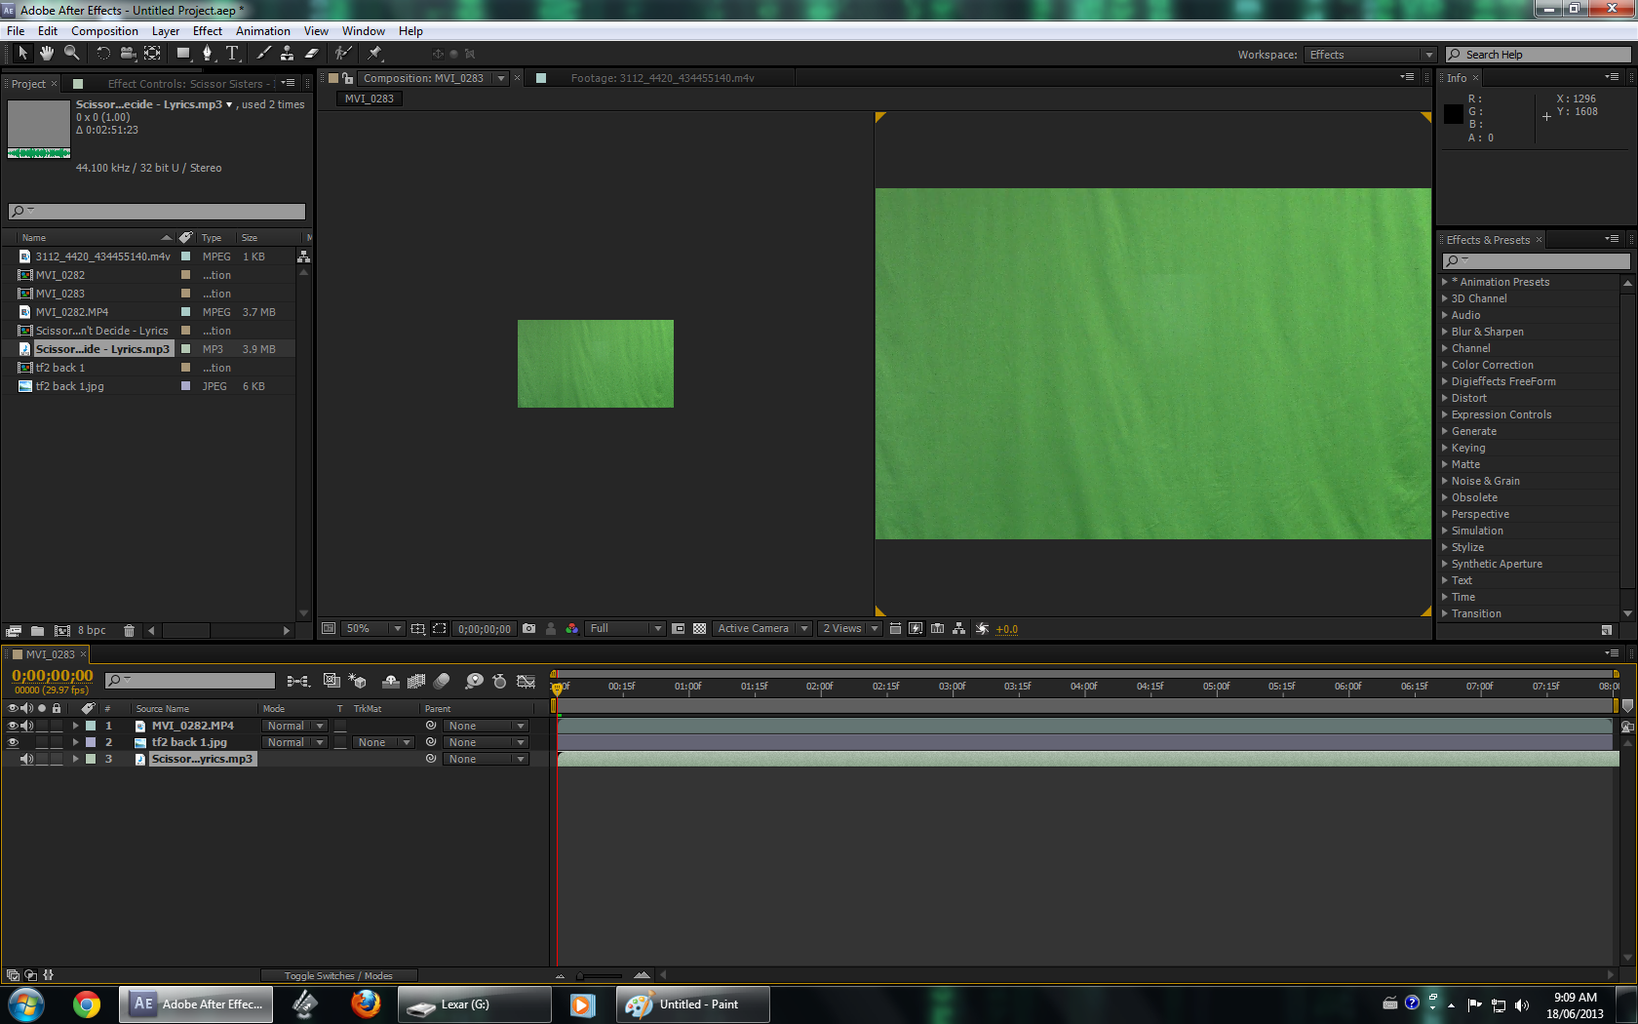
Your imported files will show up in the side bar, next you need to drag them to the tack list at the bottom of the screen. Make sure that your footage is placed above the background or else the background will show up over top of the footage.
Step 3: Keylighting

In the track list at the bottom select your footage and in the toolbar on the right click Keying and in the drop list select Keylight. Now on the left side of the screen next to Screen Color there will be a black square, select the icon next to the square and then click on the green background on your footage.
Step 4: Resize

If your background is smaller than the footage you can select it on the screen and re-size it to fill the screen. You can also re-size your footage to scale the actors to the background.
Step 5: Add Sound Effects

You can import audio effects and drag them down to track with your other footage. Now you can click the audio track to shorten and re-position the audio to achieve the duration and start point you want.
Step 6: Add Render Que

When you feel confident with your new footage go to the top bar and under Composition select Add Render Que. The Render Que will pop up; when it does there should be an option in the Que called Output Module. Click it and change the setting to H.64.
Step 7: Render & Finnish

Finally you can click Render and your editing will be converted to video file. I hope this has been helpful and now you will be able to add special effects to all of your videos.


