

Introduction: HOW TO MAKE AN INFRARED CAMERA WITH AN IR LED LIGHT

I have realised an Infrared camera in order use it in a motion capture system. With it you can also obtain this kind of cool images : shiny objects in the camera vision that are normal in reality. You can get pretty good results for a cheap price.
Here I am gonna share the steps I followed. It is easy!
Step 1: Material and Tools

What you need :
- PS3 cameras (they are cheap and appropriate for what we want to do)
- screwdriver
- sand paper
- MDF wood, 5mm ( or cardboard, or plexiglas)
- 10 IR LED
- 10 resistors 150 Ω
- 1 battery 9V
- 1 battery clip 9V
- solderin iron + tin
- reflective tape
Be careful ! There is two types of PS3 cameras, some will be not usable for our purposes! (Picture)
You can use the camera PS3 with the software CL EYE ps3 camera driver.
Step 2: REMOVING THE IR FILTER OF THE CAMERA


- Remove the screws and open the camera carefully
- Remove the 6 screws placed inside the camera, (they are the ones that hold the lens)
- Remove the first layer of glass placed in the lens (redish circular glass), it is the IR filter.
- Removing the IR filter will change the focus of the lens, and make the images look blurry.
- To overcome this problem you need to sand the plastic edge of the lens: just sand a little with a sand paper placed on a flat surface.
- Be careful to don't sand too much ! (Make some try out with your computer to test when the image looks fine)
- Cut 3 circle in a photographic film at the size of the lens.
- Place them on top of each others above the lens. Glue them with small spots of super glue.
- Reassemble the camera by placing back the screws
- The camera is ready!
Step 3: REALISE AN IR LED LIGHT - SUPPORT


In order to make the reflective tape bright on the image, you need to irradiate it with an high intensity IR LED light. You can buy one, but you can also make it.
- First, we need to make a support for the LED. I have attached the file of the gabarit I used.
- You can print it and tape it on your wood. It will help to cut the support at the right dimension of the camera.
- Cut the wood/cardboard/Plexi in a circle and then make a bigger hole in the middle for the camera lens.
- Around the central hole, drill 10 x two small holes at every spot indicated. Each holes is made for one of the pin of the LED. Each LED (tow pins) requires two dinstinct holes. You can use a dremel with a thin drillbit.
- You can paint / spray paint your piece if you want. (here black) Let it dry completely.
Attachments

Step 4: REALISE AN IR LED LIGHT - LIGHT

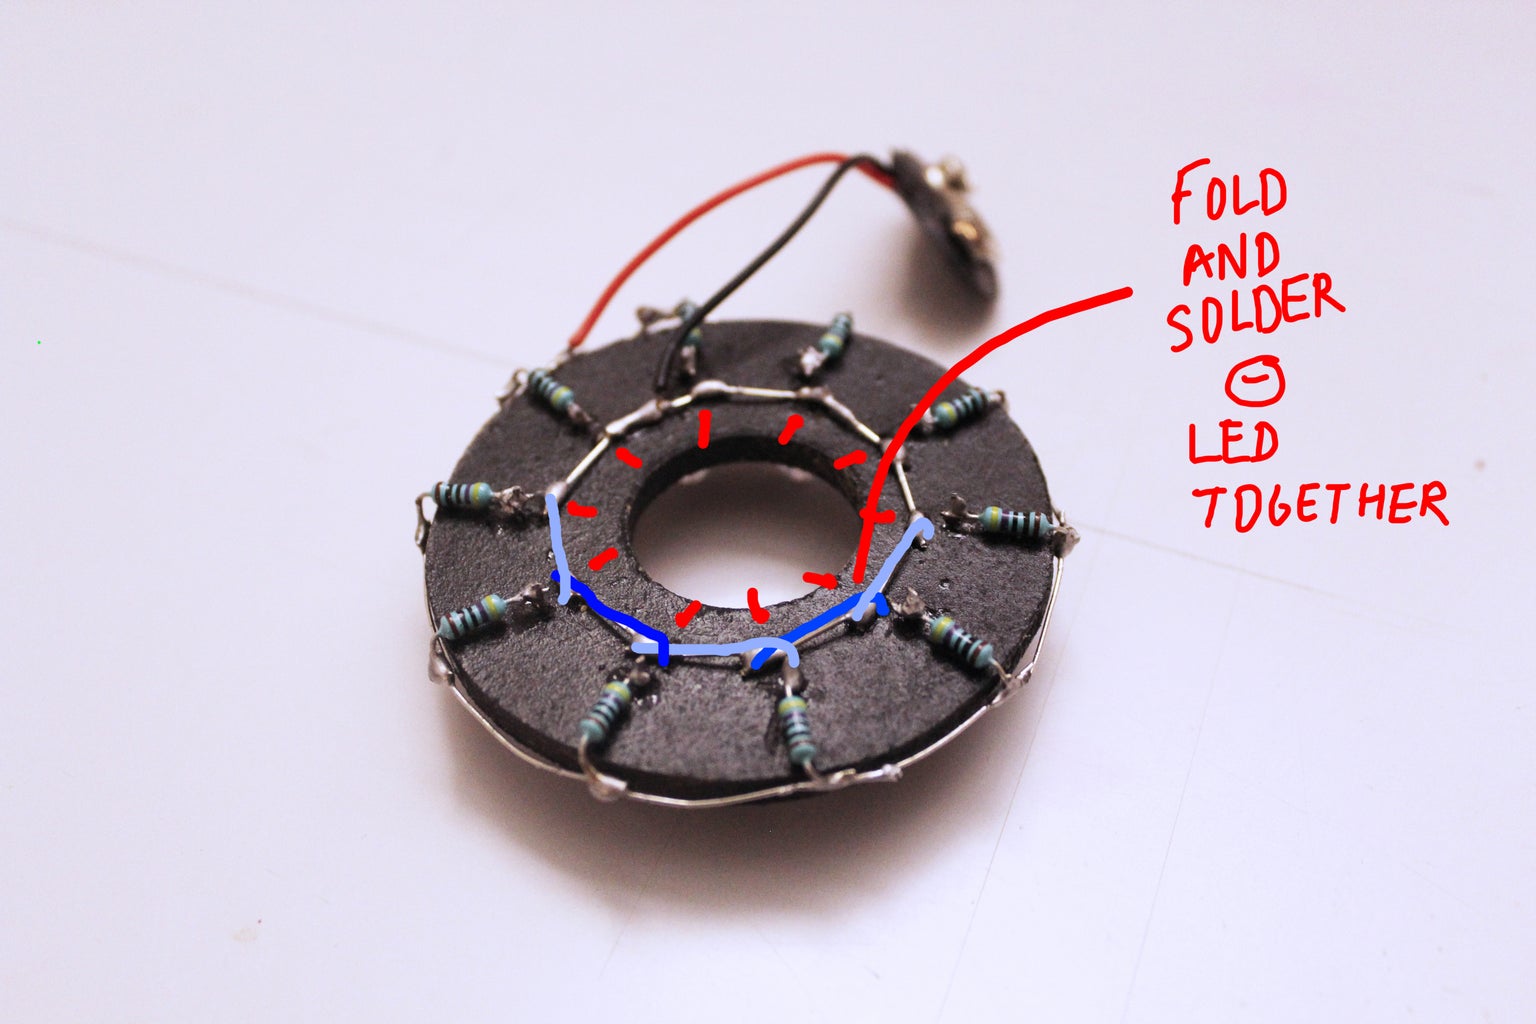


- Place all the LED of the support. All the pins – (minus) should be placed in the inside hole. All the pins + (plus) in the outside holes.
- Place your support with the heads of the LEDs under and the pins up.
- Solder 1 resistor to each + pin of the LED. Cut the all the exceeding part of the pin.
- One by one, fold the – (minus) pin without cutting it. (to make it easier, you should place then on top of the following one.) Then, solder each pin the next one.
- Fold each left over pin of the resistor on the edge of the support. Bind it on the side, so it will reach the next resistor. Solder each resistor pin to the next one, so they will be all soldered together.
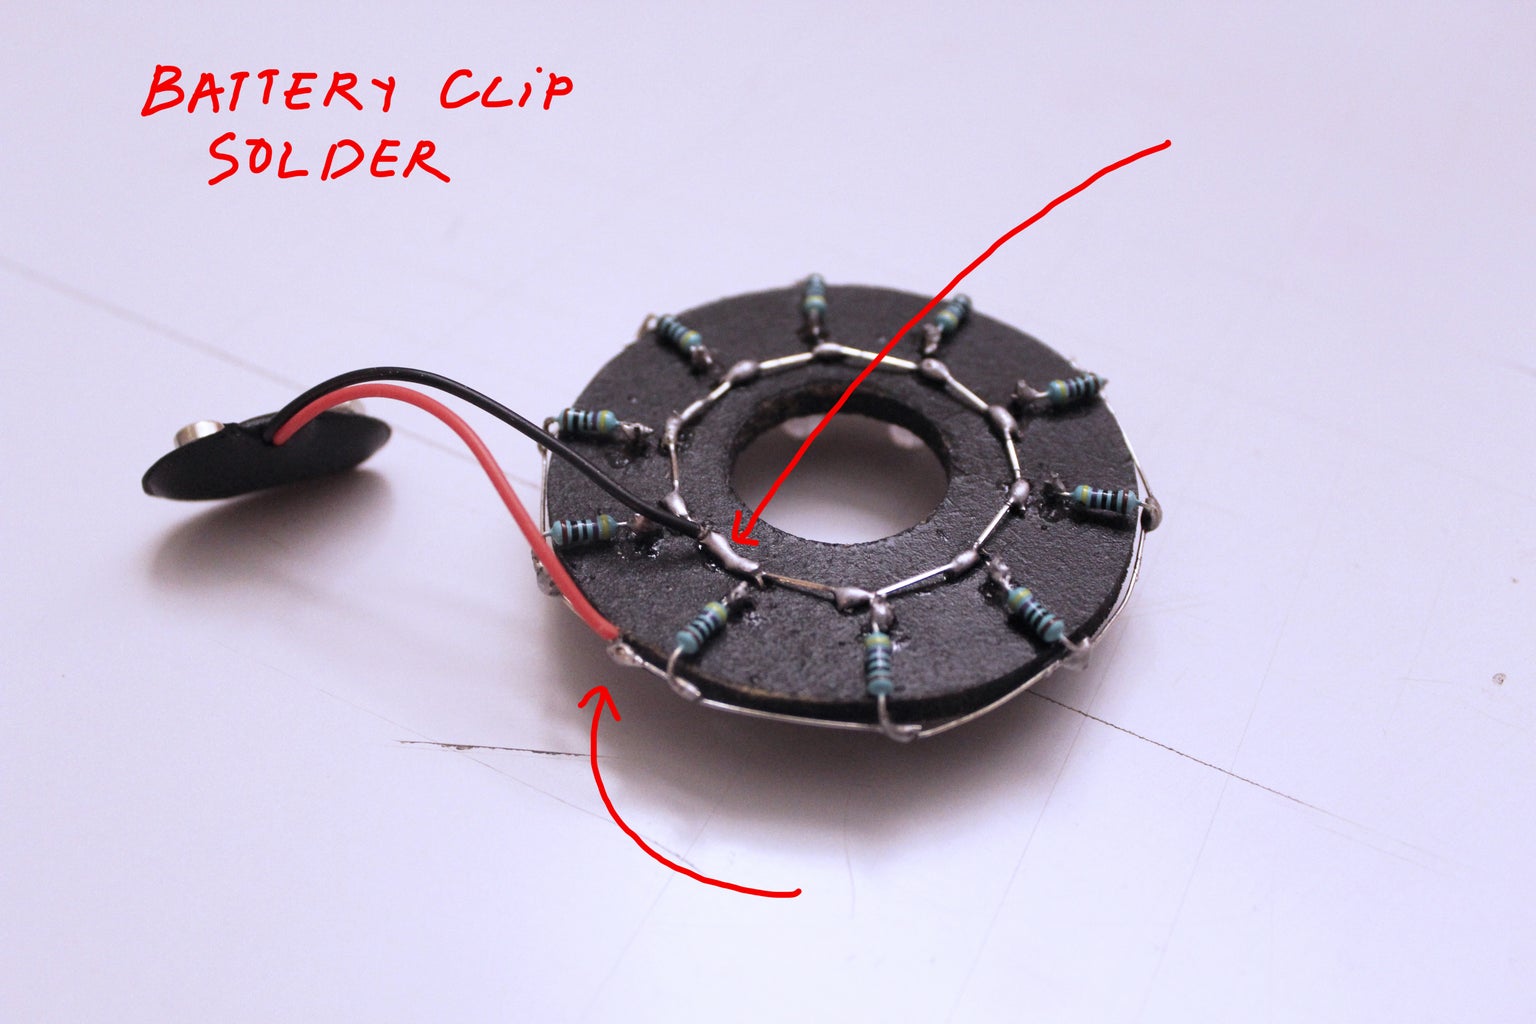
- Finally, solder the + wire (red) of the battery clip on one of the outside resistor pin ( connect to the + pin of the LED)
- Solder the – wire (black) to the – pin of the LED (inside circle).
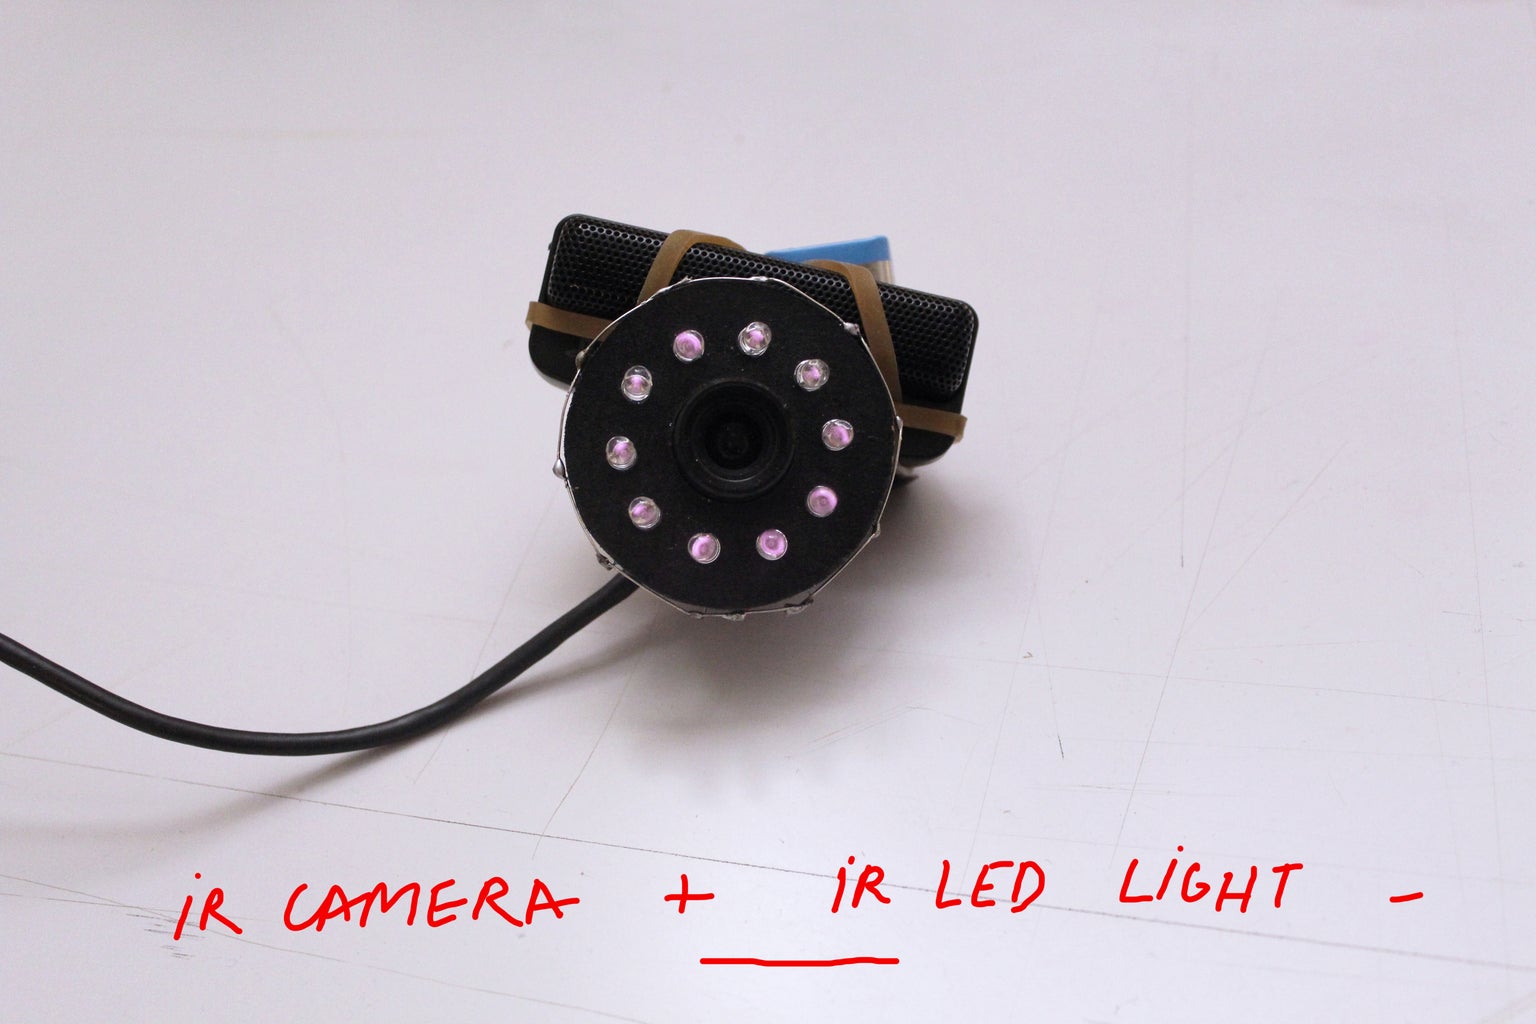
Step 5: PLACE THE IR LIGHT ON THE LENS OF THE CAMERA


To increase the light irradiation you need to place the IR light as close of the lens as possible. With the proposed design, it should work properly.
- Plug the 9V battery to the IR light.
- Tape/use an elastic band to assemble the battery to the camera.
You're done !
You can plug the IR camera to your computer and see the results. You can also play with reflective tape : the objects covered by it will appeared very white on the camera view! It is up to you to be creative.


