

Introduction: Hacking Linear Slides Into Centimeter Range, Nanometer Step Size and Atomic Resolution XYZ Nanopositioner (piezo-motor)


Hackaday invited me for a Hack Chat on 15th June. You are all welcome to join and have some fun. 🙃https://hackaday.io/event/185521-low-cost-nanopositioning-hack-chat
Nanoscale positioning has numerous applications in both academia and industry. A growing number of applications require devices with long working distances and nanoscale resolutions. Friction–inertia piezoelectric positioners, which are based on the stick–slip mechanism, achieve both nanometer resolution and centimeter-scale travel.
However, the requirements of complex preload mechanism, precision machining, and precise assembly increase the cost of conventional friction–inertia nanopositioners. Herein we present the design of an open-source XYZ-axis nanopositioning system. Utilizing a magnet-based stick–slip driving mechanism, the proposed XYZ nanopositioner provides several advantages, including sub-nanometer resolution, a payload capacity of up to 12 kg (horizontal), compact size, low cost, and easy assembly; furthermore, the system is adjustment-free.
The performance tests validate the precision of the system in both scanning and stepping operation modes. Moreover, the resonant spectra affirm the rigidity and dynamic response of the mechanism. In addition, we demonstrate the practical applications of this nanopositioner in various measurement techniques, including scanning electron microscopy, vibrometry, and atomic force microscopy.
Furthermore, we present 11 variations of the nanopositioner designs that are either compatible with ultra-high-vacuum systems and other existing systems, 3D printable, or hacking commercial linear slides.
Janis Alnis made an instant Piezo motor based on this instruction ;)
https://www.youtube.com/watch?v=1AeyGnti078
Please check this article for more details:
Low-cost, open-source XYZ nanopositioner for high-precision analytical applicationsYou might also like:
1. Hacking CD/DVD/Blu-ray for Biosensing
https://pubs.acs.org/doi/abs/10.1021/acssensors.8b00340
2. Micro and nanoscale 3D printing using optical pickup unit from a gaming console
https://www.nature.com/articles/s42005-021-00532-4
3. Using DVD optics for Nano-, Micro-, Milli-Newton to several Newtons force measurements:
https://doi.org/10.1016/j.ohx.2022.e00308
Attachments
 Hacking Linear Slides Into Centimeter Range, Nanometer Step Size and Atomic Resolution XYZ Nanopositioner (piezo-motor)
 - Hacking Linear Slides Into Centimeter Range, Nanometer Step Size and Atomic Resolution XYZ Nanopositioner (piezo-motor)
- Fig-GA.tif
- Fig-01.tif
- Fig-02.tif
- Fig-03.tif
- Fig-04.tif
- Fig-05.tif
- Fig-06.tif
- Fig-07.tif
- Fig-08.tif

Supplies


Attachments
- Magnet.SLDPRT
- PiezoStack3x5x5mm.SLDPRT
- V-Nano-01.SLDPRT
- V-Nano-02.SLDPRT
- V-Nano-03.SLDPRT
- Connector.SLDPRT
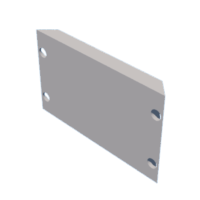
- H-Nano-01.SLDPRT
- H-Nano-02.SLDPRT
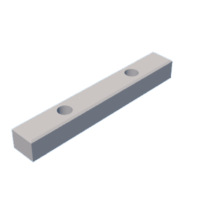
- Linear slide 6-13a.SLDPRT
- Linear slide 6-13b.SLDPRT
- Linear slide 8-21a.SLDPRT
- Linear slide 8-21b.SLDPRT
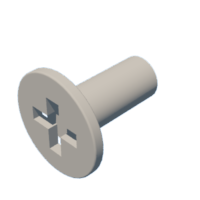
- M1 screw.SLDPRT
- M1.4 screw.SLDPRT
- M2-C-1.5mm.SLDPRT
- Arduino Mega Code - Sawtooth generator.ino


Step 1: Horizontal Nanopositioner Assembly


Horizontal nanopositioner assembly
1. Components needed: 4 × M2 screws, 4 × M1.4 screws, 4 × magnets, 2 × piezo stack, 2 × connector, 2 × linear slide 8–21, 2 × H-Nano-01, and 2 × H-Nano-02.
2. Insert and glue the connector to the side hole of the H-Nano-01.
3. Solder the voltage common collector (VCC) and ground (GND) wires (placed inside a groove on H-Nano-01) of the piezo stack to the connector. Apply glue to the VCC pin of the connector.
4. Place the stationary part of the linear slide in contact with the alignment feature of H-Nano-01.
5. Fix the linear slide on the H-Nano-01 with two M1.4 screws.
6. Glue the piezo stack on the H-Nano-01.
7. Attach two magnets to the sidewall of the linear slide platform. Ensure that the magnets are >0.1 mm below the platform top surface.
8. Glue the magnets to the piezo stack.
9. Fix the H-Nano-02 to the platform with two M2 screws.
10. Repeat the above steps for the second horizontal positioner assembly.
11. For a detailed sequence of the assembly, see video ‘Assembly Animation H Nano.mp4′ in the file repository.
Step 2: Vertical Nanopositioner Assembly


Vertical nanopositioner assembly
1. Components needed: 2 × M1 screws, 6 × M1.4 screws, 2 × magnets, 1 × piezo stack, 1 × connector, 1 × linear slide 6–13, 1 × V-Nano-01, 1 × V-Nano-02, and 1 × V-Nano-03.
2. Insert and glue the connector to the side hole of the V-Nano-01.
3. Solder the VCC and GND wires (placed inside a groove on the V-Nano-01) of the piezo stack to the connector. Apply glue to the VCC pin of the connector
4. Place the stationary part of the linear slide in contact with the alignment feature.
5. Fix the linear slide on the V-Nano-01 with two M1 screws.
6. Glue the piezo stack on the V-Nano-01.
7. Stick two magnets on the side wall of the linear slide.
8. Glue the magnets to the piezo stack.
9. Fix the V-Nano-02 to the platform of the linear slide using two M1.4 screws.
10. Fix the V-Nano-03 to the V-Nano-01 with four M1.4 screws.
11. For a detailed sequence of the assembly, see video ‘Assembly Animation V Nano.mp4′ in the file repository.
Step 3: Instant Nanopositioners and Other Variations


Attachments
- Hacking Linear Slides Into Centimeter Range, Nanometer Step Size and Atomic Resolution XYZ Nanopositioner (piezo-motor) - Step #3
- Hacking Linear Slides Into Centimeter Range, Nanometer Step Size and Atomic Resolution XYZ Nanopositioner (piezo-motor) - Step #3
- Hacking Linear Slides Into Centimeter Range, Nanometer Step Size and Atomic Resolution XYZ Nanopositioner (piezo-motor) - Step #3
- Hacking Linear Slides Into Centimeter Range, Nanometer Step Size and Atomic Resolution XYZ Nanopositioner (piezo-motor) - Step #3
- Hacking Linear Slides Into Centimeter Range, Nanometer Step Size and Atomic Resolution XYZ Nanopositioner (piezo-motor) - Step #3
- Hacking Linear Slides Into Centimeter Range, Nanometer Step Size and Atomic Resolution XYZ Nanopositioner (piezo-motor) - Step #3
- Hacking Linear Slides Into Centimeter Range, Nanometer Step Size and Atomic Resolution XYZ Nanopositioner (piezo-motor) - Step #3
- Hacking Linear Slides Into Centimeter Range, Nanometer Step Size and Atomic Resolution XYZ Nanopositioner (piezo-motor) - Step #3
- Hacking Linear Slides Into Centimeter Range, Nanometer Step Size and Atomic Resolution XYZ Nanopositioner (piezo-motor) - Step #3
- Hacking Linear Slides Into Centimeter Range, Nanometer Step Size and Atomic Resolution XYZ Nanopositioner (piezo-motor) - Step #3
- Hacking Linear Slides Into Centimeter Range, Nanometer Step Size and Atomic Resolution XYZ Nanopositioner (piezo-motor) - Step #3
- Hacking Linear Slides Into Centimeter Range, Nanometer Step Size and Atomic Resolution XYZ Nanopositioner (piezo-motor) - Step #3
- Hacking Linear Slides Into Centimeter Range, Nanometer Step Size and Atomic Resolution XYZ Nanopositioner (piezo-motor) - Step #3
- Hacking Linear Slides Into Centimeter Range, Nanometer Step Size and Atomic Resolution XYZ Nanopositioner (piezo-motor) - Step #3
- Hacking Linear Slides Into Centimeter Range, Nanometer Step Size and Atomic Resolution XYZ Nanopositioner (piezo-motor) - Step #3
- Hacking Linear Slides Into Centimeter Range, Nanometer Step Size and Atomic Resolution XYZ Nanopositioner (piezo-motor) - Step #3


