

Introduction: Handmade Memory Book With Mono-Printed Paper


My colleague at work was retiring, and I volunteered to make a Memory Book for her. Prior to her retirement party, this book was passed around to everyone in our office and to other departments so they could write a note, describe a funny or memorable experience they shared, draw pictures, or give some retirement advice. We loved our colleague and friend - she was truly a member of the "family" and we were a bit sad she would be leaving us for the world of happy retirement. We wanted to give her something that she could keep to remember us and also, if she wanted to, she could add drawings, pictures, or journal entries of her own.
Here are the steps you need to create a book similar to this. The process involves making 30-40 sheets of mono-printed paper, and creating five "signatures" (groups of 4-5 sheets of printed paper, folded in half). Next, you will make two chipboard covers and finally, you will bind the paper into a book using the traditional Coptic style of book-binding.
Materials
For Mono-Printing using a Gelatin Plate or Gelli™ Plate
- 40 + sheets of regular copier paper
- Acrylic paint, in a range of complimentary colors
- One 8" x 10" gelatin printing plate - I used THIS ONE, or make your own
- Acrylic brayer, like THIS ONE
- Sheets of deli paper or wax paper
- Baby wipes (to clean the gelatin plate)
- Teflon crafter's mat (like THIS ONE) - optional
- Assorted mark-makers such as stamps, combs, sponges, stencils, etc.
For Book-Making
- Two 6" x 9" pieces of chipboard or Davey Board, for book covers
- Waxed linen thread and book-maker's needle, LIKE THESE
- Glue Stick
- Awl or needle tool
- Hole Punch or "Crop-A-Dile"
- Old book to serve as a punching (sewing) cradle, or you can BUY ONE
- Piece of scrap card-stock or other stiff paper for hole-punching template
For Embellishing
- Permanent markers, colored pencils, gel pens, metallic gel pens, acrylic paint
Step 1: Mono-Printing Basics - a Brief Tutorial


For the memory book, you could just use any paper you like - it could even be purchased paper, if you don't want to make your own. But if you want a REALLY SPECIAL GIFT, consider making your own printed paper. It's a lot of fun! Here is a relatively brief description of how to create the papers for this book.
- Cover your table with a teflon crafting mat (optional) to keep the mess controlled somewhat. Set the gelatin plate on top of the mat.
- Squeeze out a few drops of acrylic paint - one color or various colors - your choice. Less is more, so only use a few drops or blobs.
- You'll need to work quickly, so read through the steps before beginning the process. If the paint dries on the plate, not all of the paint will adhere to the paper. So keep this in mind. See notes below for what to do if this happens to you.
- Brayer the paint evenly onto the gelatin plate. Tip: "clean" the brayer after spreading the paint on the plate by rolling it on a separate sheet of the copier paper. With each new print, roll the used, paint-covered brayer on to the separate sheet of paper. Eventually, it will be completely covered with paint, and this can serve as one of the sheets in your book! Nothing is wasted!
- Optional: Add some marks in the paint on the print plate - press some bubble wrap into the paint, lightly drag a comb or Q-tip across the paint, press on a stencil - whatever strikes your fancy.
- Set your plain sheet of paper on the paint-covered plate, and "burnish" it with your hands so all the paper touches the paint. Optional: Cover the paper with a sheet of wax paper or deli paper before you burnish so you don't get paint on your hands. I'm a "messy" crafter, and I don't mind the paint on my hands. :-)
- Now, pull up the paper, revealing the paint and pattern you marked on the gelatin plate. Set aside on a flat place to dry.
- Optional: With a new sheet of paper, quickly make what is called a "ghost" print: Without adding new paint to the gelatin plate, press the paper onto the plate, burnishing with your hands. Pull the print to reveal a much lighter version of the first print. Set this one aside to dry, too.
- You don't need to clean the printing plate after each print. The "old" paint gets re-moistened when you add new paint, and it will come up with the next print. You can get some really beautiful "happy accidents" with this phenomenon.
- Repeat this process until you have used up as many sheets of paper you want to include in your book. By the time you are finished with the 40th sheet of paper, the first prints you made will be dry enough to begin printing on the other side.
- So now, mono-print the back sides of the papers you printed, repeating steps 5 through 7 until every sheet of paper is printed on both sides. Allow all papers to dry thoroughly.
- Since the gelatin pad I used is 8" x 10", I had a white border around all of my prints. I went back and added paint to some of the unpainted parts of each sheet of paper, repeating the mono-printing process, but just pressing the unpainted parts to the plate. You can complete several papers on one "batch" of paint on the plate, so this part won't take a lot of time or paint.
- When all mono-printing is complete, allow all papers to dry thoroughly, preferably overnight.
- Optional: Once completely dry, you can further decorate your papers with stamps, sprays, inks, and stencils. Be sure to use permanent ink or paints. Other media will probably smudge. Sometimes, heat-setting with a heat tool helps, but be sure to test before committing to that medium.
- When everything is done to your liking, find about 4 printed papers that would look good for the front and back covers of the book. Two should be for the outsides, and two complimentary sheets are for gluing to the inside of each cover. Set these aside.
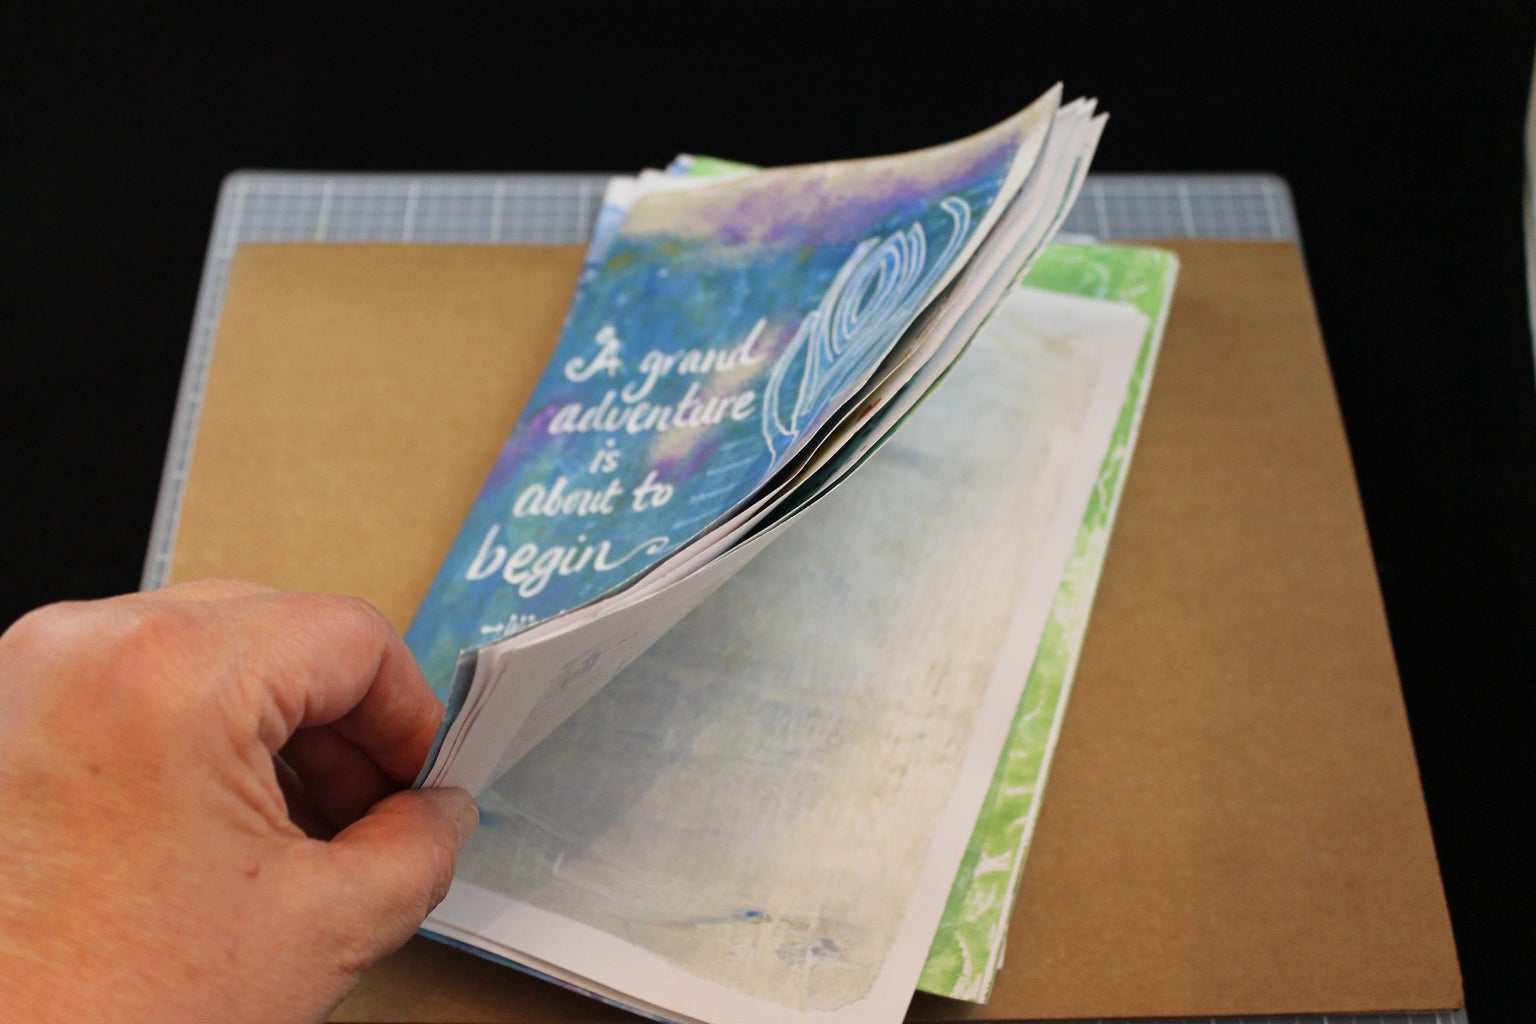
- With the remaining papers, select five or six stacks of 4 or 5 sheets of paper each and fold in half, making a mini-booklet, or "signature". You will end up with four or five signatures. You will have extra sheets of paper. I always make a few more than I need, because I almost always have some "rejects." These can be printed over again, so don't throw them away! Use them in another project!
- Now you are ready to make your book.
Notes
If your paint dries on the gelatin plate, you can revive it and achieve very cool results by brayering on additional paint and then pressing a new sheet on top of the whole mess. Burnish briskly, taking a bit more time, and then carefully pull up the print. You will see that virtually all of the old paint, now on top of the new paint is on your paper and the effect is stunning! A happy accident!
If you would like to learn more about mono-printing, there are many good tutorial sites online. Do a search and you will find what will work for you. One site I like to visit is HERE, and they have some great tutorials! I learned this craft recently, and I've made several handmade books and cards using the papers I have created, giving them away as gifts. Some have become my own art journals, which is another craft I'd like to explore in the future.
Step 2: Make the Book Covers


Cover Materials
- Two 9" x 6" pieces of chipboard or "Davey Board"
- Glue Stick
- Two of your best/favorite papers (for the outside covers) cut to 10" x 7"
- Two complimentary papers (for the inside covers) cut to 8 1/2" x 5 1/2"
Making the Covers
- Cover one side of the chip board with glue stick. Make sure to cover every bit of the surface.
- Cover the back of one of your 10" x 7" papers, making sure to cover every bit of the surface, including the very edges of the paper.
- Carefully place the two glued surfaces TOGETHER, leaving an even 1/2" border of the paper all around the chip board.
- Thoroughly cover the inside cover's chip board with glue stick.
- Beginning with the long sides, carefully adhere the excess paper to the "back" of the chip board, pressing firmly to adhere. You may want to run your thumbnail over the edge, to get a crisp folded edge.
- To deal with the corners and top and bottom sides, there there are a couple of ways to do it. You could simply add glue to the folded over paper from the long side and fold the short side's paper up and over as before. Alternatively, you could fold the corners like you would "wrap" the sides of a package, only in miniature. With your thumbnail, adhere the paper from the long side down the thickness of the chip board. Make a tiny angled crease in the paper. Repeat on the other corner. Next, adhere the paper to the "back" of the chip board. In the picture above, you will see that I did both methods, to show the difference between the two. The angled version makes a neater corner than the other method does. Either way works.
- Now, cover the backs of your complimentary papers for the inside covers with glue stick and adhere.
- I like to burnish all the papers so I'm sure they stick to the chip board and that there are no air bubbles. You could use a bone folder (like this one) or an old credit card for this. You could also use your brayer, as long as it is very clean and won't mark the surface. If some glue oozes out from under the paper, just take a baby wipe or slightly damp cloth and wipe it away.
Step 3: Make a Template for the Holes in the Covers and Signatures


This template will help you make evenly-spaced holes in the cover and in each signature. You want to have holes placed at 1/2" from each edge of the book cover, and three additional holes evenly spaced apart, for a total of five. You could measure, but I have a non-measuring way to place the holes, too:
- Cut a 10" x 2" piece of card stock and fold in half lengthwise. This template should be the exact height of your book, so measure your covers again to be certain.
- On the card stock, measure 3/4" in from the top and bottom and place pencil marks at those two points along the fold.
- Fold the strip of card stock in half width-wise and make a sharp crease in the center of the strip.
- Open back up, and take one end and match the mark you made earlier to the middle crease you just made, and press to make a firm crease.
- Repeat for the other side. This is difficult to explain, but it makes sense if you watch the video above.
- With a pencil or marker, mark the point of each crease so you can see it better.
- Mark the top end of the template with a "T" for TOP.
This is your template.
Step 4: Punch Holes in the Covers


- Decide which cover will be the front, and put the two covers together, as they will be when they are a book.
- With a pencil, mark the front cover with a T (TOP) and an F (FRONT), and mark the back cover with a T (TOP) and a B (BACK). You want to make sure you are putting your holes on the correct sides of the covers, so marking these now will help avoid making any mistakes. Believe me, it is easy to get confused with the orientation of these book covers and end up punching holes on the wrong side of one of the covers. Ask me how I know!!
- FRONT COVER: With a ruler, lightly mark a line that is approximately 1/2" in from the left edge.
- Place your template beside that line, making sure you are centering the paper even with the top and bottom of the cover.
- With a pencil, along the 1/2" line you made earlier, mark the cover with a dot at each of the five points on the template.
- BACK COVER: Repeat steps 3 - 5, except mark holes on the right side of the back cover.
- With an awl or Crop-A-Dile, punch a small hole through each of the markings.
Step 5: Punch Holes in the Signatures


You should have 5 or 6 folded stacks (signatures) of mono-printed paper. Double-check to make sure you have the papers aligned evenly and they are in the order you like. Make a stack of your signatures and lightly mark a T (for TOP) at the top of each signature. This will help you to keep everything aligned.
You will need to "edit" your template a bit, because your papers are about 1/2" smaller than the covers. Just look at most hard-cover books, and you'll notice that the papers are a bit smaller than the covers. Simply cut 1/4" off the top and 1/4" off the bottom of the template. Check the template against your papers to make sure everything is aligned, and always be in the habit to keep the template and the papers in the same orientation, with the "T" you marked earlier, always at the top.
Punch the Holes
- Find an OLD, rather large hard-cover book to be your punching cradle. If you own a real punching cradle, by all means, use it. Or you could make one. One version's directions are HERE. There are many, many variations, and it would be a fun project. Regarding the old book method: Don't use Mom and Dad's World Book Encyclopedia - you will essentially poke holes in the spine of the old book, and I would guess that dear old Mom and Dad won't be too happy about that! I used a textbook from graduate school that I didn't care so much about keeping in pristine condition.
- Open chosen hard-cover book in the middle and set it, open-faced on a table or other sturdy surface.
- Open one of your signatures to the center fold and set it into the book, with the paper's crease in the crease/spine of the old book.
- Place your hole-punching template on top of the signature, in the crease, and line up both top and bottom edges of the papers.
- Using your awl, poke a hole through all thicknesses of paper, using the crease of the book to help make sure the holes are centered in the crease of the papers. Again, this makes more sense when you actually try it, so give it a try. The pictures and/or video might help, too.
- Repeat with the remaining signatures, making sure to keep the "T" marks always at the top. Why? Well, even if you have made the most even placement of the holes in the history of humanity on your template, invariably the holes are slightly off from others if you flip the template around. I know this from personal experience, and measuring is a real challenge for me. See the last picture. You can see that some of my punched holes are a little out of line. Nothing too major. If this happens to you, it really won't matter much, but if you are a perfectionist, well, that's why you made extra papers!
Now on to the bookbinding step...
Step 6: Assembling Your Book and Beginning the Coptic Binding Method


Yes, this is a complicated project If you've never sewn before, this will seem especially tricky, but you will get the hang of it by the time you are finished sewing in the first signature! So, pour a cup of coffee, play some nice music, and relax. But give yourself some uninterrupted time to complete this part. Once you get started, it's best to push on and finish. Setting it aside for later will set you up for forgetting where you were in the process, and possibly getting your page orientation mixed up.
Here we go!
Front Cover and First Signature
- Gather your needle and waxed linen thread. Measure your thread: The height of the book, multiplied by the number of signatures, plus a little more. So, if you have five signatures and are using the book board measurements I listed at the beginning, you would cut a piece of thread 45" (9" x 5), plus an extra 10 inches, for a total of 55". I add a whole 10" to 12" extra so I am sure I won't run out of thread before I'm finished.
- Stack your book in this order: back cover, signatures, front cover. Begin with the front cover and the first signature, and set the rest of your book materials aside, but still in a neat stack.
- Open up the signature until you get to the center fold. From the inside of the signature, poke your needle down into the bottom hole, and pull the thread through gently, until you have a "tail" of about 3 inches on the inside center fold. See the 3rd picture.
- Put the needle into the bottom hole of the front cover, from the inside to the outside, and gently pull the thread until it is relatively taut with the signature.
- Now go back down into the same hole of the signature and gently pull the thread through to the center fold of the signature until taut (but not too tight).
- Poke the needle through the second hole in the signature and pull the thread through.
- This time, put the needle into the second hole up from the bottom on the front cover, from the inside to the outside, and gently pull the thread through until it is relatively taught with the signature, as before.
- Now go back down into the same second hole of the signature and gently pull the thread through to the center fold of the signature as before.
- Repeat these steps until you have reached the top-most hole on the signature and the cover.
Notes
I hope I am being clear with my directions. Wondering if there were other tutorials "out there," I did a quick search on Instructables and elsewhere on the Internet, and discovered that many people have already written excellent tutorials. I thought, "Why reinvent the wheel?" Therefore, in the spirit of making and sharing and learning from others, I decided to suggest some tutorials that I think describe things much better than I could ever do. I highly recommend the following:
- Book: Making Handmade Books, by Alisa Golden, her Blog is HERE I own this book. It's a GREAT resource.
- Instructables Tutorial: DIY Coptic Stitch Bound Notebook by Hafsah Aamer
- Online Tutorials: HERE and HERE
Step 7: Adding the Remaining Signatures and the Back Cover


Once you get to the last hole in the cover and the signature, it's time to add your second one. This process is repeated for each signature you add to your book. I find this part to be almost relaxing.
How many signatures should you have in your book? You could have a large number of signatures if you wish, but most book artists include five to seven. The Coptic method of binding allows the pages to lay flat when the book is opened, but if you add too many signatures, they may not lay as flat as you'd like. You might need to experiment to see what you like best.
Sewing the Signatures
The video in this step is a time-lapse collection of my making process for this book. It doesn't show ALL of the steps, but there's a nice section in the video that shows the repetitive motions used when adding the signatures. Perhaps you will find it helpful.
- At the end of the first signature, with the thread coming out of the last hole, bring the next signature to your work and poke the needle into the second signature, from the outside to the inside center fold. Pull the thread taut.
- Poke the needle up through the second hole and pull the thread through to the outside of the signature.
- Insert your needle down in the space between the cover and the first signature and bring it back up on the other side of the chain-looking stitch you made, essentially looping the thread around the stitch, "hooking" on to it.
- Now poke the needle back into the second hole of the second signature, and pull all the thread through. Give it a little tug to be sure you are keeping your work even and with the same amount of tension across all stitches.
- Move to the next hole and repeat this process of looping around the stitch below before going back into the hole you came out of. Repeat until you reach the last hole.
- For the last hole, come up through as before, except this time, instead of looping around the stitch below, bring your next signature to your work and poke the needle down into its first hole, pulling the thread taut as before. Note: All of the "last holes" will be treated this same way, adding a signature each time until you have sewn all signatures into place.
Adding the Back Cover
- Almost finished! The back cover is treated a bit differently. When you get to the last hole of the last signature, and the thread is coming out of that last hole, bring the back cover to your work and insert your needle into the first hole in the back cover, from the OUTSIDE to the INSIDE this time.
- Insert your needle into the space between the last and second-to-last signature and loop around as before, coming back up the other side of the stitch.
- Poke your needle back down through the LAST signature, pulling the thread taut, and again, making sure the stitches are even and the tension is consistent.
- Come up through the second hole in the last signature, and repeat the process, inserting the needle into the back cover, from the inside to the outside, looping around the stitch below, and inserting the needle back down into the hole in the last signature.
- Repeat until you finish the last hole, going back down into the center fold of the last signature.
- From the inside, check to be sure all of your stitches are nice and consistent and tie a simple half-hitch knot a couple of times, and trim the thread to leave a 2" tail, and neaten the thread line. Waxed linen sticks to itself, so if you just press on the tail and the other running thread, it should be secure enough.
Step 8: Final Comments and Taking It Further


There! If you have followed these steps to this last step, I salute you and admire your persistence and patience! Admire your work. Celebrate the idea that you have completed a process that has been done since the second century! If you want to read more about the history of the Coptic binding method, check out THIS ARTICLE. It is all very interesting, indeed.
Back to the retirement gift: My handmade book was passed around to every person in our department and to friends and family of our retiring friend and colleague, Mary. The book was presented to her at her retirement party, and it was a joyful moment for everyone as she looked through all of the pages and saw what everyone had written, drawn and/or pasted into the book. It was truly a gift from the heart!
I hope you will consider making a similar gift for someone special in your life. If you use my Instructable, I'd love to see what you make! Post it here in the comments!

Participated in the
Homemade Gifts Contest 2016

Participated in the
Epilog Contest 8


