

Introduction: How to Replace the Power Light in Your Nintendo Gamecube


In this Instructable I will show you how you replace the power light in your Nintendo Gamecube. I recommend putting a game in the Gamecube before taking it apart so their is less of a chance of scratching the lens. I am not responsible if you damage your Gamecube trying to modify you it. If you follow my instructions carefully you shouldn't damage your Gamecube.
Step 1: Gather Materials


Here is a list of things you need for the Instructable.
1-Nintendo Gamecube
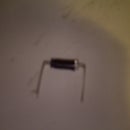
1-Led (5mm or smaller of any color(I used a blue 5mm led))
Tools
solder
soldering iron
5/32" nut driver
philips screw driver
Optional but recommend
Helping hand
A tray to hold the screws
Step 2: Take the Gamecube Apart


Start by unscrew all 4 screws located at the bottom of the Gamecube with the 5/32" nut driver. Next seperate the 2 half's. Then gently tilt back the face plate being carefulnot to wreck the ribbon cable. After disconnect the ribbon cable from the Gamecube by gently pulling on the cable. Next unscrew the pcb from the light grey face plate by removing 2 screws on the face plate.
Step 3: Changing the Led


First desolder the orange led. Then solder your new led on to the pcb according to image shown on the other side of the board.
Step 4: Make Room for the Led (skip This Step If You Didn't Use a 5mm Led)

Skip this step if you didn't use a 5mm led if you used a 5mm led you must continue. Now make room for the led by using a drill and a 3/16" drill bit and drilling down about 1/8" into the dimple located on the translucent peice of plastic.
Step 5: Put the Gamecube Back Together


Now screw the pcb to the light grey front plate. Then reconnect the ribbon cabble to the Gamecube. Next clip the front plate back in place. After that slide and screw the cover back on the gamecube.
Step 6: Test Your Gamecube
Plug all the cables back into your Gamecube. Then try it out and see how your Gamecube looks now.


