

Introduction: How to Build Free-Standing Stairs


In February 2019, our 80’ long suspension bridge took a big hit due to an ice-snow storm. An old maple tree above it snapped and came straight for one of the support posts, taking a few trees along with it. The post snapped about in half and the bridge went sideways. That devastating event is chronicled here. You can also find two blog posts about how we fixed the damage and raised the bridge again! By the way, we wrote an Instructable about the bridge construction, which can be found here.
The free-standing stairs on either side of the bridge were constructed of recycled materials way back in 2005 and the decking was not meant to be permanent either, so this disaster was an important reminder that we needed to do some updating on our bridge. The decking is ready to install later in the summer and meanwhile I screwed down planks to keep the bridge safe to walk on for now. The free-standing stairs became more of a priority because they were already falling apart before the storm.
Supplies
Here are the materials required for this portable stair system. Once you figure out the rise and run for your steps, you can figure out the lengths.
2 - 4x12 pressure-treated beams (stringers)
4 - 2x4 pressure-treated lumber (supporting structure)
5 - 2x12 pressure-treated lumber (steps)
Structural wood screws 6” long
Exterior wood screws #9 3-1/2” long. These should be ceramic coated or similar comparable coating to resist the corrosion effect from treated wood. For more information about that, please see my blog post here.
Step 1: The Two Rules of Thumb for Free-Standing Stairs
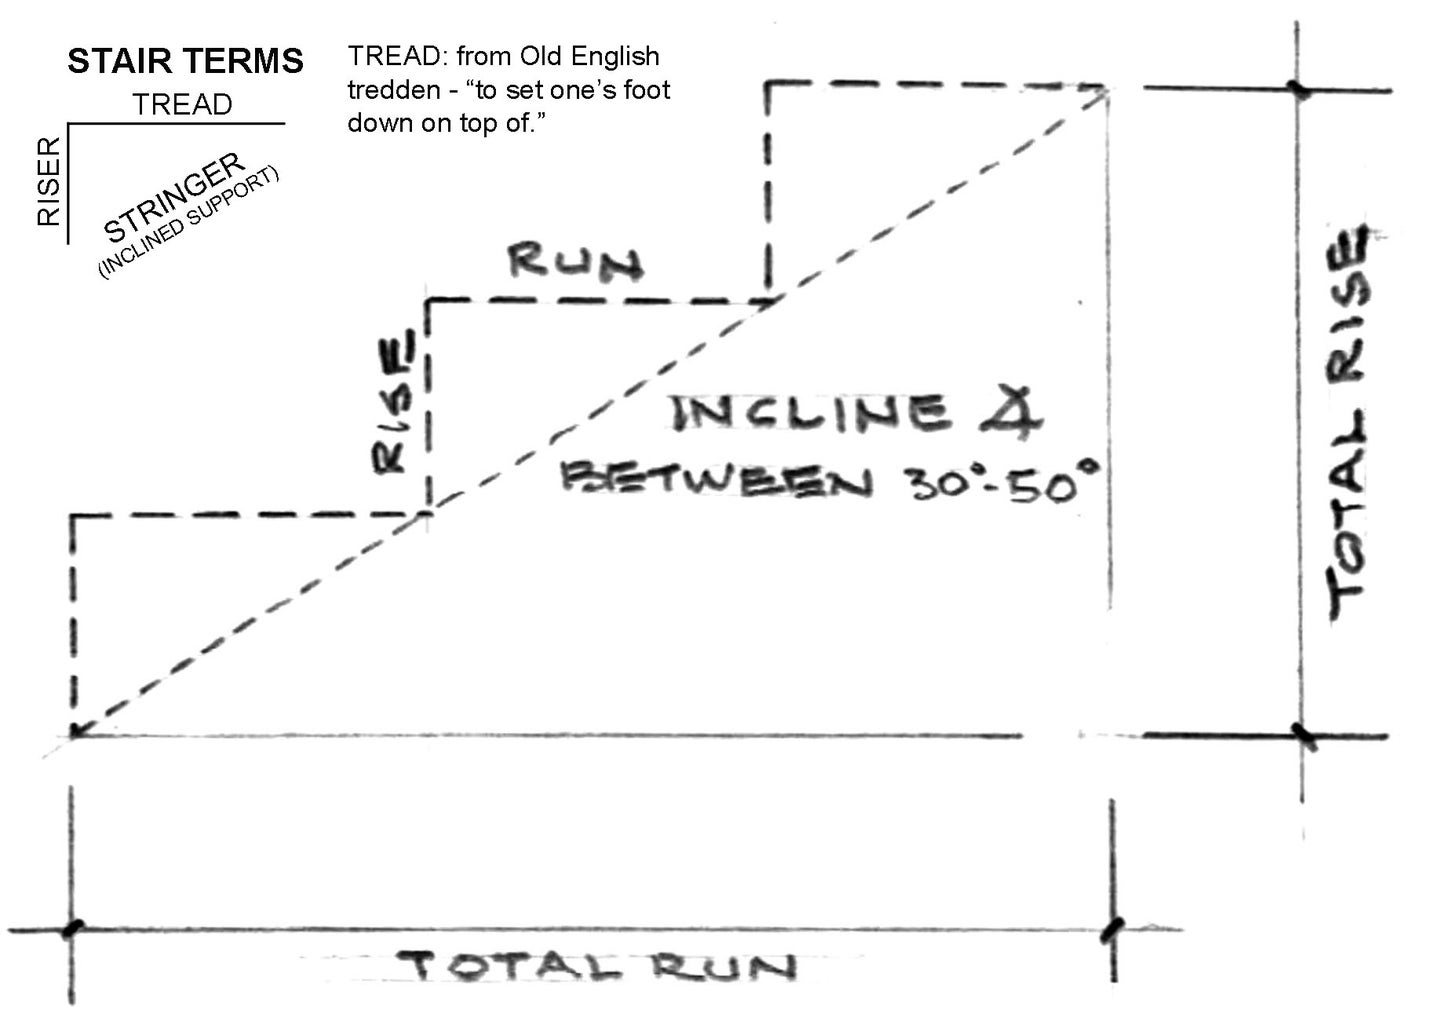
1. One riser plus one tread = approx. 18 inches
2. Two treads plus one riser = approx. 28-29 inches
There are other rules of thumb, such as when dealing with landscaping and low slope terrain, but these two rules will handle almost any building situation.
Step 2: Do the Math

When you design your free-standing stairs, you begin with “What is my total rise?” Take that total rise and see how a 7” rise and an 11” run will work (which is the recommended ratio). Divide 7 into your total rise. That will indicate the number of steps (including the landing). My stairs have a 7” riser and 11” tread measured nose-to-nose with a 35" total rise with a 32-1/2° incline. What if you have a total rise not divisible evenly by 7? Perhaps it’s 34”. 34 ÷ 7 = 4.85. Round 4.85 up to 5. 34 ÷ 5 = 6.8 or 6-25/32 or 6-13/16. With that number, you would just leave the tread at 11”.
If it turns out that you have a total rise that is more evenly divisible by the next higher riser, say 8”, go with that. For example, a 32” rise would give you four 8” steps with a 10” tread (remember the rule of thumb).
Not to belabor this, but you could have a rise of 7-1/2” if it divided into your total rise evenly. And then the tread would be… (you figure it out using the rule of thumb*).
The other question is, “How much space in front of my stairs do I have to work with?” If you are in tight quarters and the rise would end up being more than is comfortable for walking, then you’ll make a landing and turn the stairs at an angle to gain more run that gets you to your final landing. You can also build an alternating-tread ladder stair.
Step 3: Chisel the Slots


The layout is carefully marked on the two 4x12 pressure treated beams (stringers), and cut. The steps will fit into slots in the beams and screwed from the sides. My slots are 3/4” deep.
To carve a slot, I use my skilsaw to cut multiple passes, then chisel out. It’s easy to knock out the remaining wood after cutting. The very back where the round blade doesn’t reach needs extra work.
Step 4: Pre-Drill the Holes for the Side Screws


Pre-drilling the stringers makes assembly go a lot faster.
Step 5: Attach the Base Plate and Vertical Support Tie


Each stringer is screwed to a vertical 2x4 pressure-treated piece, height based upon your total rise.
Then, each beam has a horizontal pressure-treated piece, length based on your total run.
(I used a wood preservative in the slots to give them extra protection from rot.)
Step 6: Put It Together


The stairs can be assembled and then moved into place, or they can be assembled on-site. For the near-stairs on our bridge, I assembled them in advance. For the far-stairs, I assembled the components on-site.
How you assemble is up to you. I stuffed the three middle steps into a stringer and screwed them with the structural wood screws through the pre-drilled holes, then did the same with the second stringer.
Finally I screwed in the top step with three exterior wood screws on each side.
Step 7: Step Up!

When completed, you'll have stairs that are comfortable to walk up and down, even if you're a 14 year-old pup. And they should last a very long time.
* 10-1/2”

Participated in the
Backyard Contest


