

Introduction: How to Convert PowerPoint to EPS Files


This method works with pretty much anything from a Microsoft suite that you might want to print out and use in a LaTeX document. I really want to make a long story short on this one, if at all possible.
If you're reading this, then you have been troubled for long enough, so read on:
I've been trying to figure this out for a very long time and I finally have a perfectly free and efficient way of converting Powerpoint Presentations (.ppt) of figures, annotated graphs, etc to Encapsulated Postscript (.eps) files for use in LateX documents:
(I suspect that this works with the OpenOffice version of Powerpoint also, (Impress) for those that dont wanna feed the Microsoft beast any more than they have to.)
This is a product of years of tinkering. I am not aware of an easier/better way of doing this and am very proud of the results :)
In the next step, I list the programs we will need >>
Step 1: Things to Download
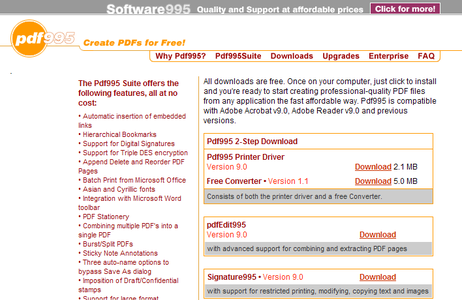
(1) First you will need a postscript printer. Luckily a virtual printer will do just fine, so go over to PDF995 and download the free PDF printer software.
Get the Pdf995 Printer Driver and Free Converter and install them both.
This will also give you the ability to save any document as a PDF file for free (niiiiice!) (borat rules):). The software is add supported (unobtrusive) and very reliable.
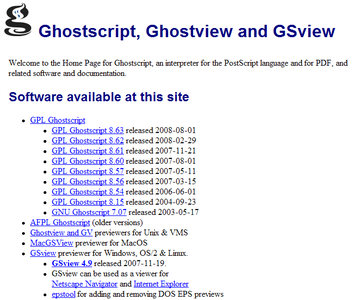
(2) Get Ghostscript and Ghostview. If you're looking to embed EPS images in a LaTeX file, you already have these. We will need it to define the bounding box of our .EPS file, once we export it out of Powerpoint. Here's the download link:
Download Ghostscript and Ghostview
(3) A LaTeX edittor is good to have. My favorite is TeXnicCenter. For the purposes of this instructable you can get away using Notepad, because we might need to make a small change to the header file of the exported EPS file.
Download TeXnicCenter
In the next step, we will configure Powerpoint to spit out EPS files >>
Step 2: Configure PowerPoint


The images speak louder than words here. Read on for a discussion and notes.
Fire up Powerpoint and adjust the page properties to reflect the size/scale that you want your eps image to have. This method will make an .eps file out of a whole slide, so make sure the scale fits your needs:
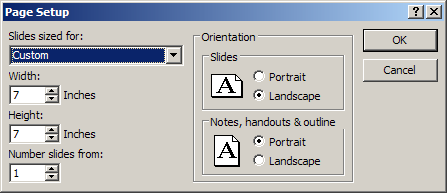
(1) 'File > Page Setup: Set Width and Height of Slide to your Penis size. In my case, 7 Inches.
Im just joking of course - hope noone takes offence, but this really is some boring stuff here! However, there is a sliver of truth to this step:
The bounding box for your eps image is likely to get messed up if you dont use a square page size that is very similar to the printing size of a normal page. Through trial and error I have found that 7 inches works for me, so from now on all of my images are perfect squares - to start off with - something I have found very easy to live with.
If you have a sketch already made, you should create a 10x10 slide and copy your sketch directly into it, instead of resizing the one its already on, because Powerpoint will just distort it. The size of the slide doesnt matter at all, we just want it to fit in the ppt.
In the final step we will see how to change the dimensions of the EPS file so there are no white borders, so dont worry about that.
(2) File > Print, select the PDF995 printer and put a tick on Print to File, as shown in the image.
(3) Click on the printer Properties > Advanced and change Paper/Output > Paper Size to PostScript Custom Page Size. Here enter the same page dimensions as you entered earlier in Step 1: 7x7 inches.
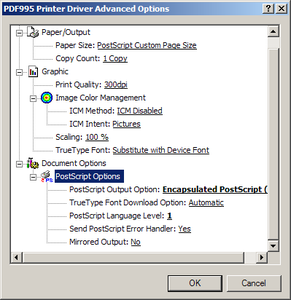
(4) Document Options > PostScript Options and set PostScript Output Option to Encapsulated PostScript (EPS) and PostScript Language Level to 1, as shown in the image. The last step is only needed if you are experiencing problems. I usally heave this at Level 3 - not sure what the difference is.
You're all done. Click: OK - OK - OK.
In the next step we create an vector drawing that we want to turn into an EPS>>
Step 3: Make Your Powerpoint Sketch

I think powerpoint is one of the best general drawing applications. Its not an image edittor or a graphing program, but something a little bit of both. I use it to make sketsches and outlines all the time.
I usually just copy and paste things into it, adjust them and then instead of exporting them (!), I take a screenshot and put them into Infanview and save it as a PNG. When I'm writing a LaTeX document however for school research or publishing a paper (Im a physicist), I always turn to Powerpoint, because I dont like Linux or Macs that much (but I appreciate them - so dont shoot!)
You do your own thing - Im just giving ideas here.
Once you're done, the usual matra: '
File > Print > Select "All files > Save your file as *.eps
(you dont want to print it as a prn file. That will confuse LaTeX sometimes, or whatever program you're using.)
In the next step we "print" out our ppt to an eps file >>
Step 4: Adjust the Size of Your EPS File (Bounding Box Hack)


In most cases you will have to trim some of the edges. This annoyed me for a very long time, until I went hacking the postscript. Once I thought of it, it took me 5 seconds to figure out what to do. Here's the story:
(1) Open your file in Ghostview. Point your crosshair at the lower left corner of the image as you want it to appear in your document. Write down those coordinates as shown.
(2) Do the same with the upper right corner of the image. Write down the coordinates.
(3) Leave the image open in GSView and open it in TeXnicCenter or Notepad also. The 6th line down, where it says bounding box define the lowerleft and upper right corner of the image, as it will be interpreted by the postscript compiler.
%%BoundingBox: 0 0 720 720
Enter the numbers you recorded here, in the format: LLx LLy URx URy
%%BoundingBox: 94 135 583 597
When you save it (press CTRL-S), ghostview will automatically update your changes - HOW AWSOME. You can now make adjustments on the fly, by changing the numbers if you didnt get it right the first time and checking the results instanteneously in GSView.
In the final step, we see our results and comment on the quality of this method >>
Step 5: Enjoy Your Beautiful Postscript Graphics

Open your file in Ghostview and see if you like it.
In anticipation of people telling me that I can just use GIMP to save images as EPS files, I have included an image here showing the difference between the two. GIMP converts to Bitmap before saving as EPS. The purpose of this instructable is to show you how to perserve the vector nature of the graphics and fonts. The image says it all.
The size of the eps file is significantly smaller than that of a bitmap>eps file. This will make your final PS or PDF file proportionally smaller also, in addition to it being absolutely beautiful.
I've struggled through graduate school, wasting many precious hours of tinkering with images to get them perfect. After a long long road and comparing results between many graphics programs (Photoshop, Paint Shop Pro, GIMP) I finally have a dependable way of getting my PPT outlines and sketches into Latex documents.
I have been told that Illustrator does a good job exporting vector graphics, but I dont own it to test it out. Maybe someone can report on its usefulness, especially when converting from PPT or other vector drawing packages (is there one easier to use that Powerpoint?)
Zoom in using the magnificentation tool and bask in the beauty of postscript rendered vector graphics and text! No more compression artifacts. No more resize pixelations. You are now... my friend... a typesetting GOD!
Thank you for reading. I hope you find this helpful. All comments welcome.


